
The OBDLink® app can log vehicle data to a Comma-Separated Values (CSV) file or a binary data file automatically. By default, the OBDLink app enables trip logging for certain vehicle PIDs (vehicle speed, longitude, and latitude), so you can view log data even if you haven’t changed any of the options described in this article.
You can view the logged data on the Files tab of the Logs screen, and you can export it to an external program of your choice. Follow the steps in this article to change the logging settings and capture the data that you want.
Note: We recently updated the OBDLink app and made improvements to its features and how it looks. This revised article matches the updated app’s screens and features. Download the latest version of the OBDLink app from the App Store (iOS) or Google Play (Android) to take advantage of the updated app's features and performance.
Every time the app connects to your vehicle, it captures log data that can be viewed in several ways:
- File view for data files and CSV files
- Map view (accessed using the Maps function)
- Trip view (accessed using the Trips function)
TABLE OF CONTENTS
- Set up log preferences
- Data Logging preferences
- CSV Logging preferences
- View information while driving
- View log data
- Learn more
- Need more help?
Set up log preferences
The OBDLink app supports two types of logging:
- Data Logging: Records PID responses in real-time and stores them in a binary format, which captures a large number of data points using a small file size (compared to a CSV file). You can view and play back data logs in the OBDLink app when you are not connected to the vehicle.
- CSV Logging: Records PID responses from the vehicle to a CSV file. The OBDLink app stores the values as plain text. You can open the resulting CSV file in an external application such as Google Sheets or Microsoft Excel.
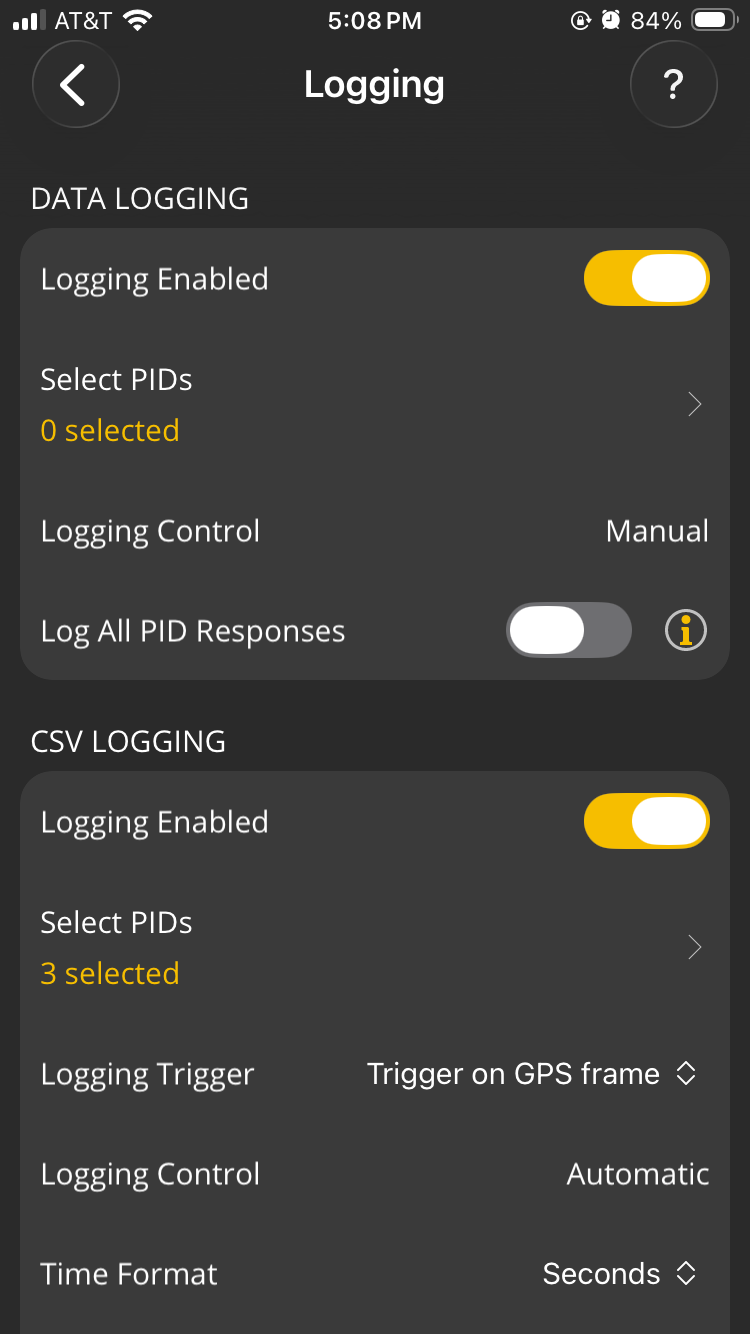
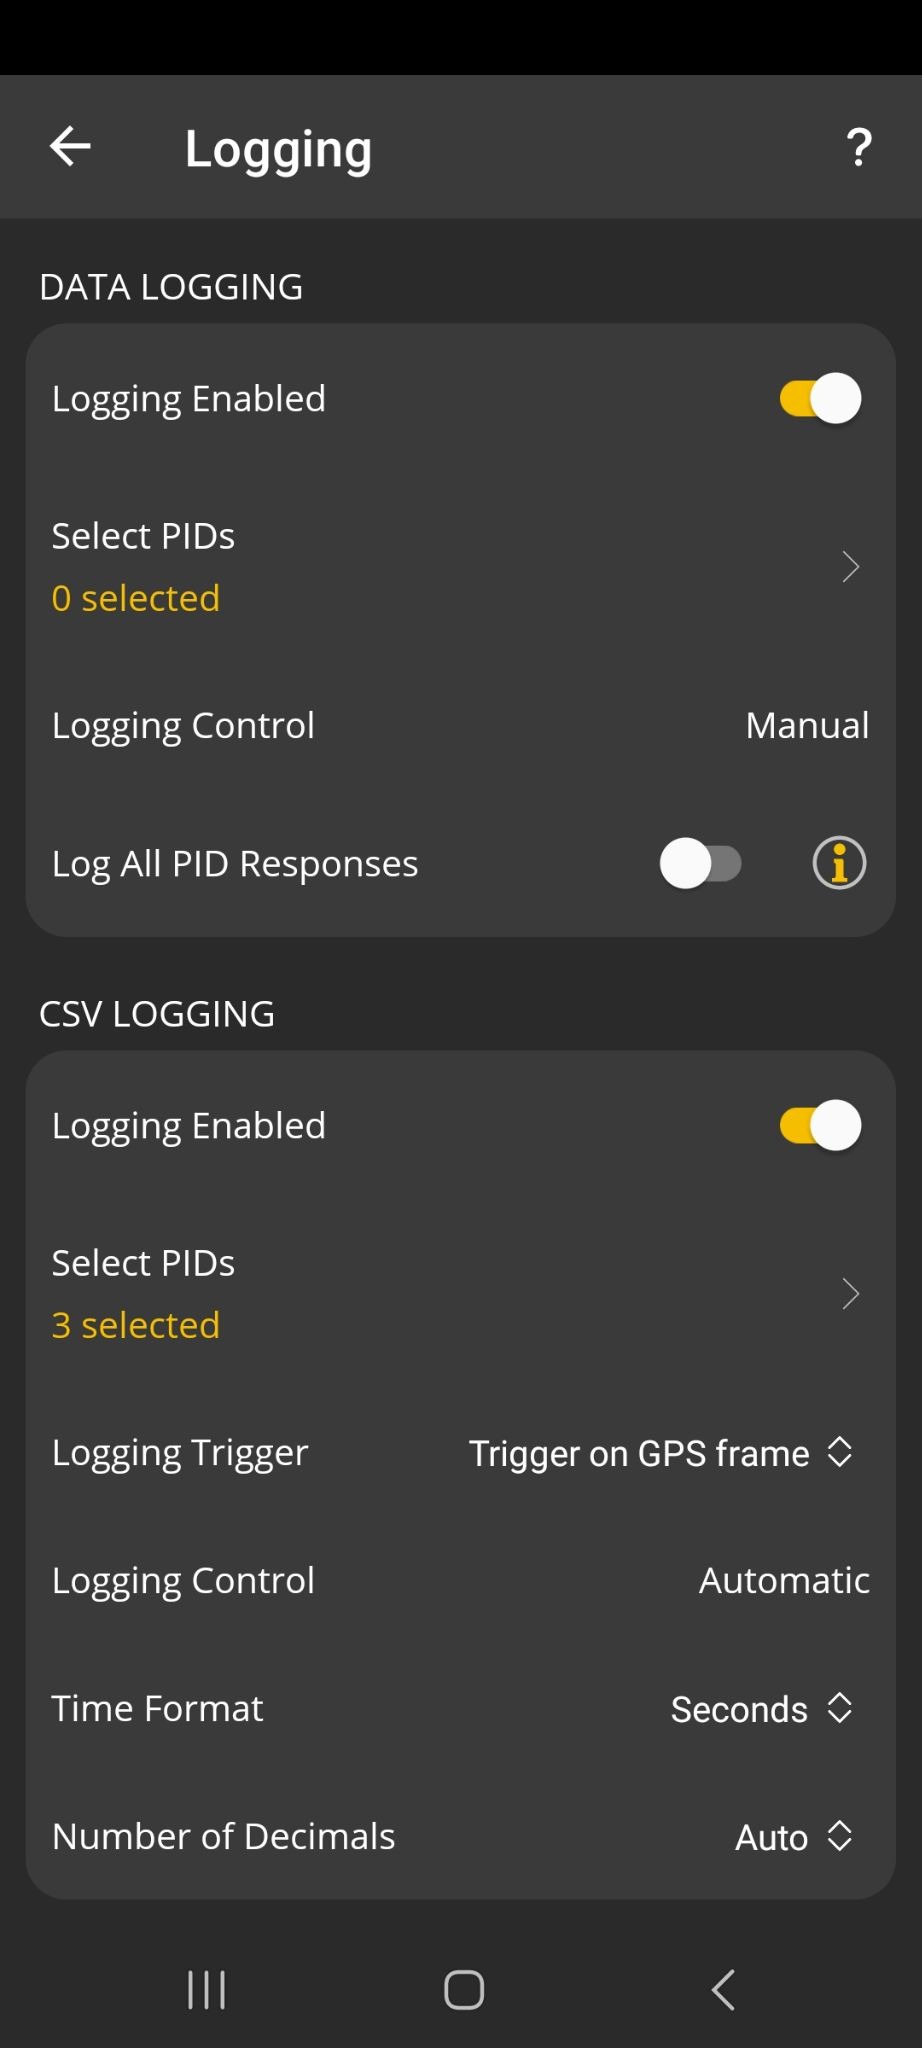
To configure logging, tap Settings > Preferences > Logging. This screen may look different depending upon the type of OBDLink adapter that you use. You may need to scroll down to see all the options. Each setting on this screen is described below.
| iOS | Android |
 |  |
Data Logging preferences
The settings for data logging are in the upper part of the Settings > Preferences > Logging screen (highlighted).
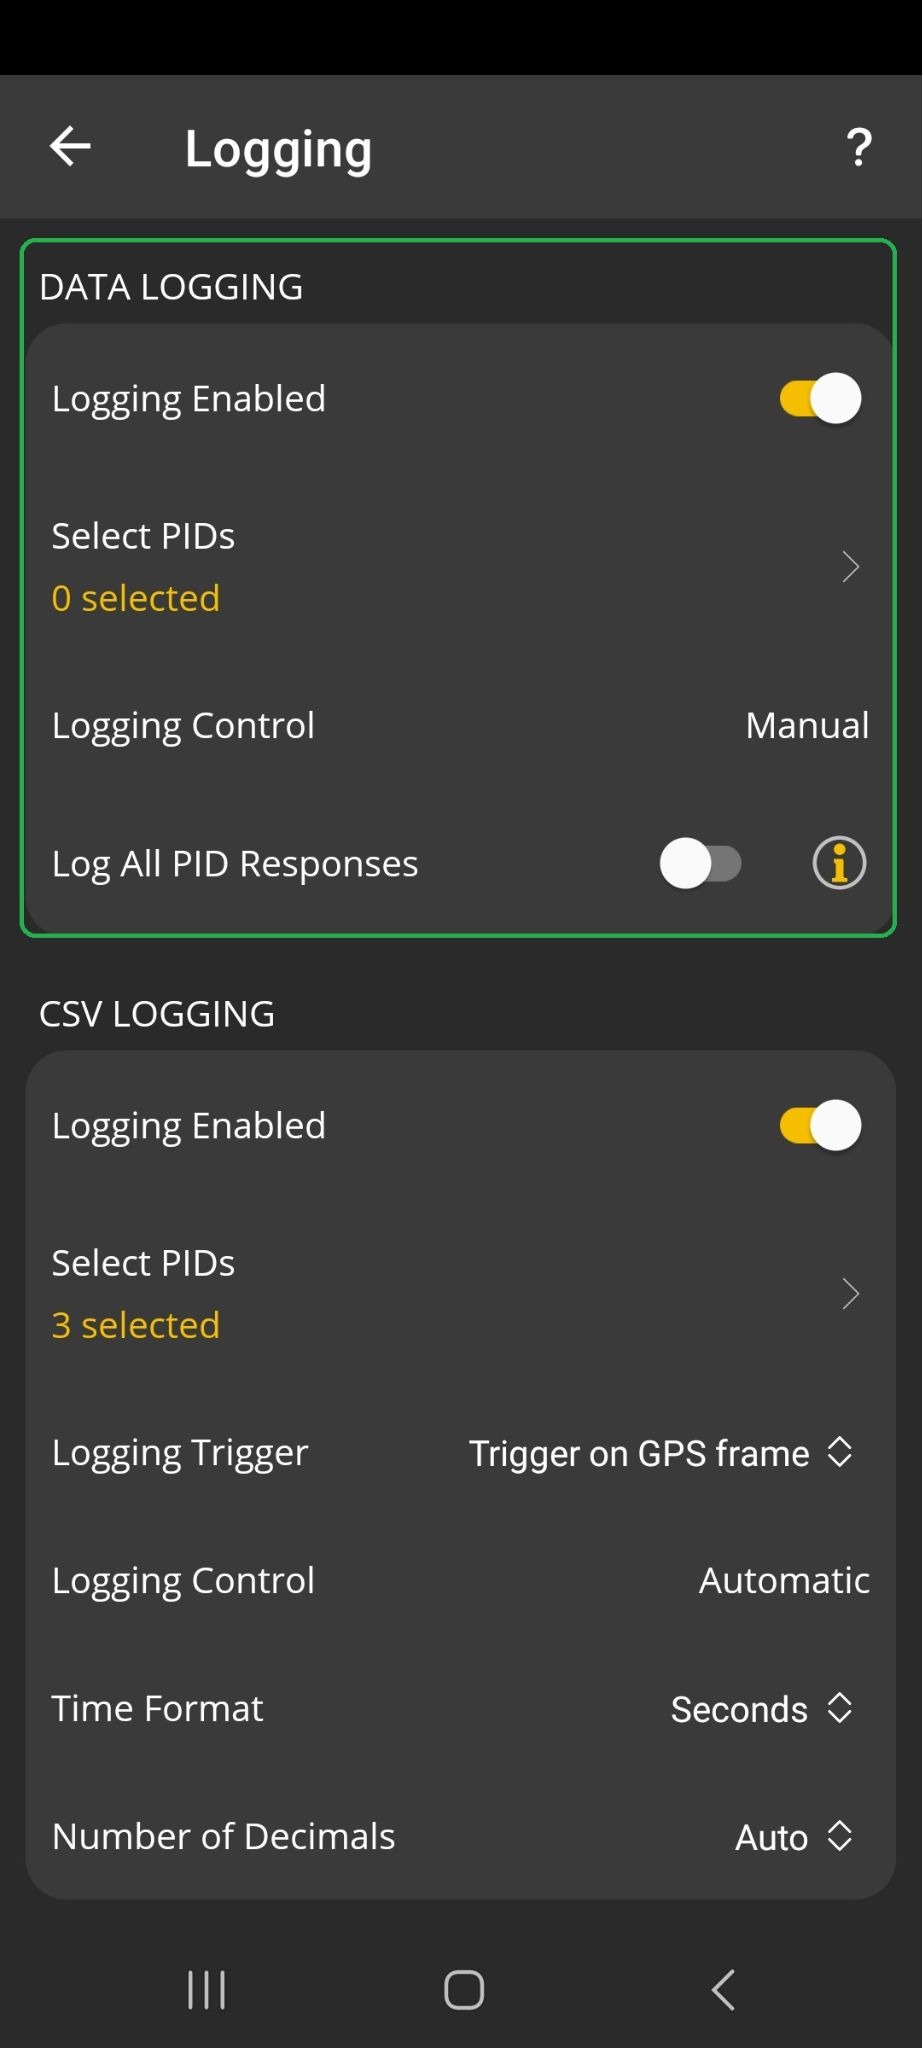 |
Logging Enabled
This option enables or disables the data logging feature. [Default setting is Enabled]
When logging is enabled, a new data log file will be created automatically each time the app connects to your vehicle if you have selected PIDs to log. See the next section for details.
Select PIDs
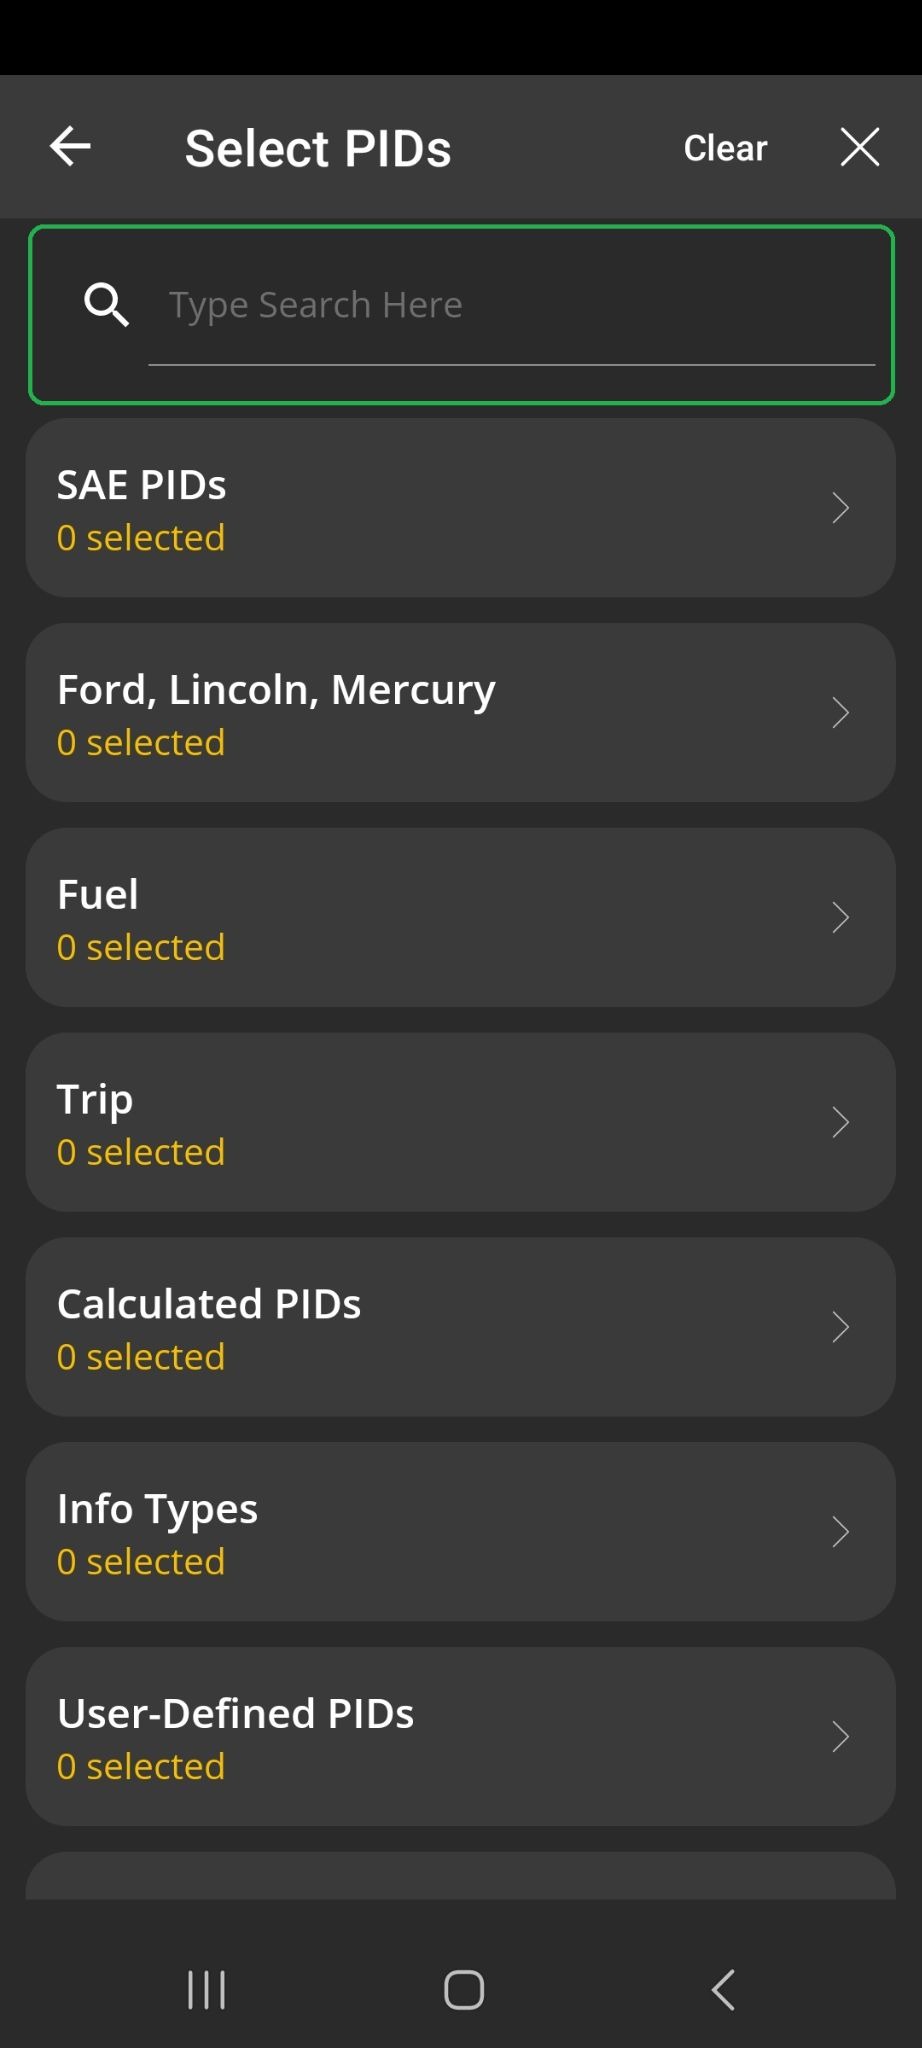
Tap Select PIDs to open a new screen and select which PIDs (such as RPM or coolant temperature) you want to record to a data file. [Zero (0) PIDs are selected by default]
Notes:
- Each PID you add for data logging must be continuously monitored, which can reduce the refresh rate of other PIDs being monitored.
- If GPS is not turned on, you will be able to select GPS PIDs in this screen, however, no data will be returned.
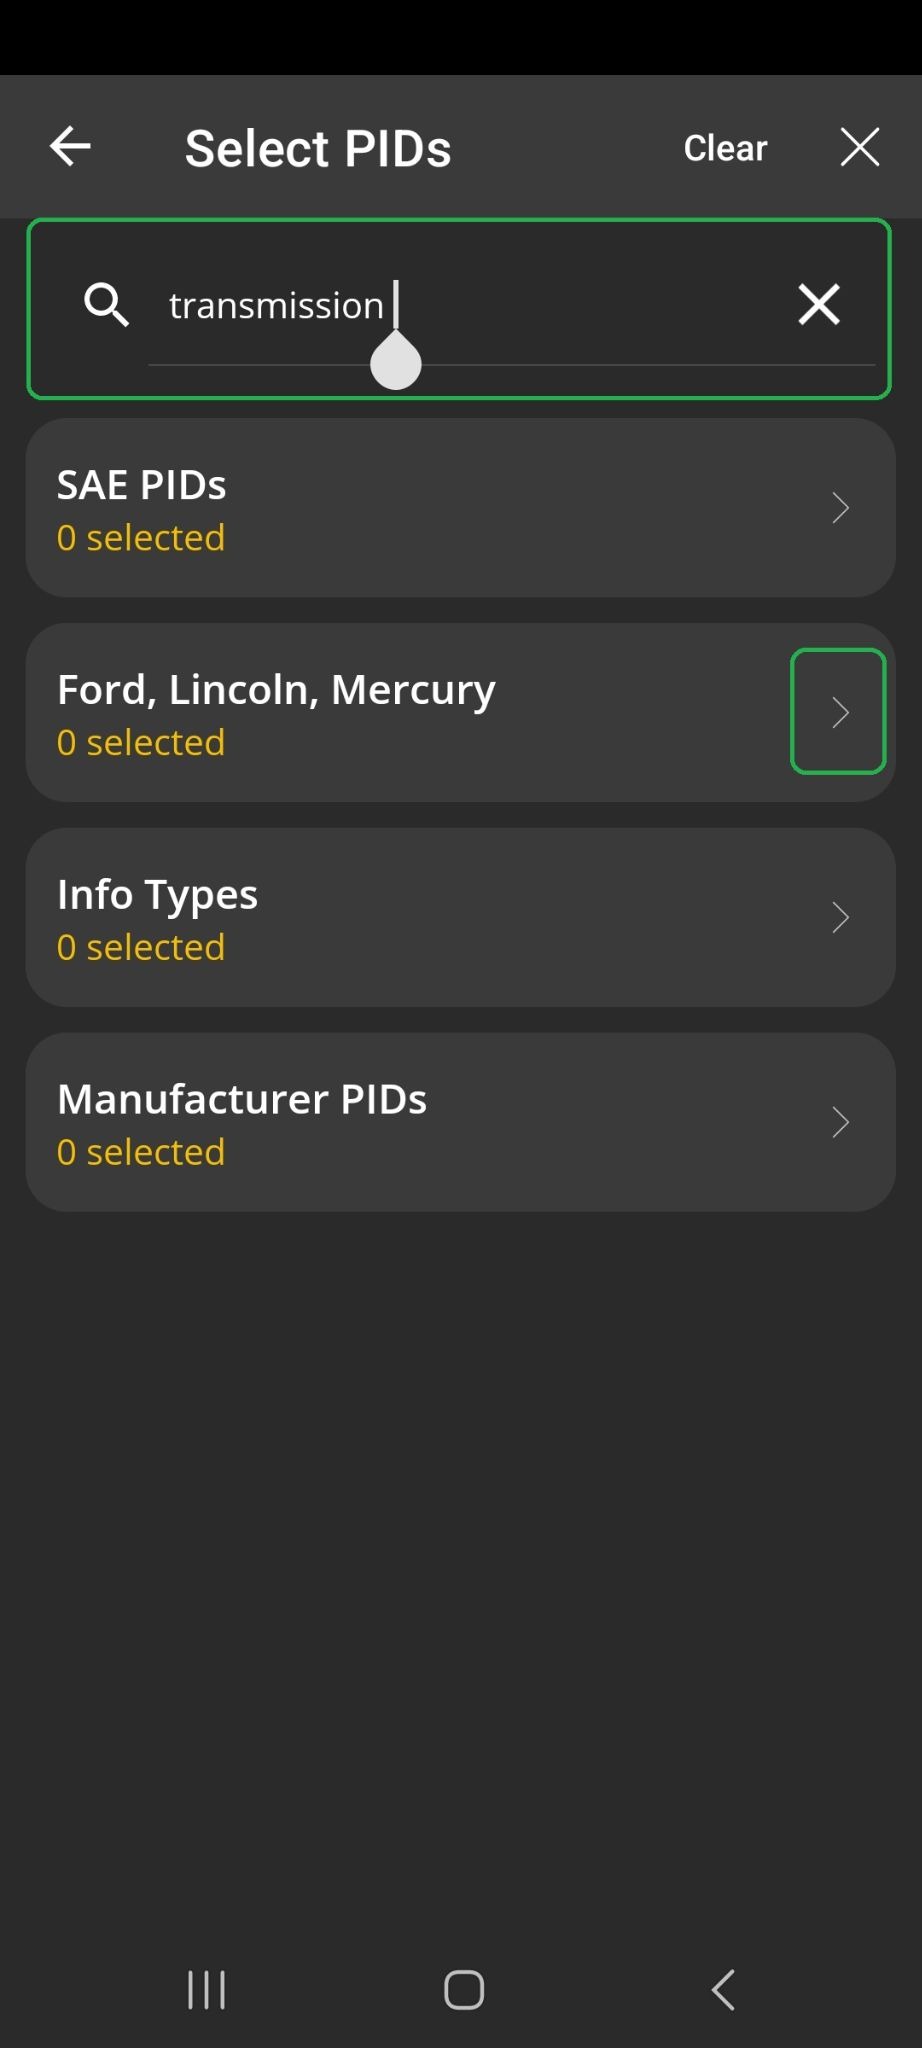
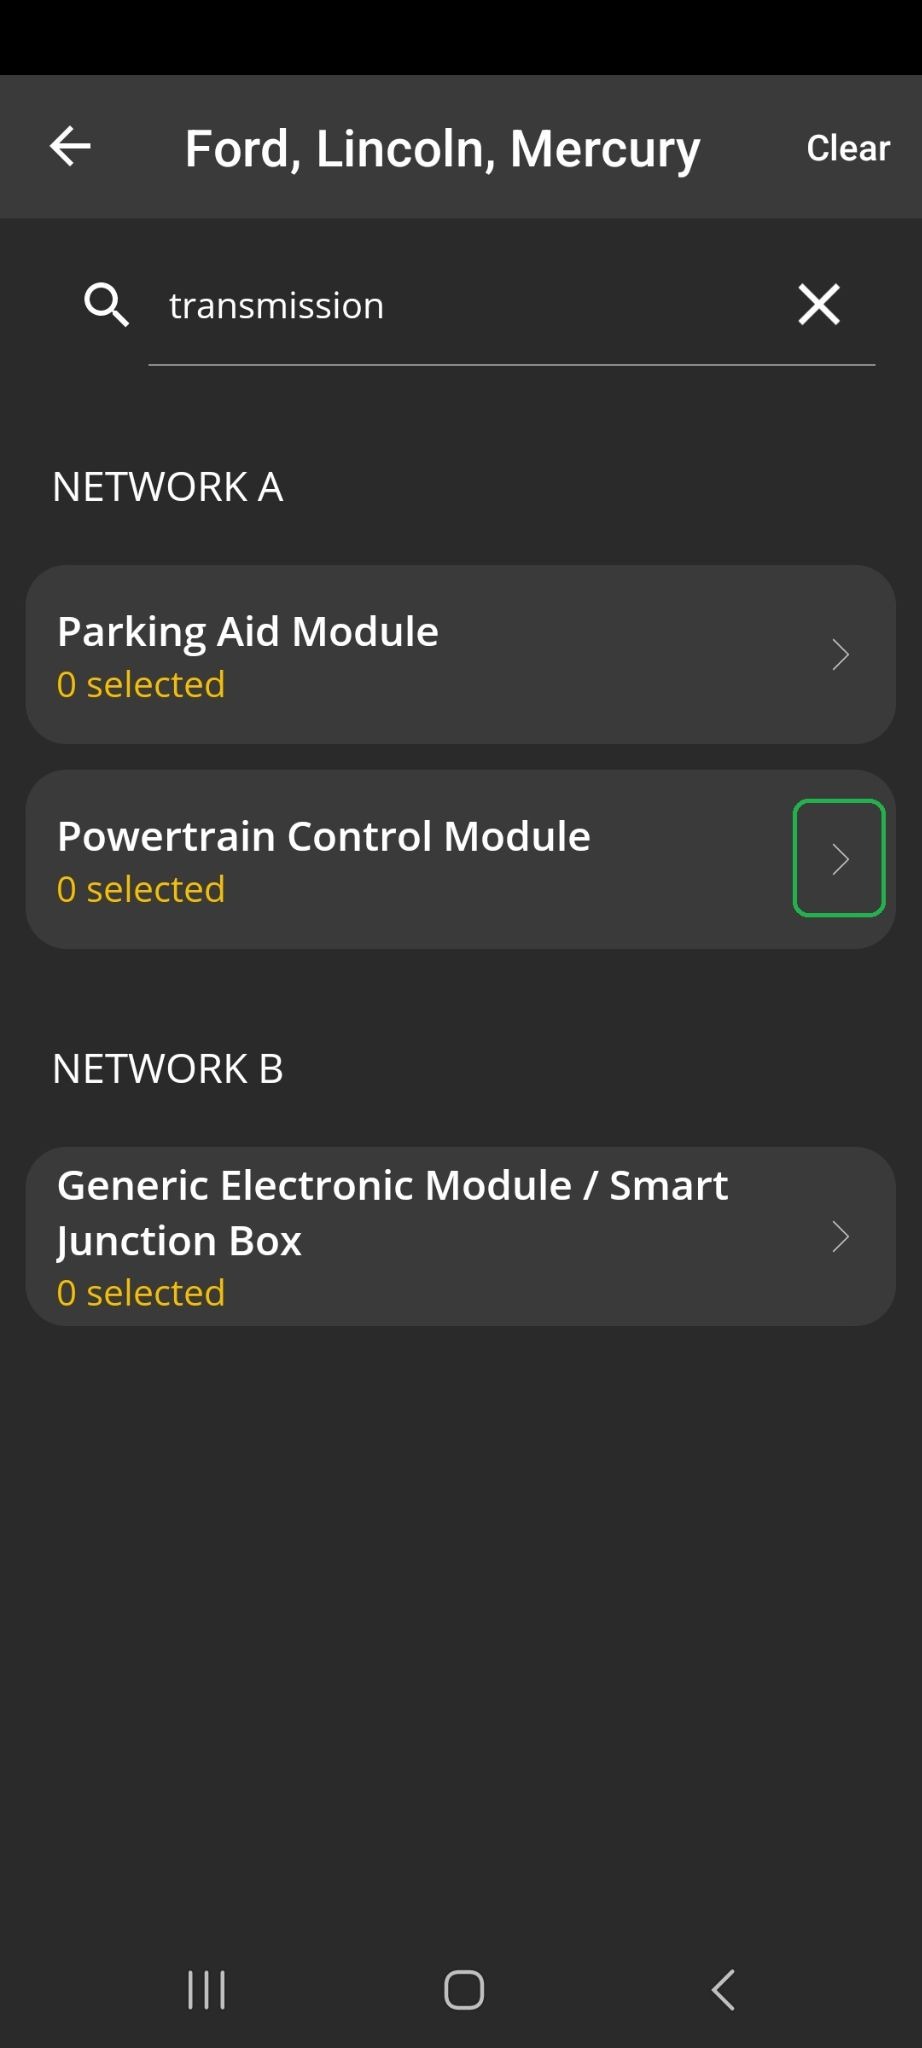
To search for a particular PID, enter the name of the PID in the search field and tap Search. The app displays categories that have possible matches. Tap the > arrow to drill down until you find the PID you want.
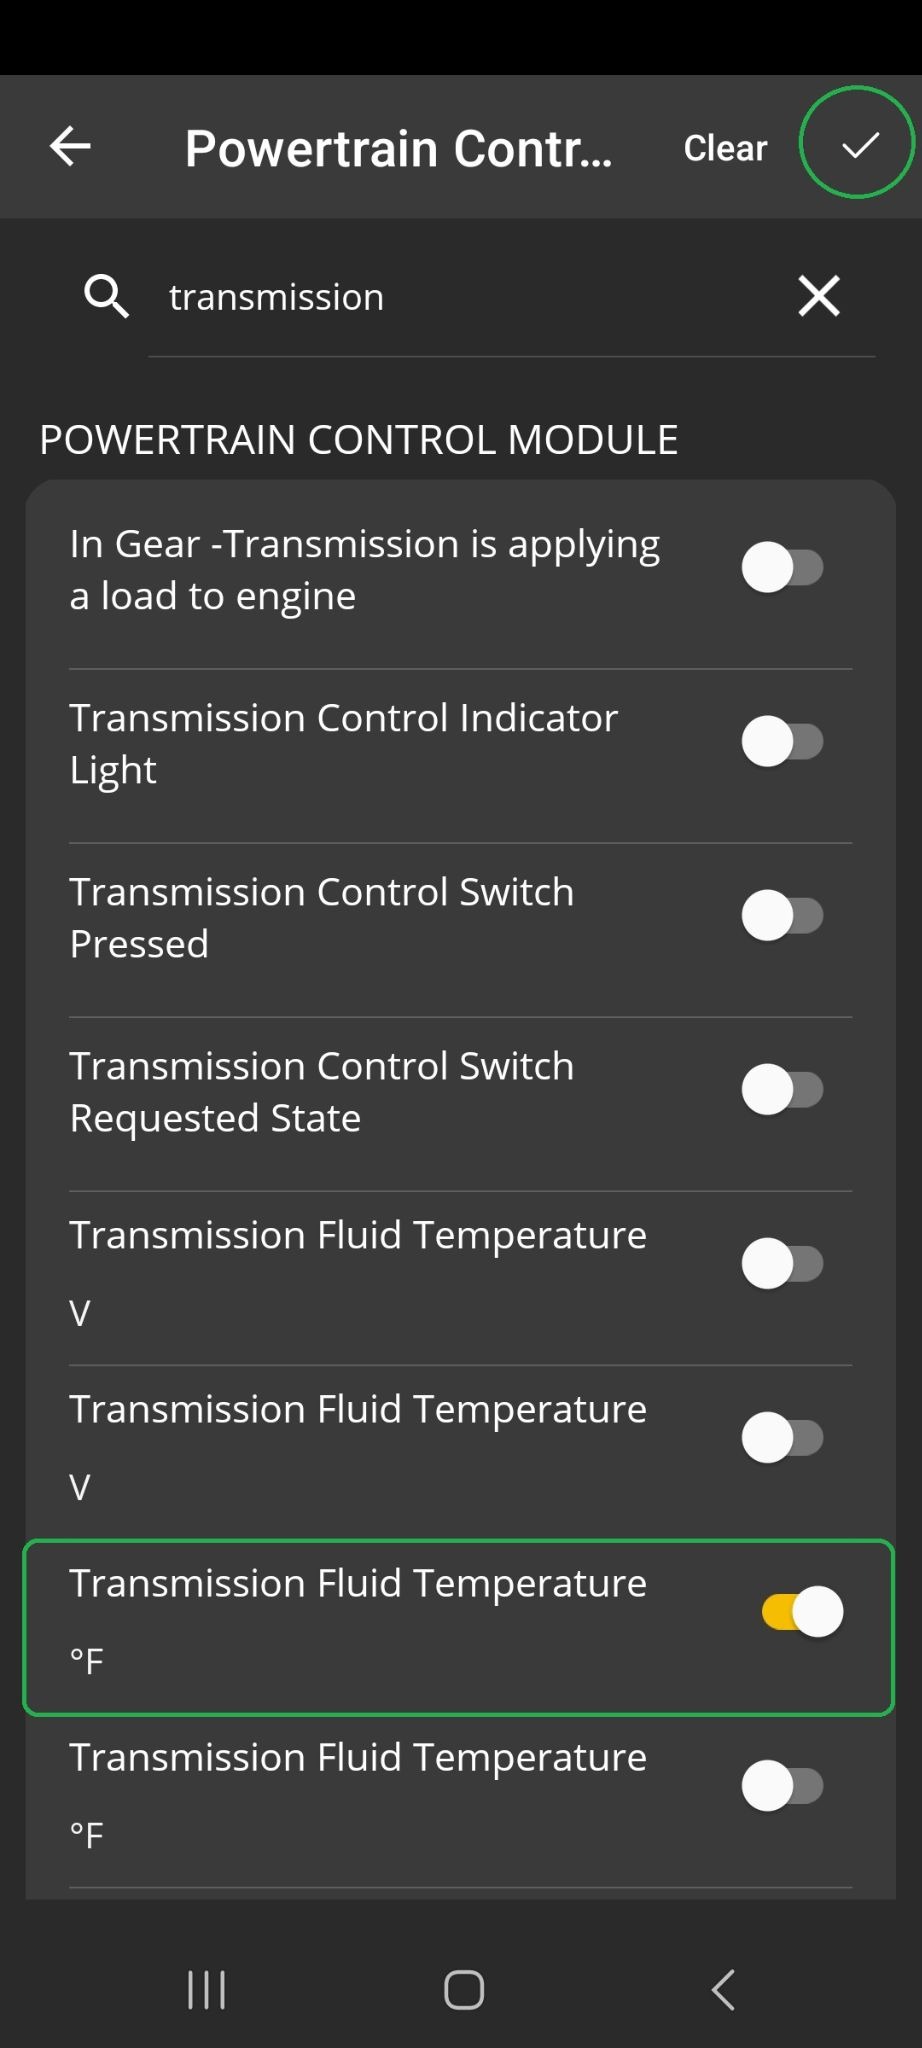
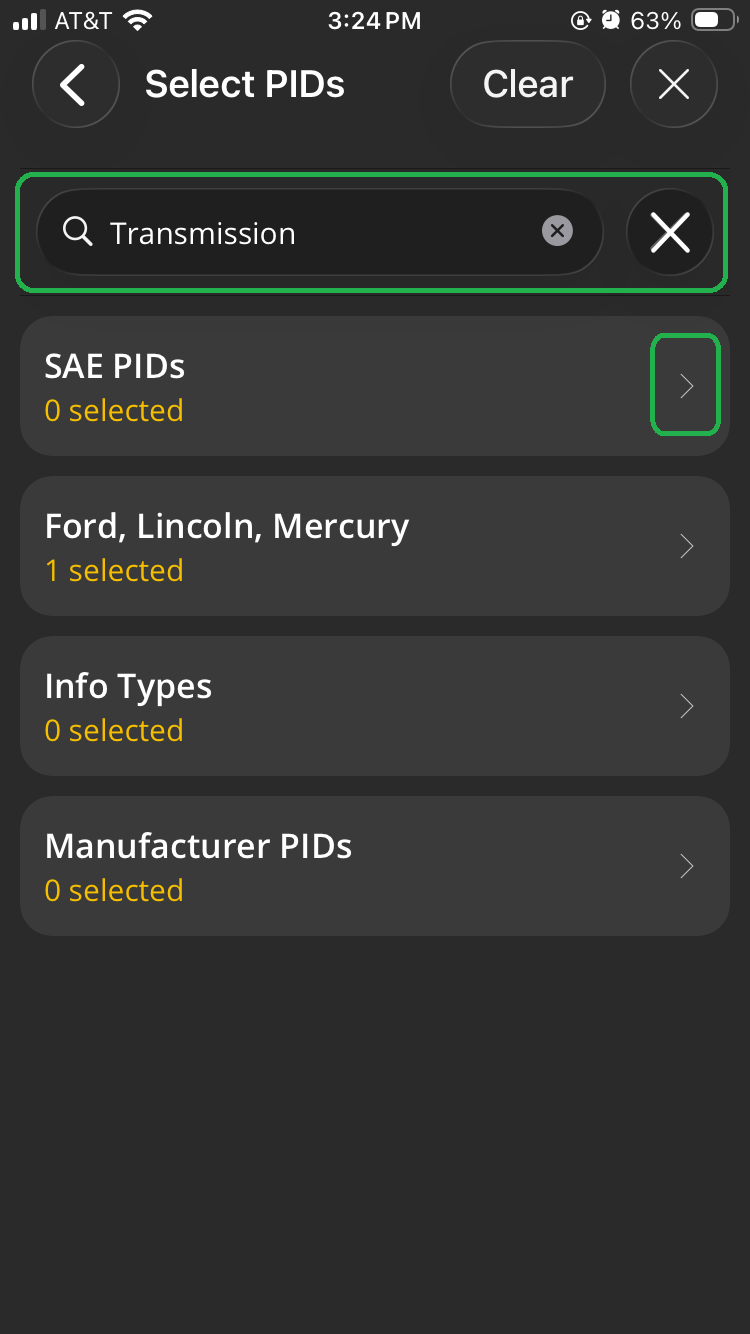
In the example screenshots below, we entered Transmission in the search field, then tapped the > arrow to find a Transmission Fluid Temperature PID for a Ford vehicle in the Powertrain Control Module.
 |
 |
 |
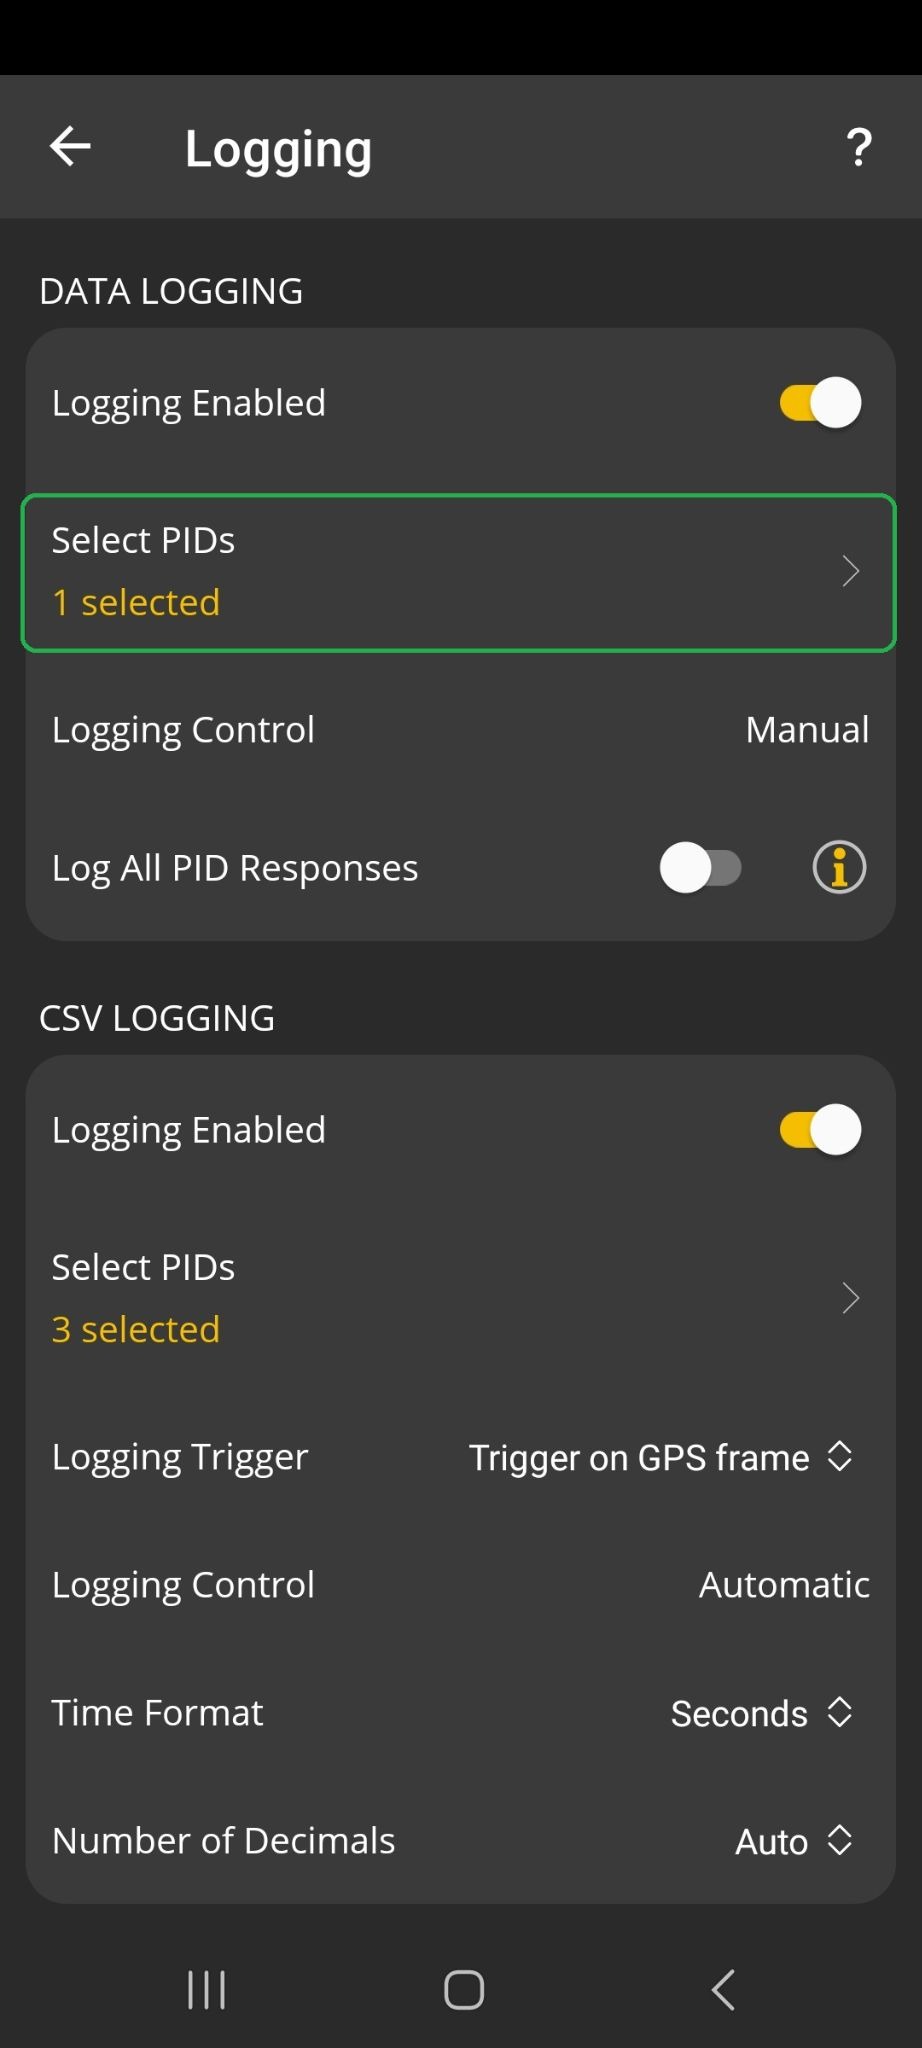
We selected Transmission Fluid Temperature (°F), and tapped the checkmark (✓) in the upper right corner to save the setting. The Settings > Preferences > Logging screen shows that 1 PID is selected for data logging (highlighted).
 |
 |
The OBDLink app will display search results for your vehicle when searching the SAE PIDs and Calculated PIDs groups.
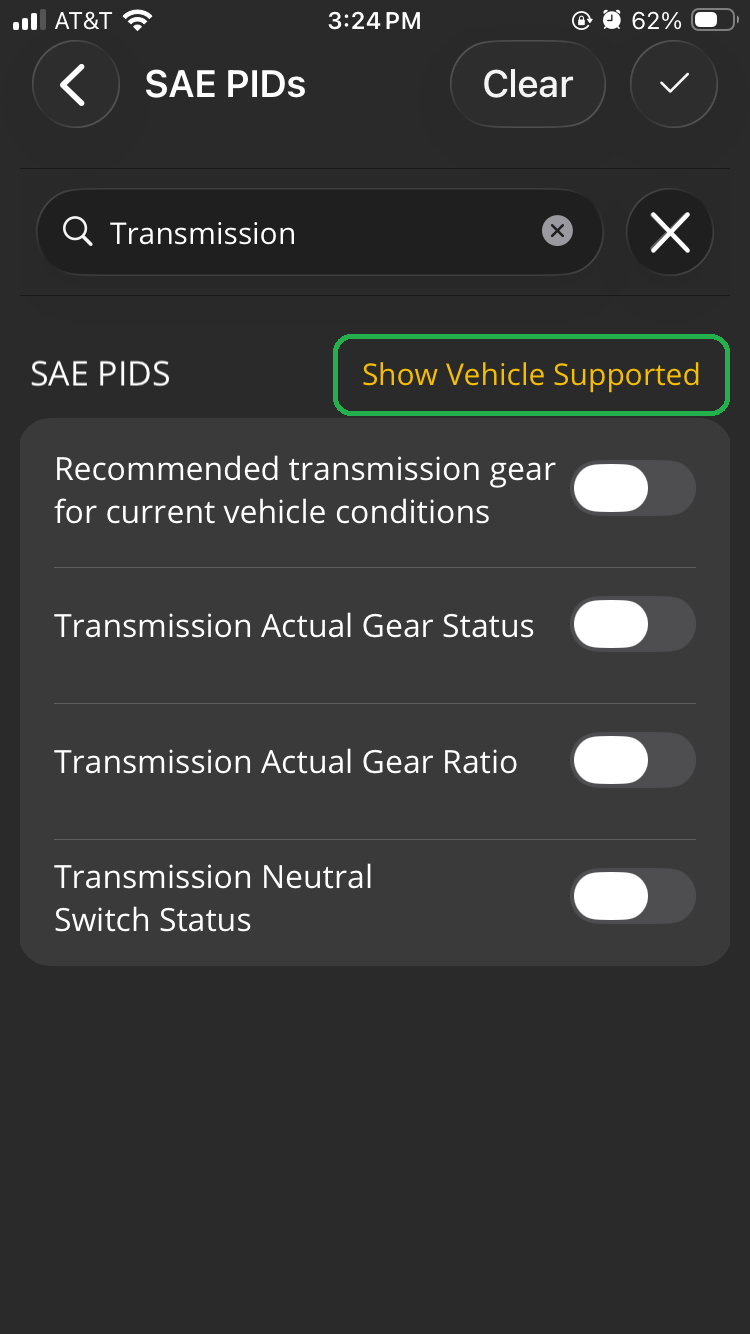
For example, if you search for Transmission and open the SAE PIDs category, you will see PIDs supported by your vehicle.
 |
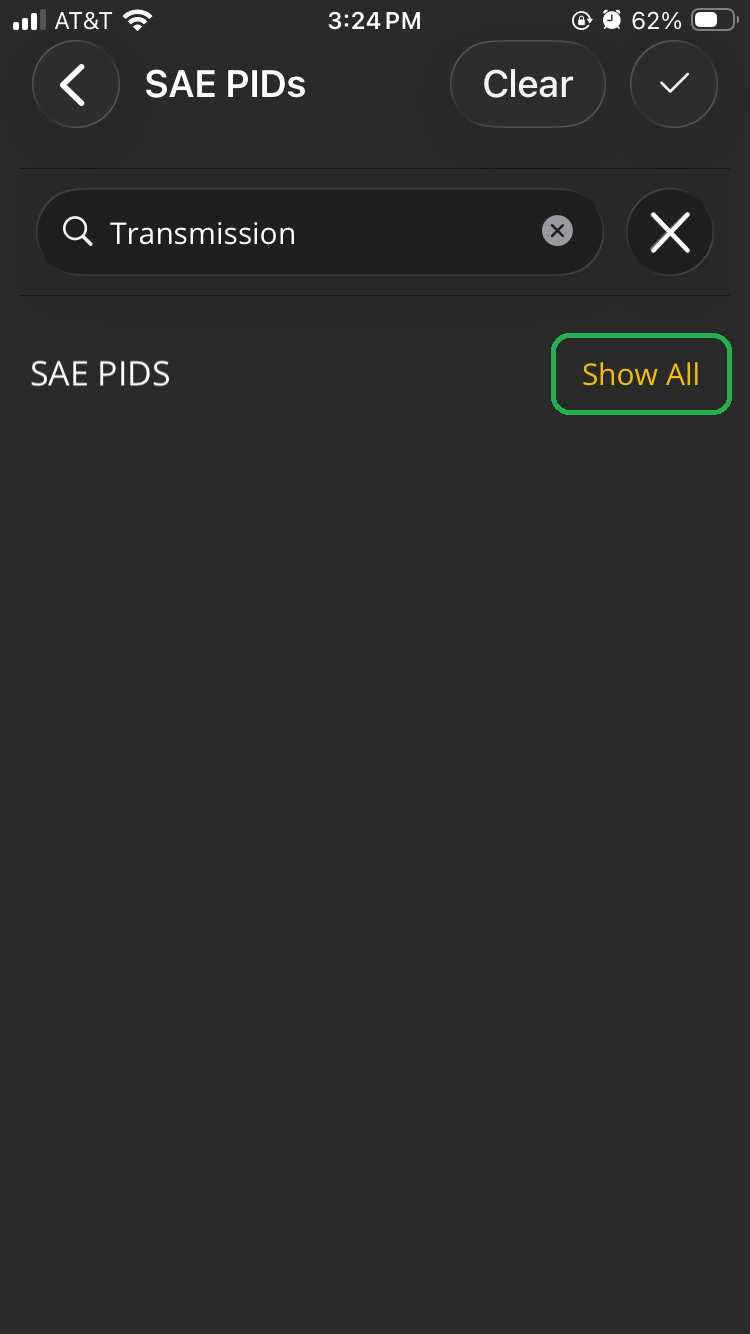
In the example below, no PIDs are listed, because this vehicle doesn't support SAE PIDs with "Transmission" in the name.
Tap Show All to toggle the search results. Tap Show Vehicle Supported to return to the default view.
 |  |
Logging Control
This option determines whether logging is Automatic or Manual.
- Automatic - Logging starts when the app connects to the vehicle.
- Manual [Default setting] - Logging must be started manually using one of these options:
- Navigate to Logs > Files, tap the 3 dots menu button, and tap Start Data Logging.
- Set up a dashboard gauge using the push button style and the action to Start or Stop Data Logging. For step-by-step details to do this, see the Add and Edit dashboard gauges article, in the Example: Add a push button display section.
Log All PID Responses
This option determines how many PIDs will be recorded during the logging session.
- Enabled - The selected PIDs and all other PIDs read while logging will be recorded.
Warning: Enabling this option can significantly increase the data file size. - Disabled [Default setting] - Only the selected PIDs will be recorded.
CSV Logging preferences
By default, the OBDLink app enables trip logging for certain vehicle PIDs (vehicle speed, longitude, and latitude), so you can view CSV log data even if you haven’t changed any of the options described in this article.
The settings for CSV logging are in the lower part of the Settings > Preferences > Logging screen (highlighted).
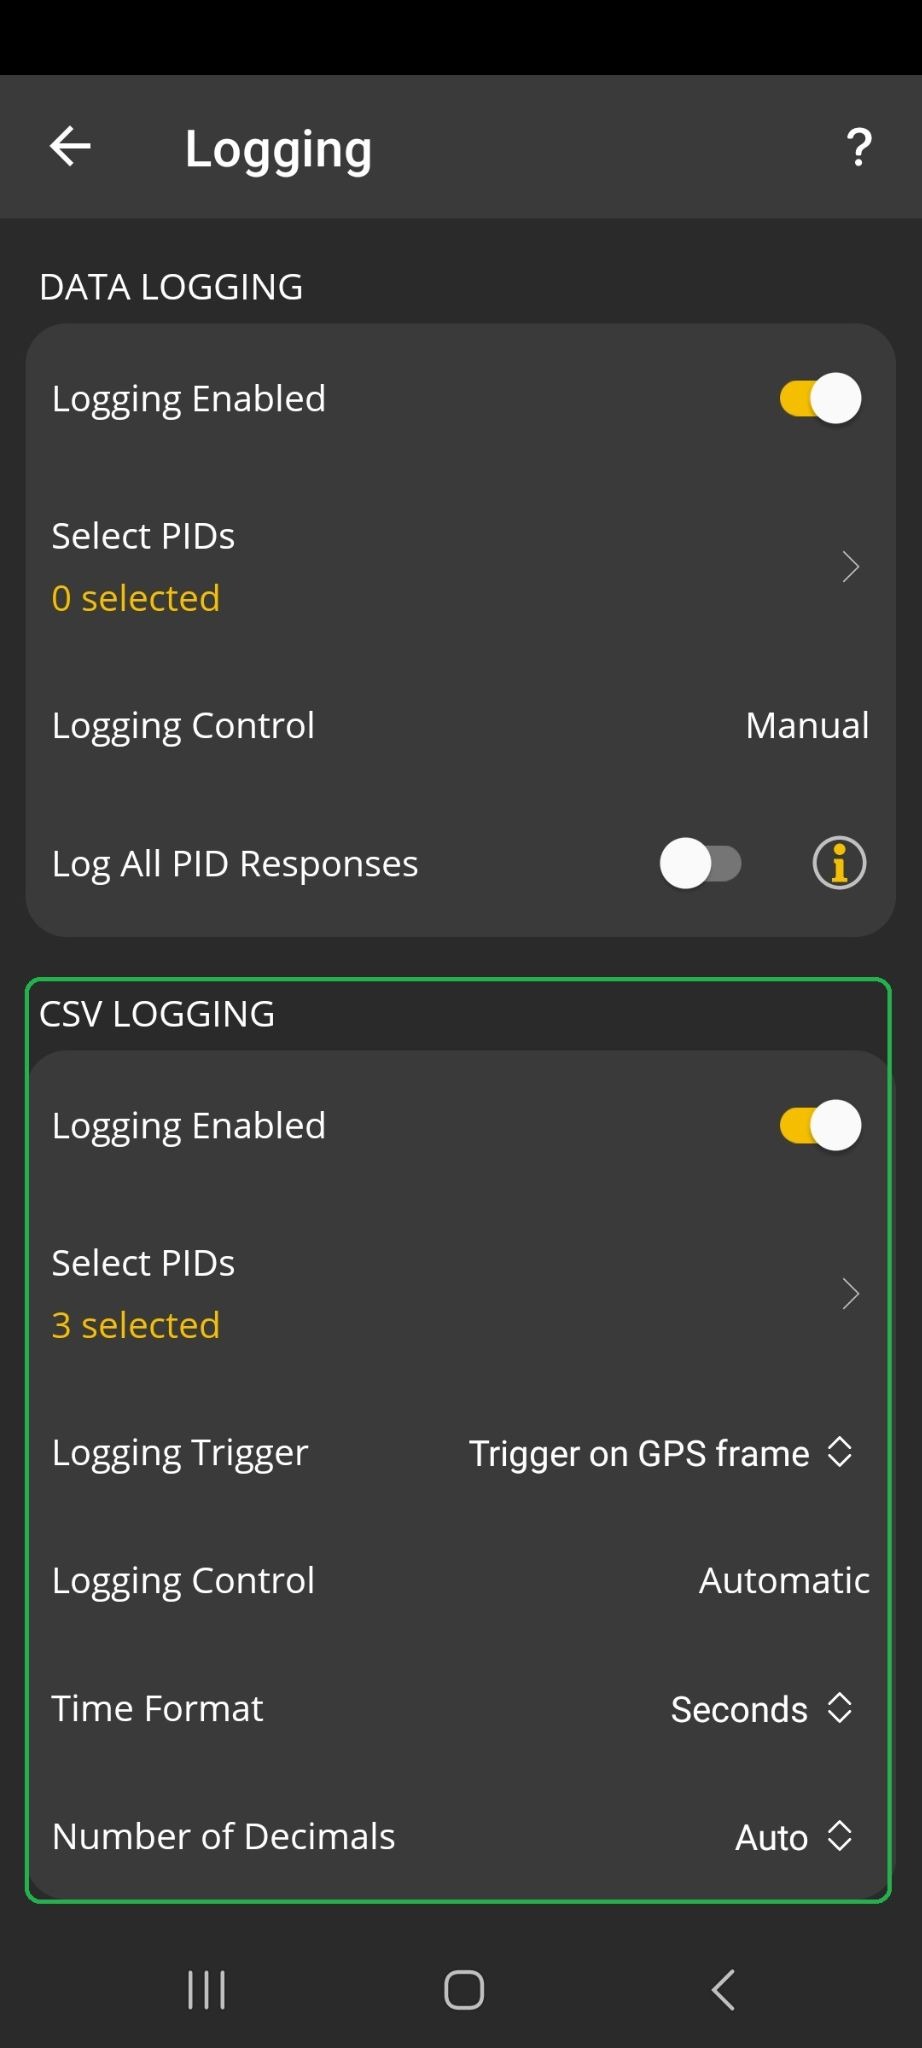 |
Logging Enabled
This option enables or disables the logging feature. [Default setting is Enabled]
When logging is enabled, a new CSV log file will be created automatically each time the app connects to your vehicle.
Select PIDs
Tap Select PIDs to open a new screen and select which PIDs (such as RPM or coolant temperature) you want to record to a CSV file. [3 PIDs are selected by default]
Note: If GPS is not turned on, you will be able to select GPS PIDs in this screen, however, no data will be returned.
To search for a particular PID, enter the name of the PID in the search field and tap Search. The app displays categories that have possible matches. Tap the > arrow to drill down until you find the PID you want.
In the example screenshots below, we entered Transmission in the search field, then tapped the > arrow to find a Transmission Fluid Temperature PID for a Ford vehicle in the Powertrain Control Module.
|
|
|
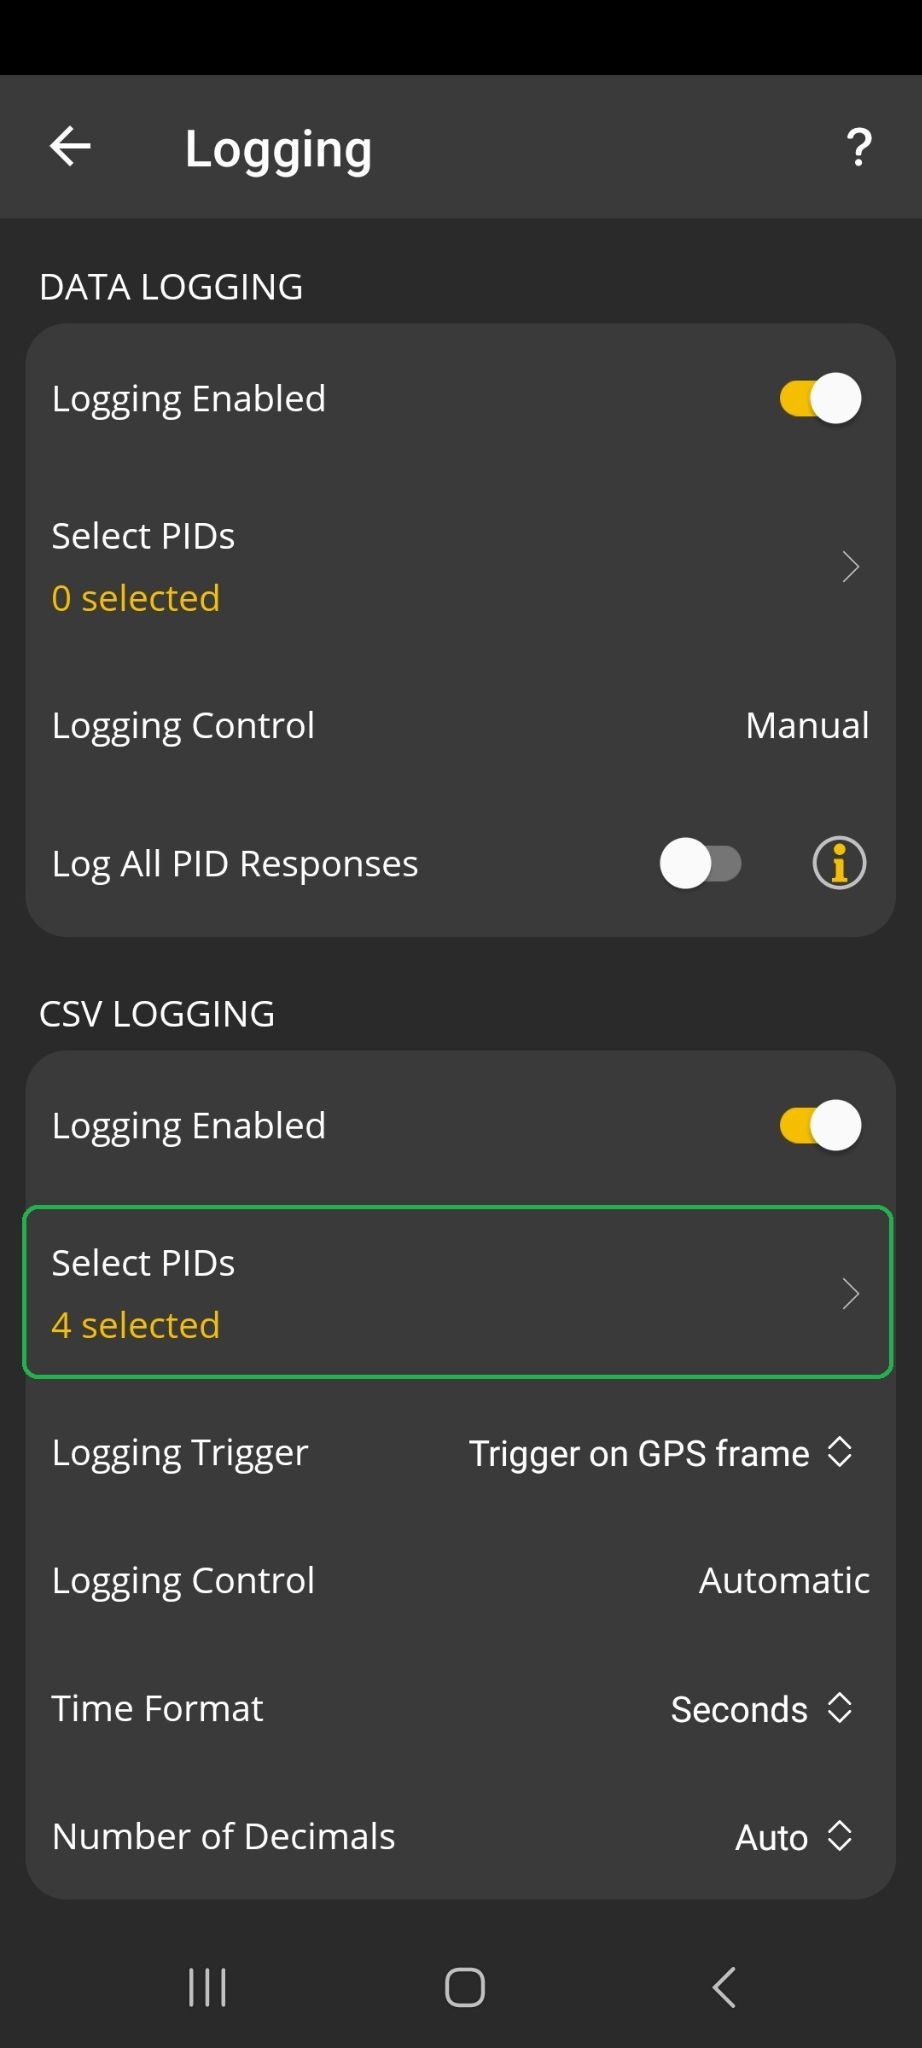
We selected Transmission Fluid Temperature (°F), and tapped the checkmark (✓) in the upper right corner to save the setting. The Settings > Preferences > Logging screen shows that 4 PIDs are selected for CSV logging (highlighted).
|
 |
The OBDLink app will display search results for your vehicle when searching the SAE PIDs and Calculated PIDs groups.
For example, if you search for Transmission and open the SAE PIDs category, you will see PIDs supported by your vehicle.
|
In the example below, no PIDs are listed, because this vehicle doesn't support SAE PIDs with "Transmission" in the name.
Tap Show All to toggle the search results. Tap Show Vehicle Supported to return to the default view.
| |
Logging Trigger
The logging trigger configures when a frame of data is recorded to a CSV file. A single frame of data contains one data point for each sensor being logged. Tap Logging Trigger to view the options. The following options are available:
- Trigger on GPS frame [Default setting] - A frame of data is saved to file when a new GPS reading is captured from your phone or device. GPS readings are usually captured at a rate of one per second. This logging trigger is the most useful when you are using the CSV logs to view data on the Maps screen. If you are exporting the CSV files for use outside of OBDLink, then you might want to consider using one of the other logging triggers.
Note: If GPS is disabled or your device is not receiving a GPS signal, then there will be nothing to trigger the data logger and a CSV file will not be created. - Trigger on PID frame – A frame of data is saved to file when the OBDLink app refreshes each sensor being logged. For example, if vehicle speed, engine RPM, and engine load are being logged to a file, the app will read one sample of each of the three items from the vehicle, then the data will be written to the log file. This logging trigger is useful if you want to export the log files and want to have data points at the same rate as they are read from the vehicle.
Note: This option provides the fastest sampling rate. - Trigger at a fixed sample time – A frame of data is saved to file at a fixed sample time. The sample time is configurable on the Logging screen. In this trigger mode, the OBDLink app keeps track of the most up-to-date frame of data read from the vehicle. When the logging sample time expires, that frame of data is written to a CSV file. This logging trigger is most useful if you want to export the log files and want the data at a constant sample rate.
Note: If the sample time is faster than the rate at which data is read from the vehicle, you will see multiple rows in the log file with the same data points.
Logging Control
This option determines whether logging is Automatic or Manual.
- Automatic [Default setting] - Logging starts when the app connects to the vehicle.
- Manual - Logging must be started manually using one of these options:
- Navigate to Logs > Files, tap the 3 dots menu button, and tap Start CSV Logging.
- Set up a dashboard gauge using the push button style and the action to Start or Stop CSV Logging. For step-by-step details to do this, see the Add and Edit dashboard gauges article, in the Example: Add a push button display section.
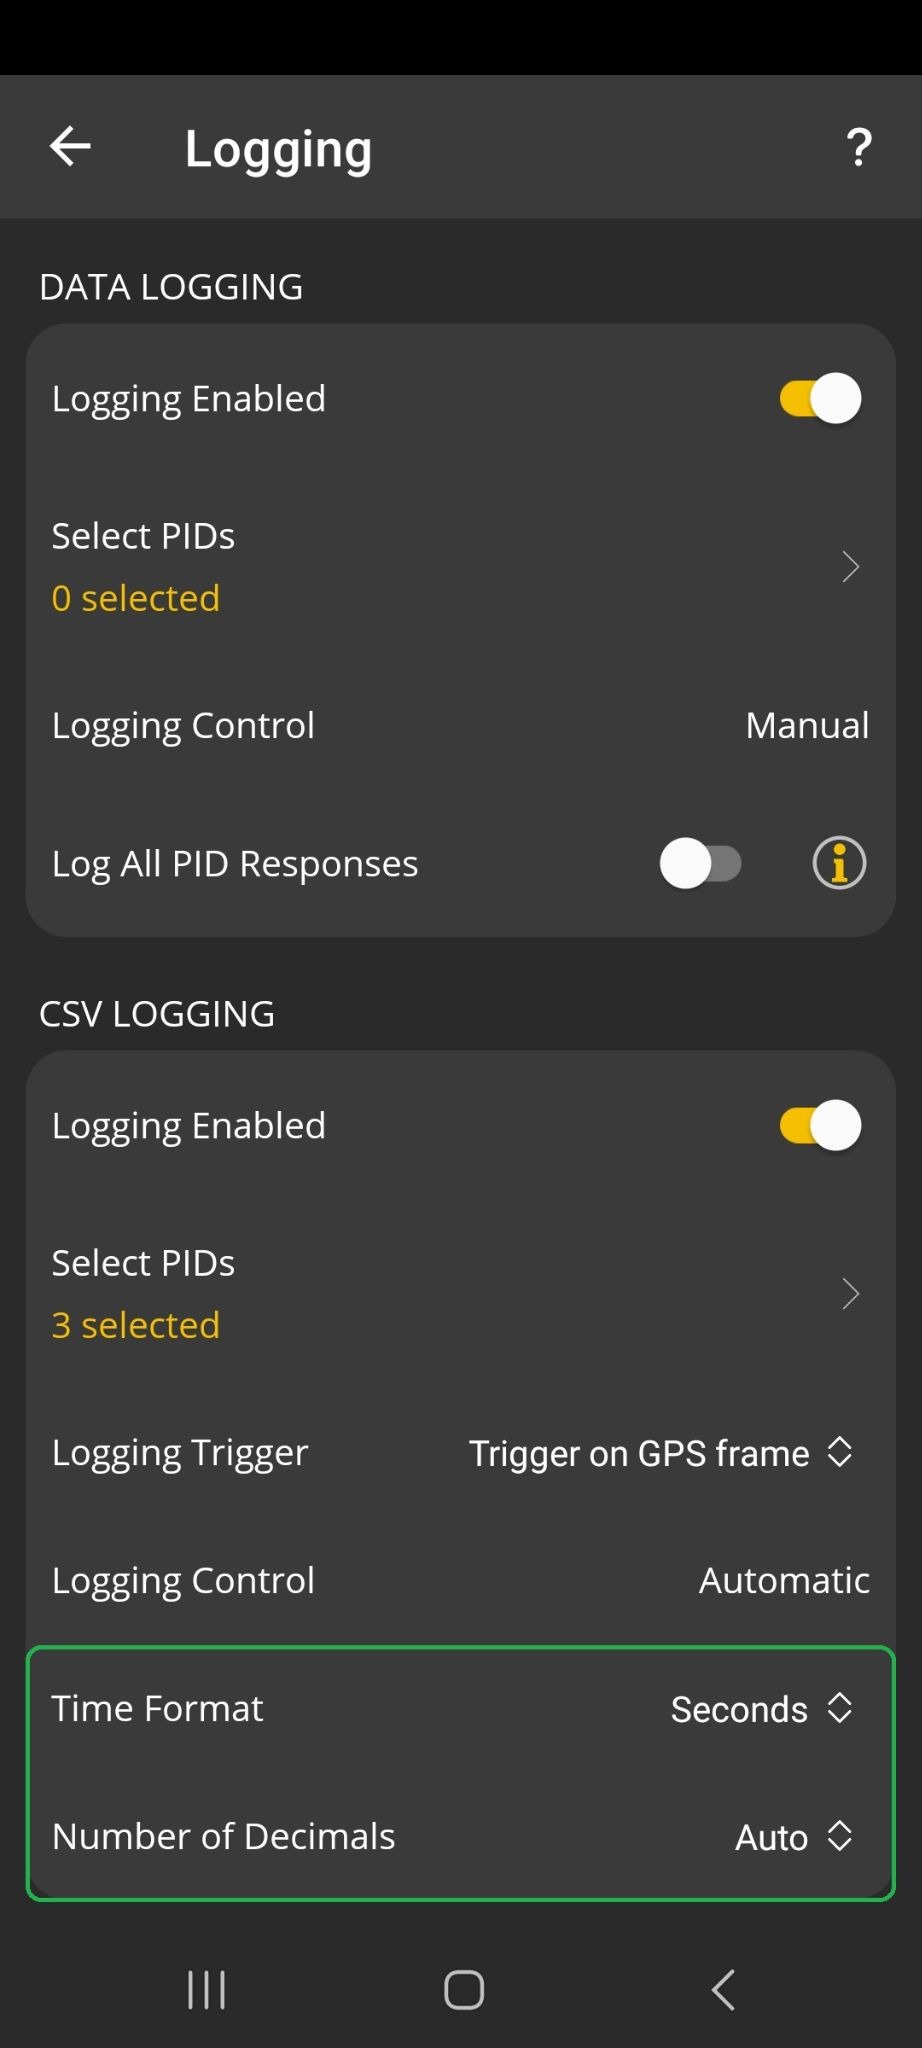
CSV File Options
 |
Time Format
All CSV log files contain a column with the time at which the frame was captured. The time format option determines whether the time column is written as seconds (from the start of the log) or as a full date and time stamp. [Default is Seconds]
Number of Decimals
This setting determines the number of decimal places used to write data to the CSV file. [Default is Auto]
View information while driving
The Graphs tab allows you to view up to four PIDs while the vehicle is in motion.
Note: The information presented on the Graphs tab is a separate visual representation of PIDs that you select. The Graphs data is not logged to either a CSV or binary data file. It is not related to the PID selections you make to configure logging, via Settings > Preferences > Logging.
Before you begin, be sure to:
- Start your vehicle.
- On your phone/tablet, open the OBDLink app and connect to your OBDLink adapter.
- Make sure your phone/tablet is not streaming to any other Bluetooth/BLE devices.
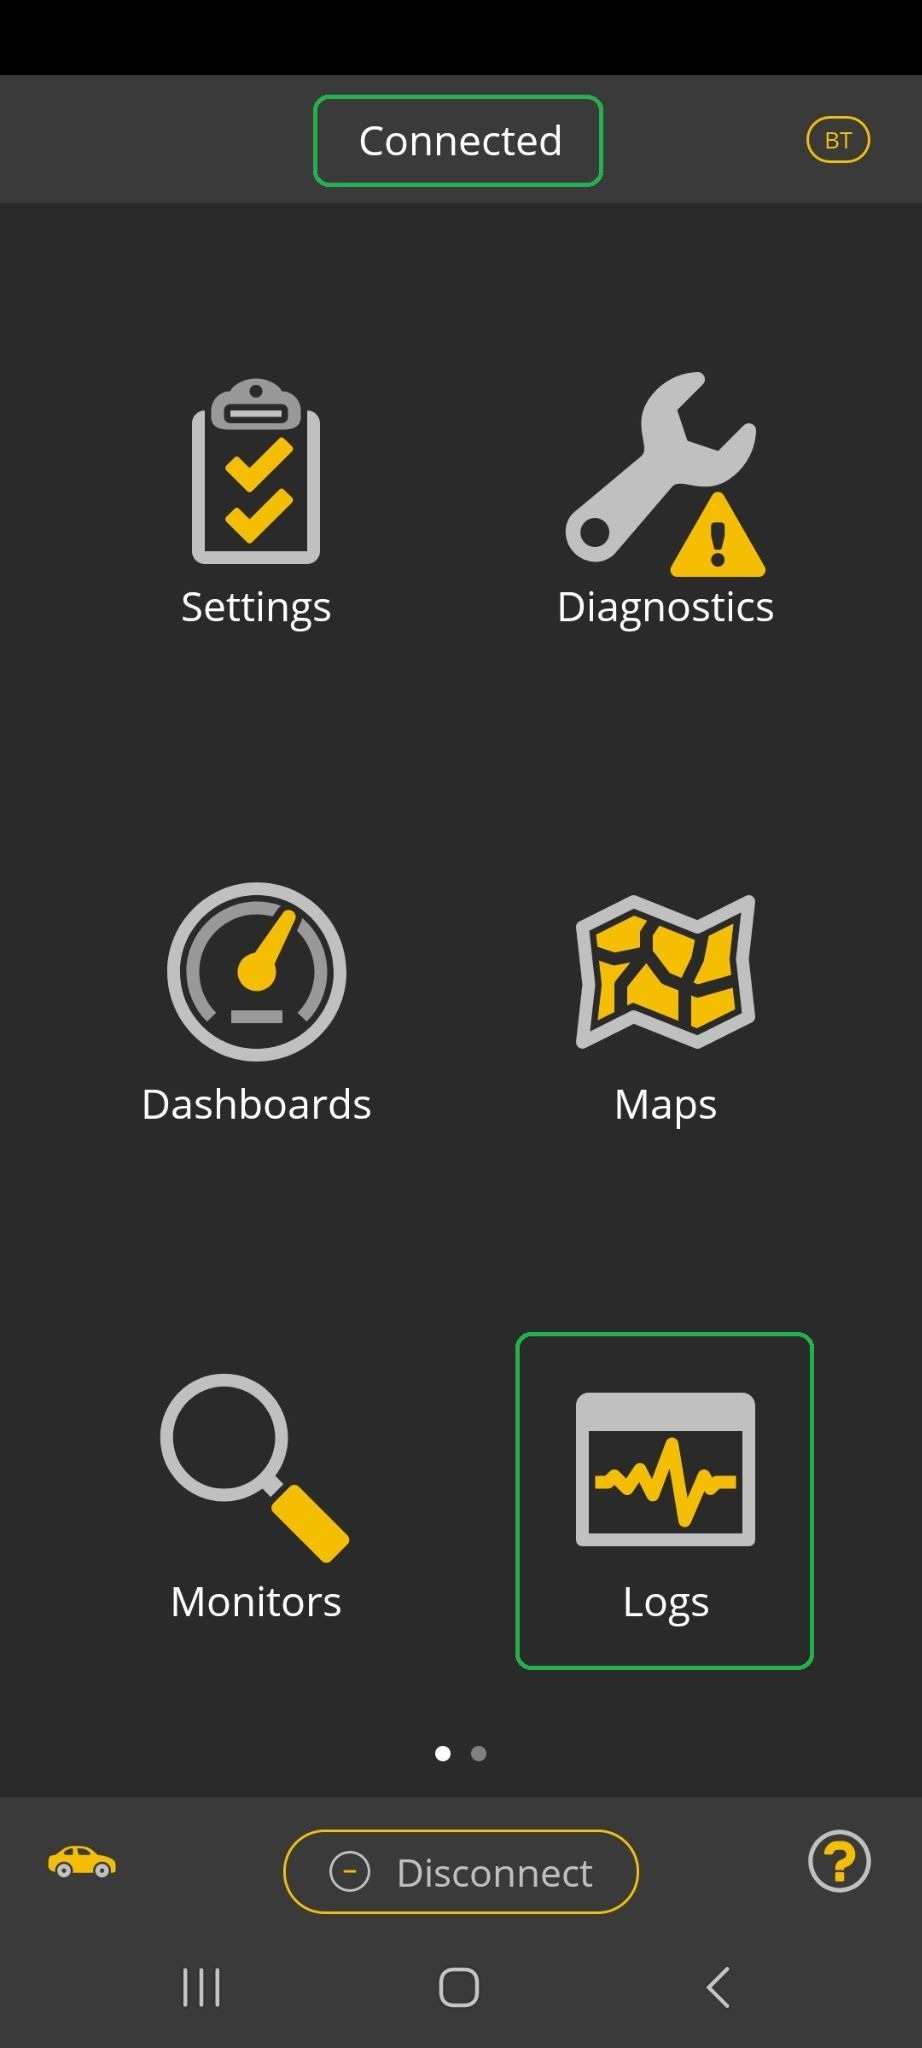
- Confirm that your phone/tablet is Connected to the OBDLink adapter and tap the Logs icon.
iOS Android 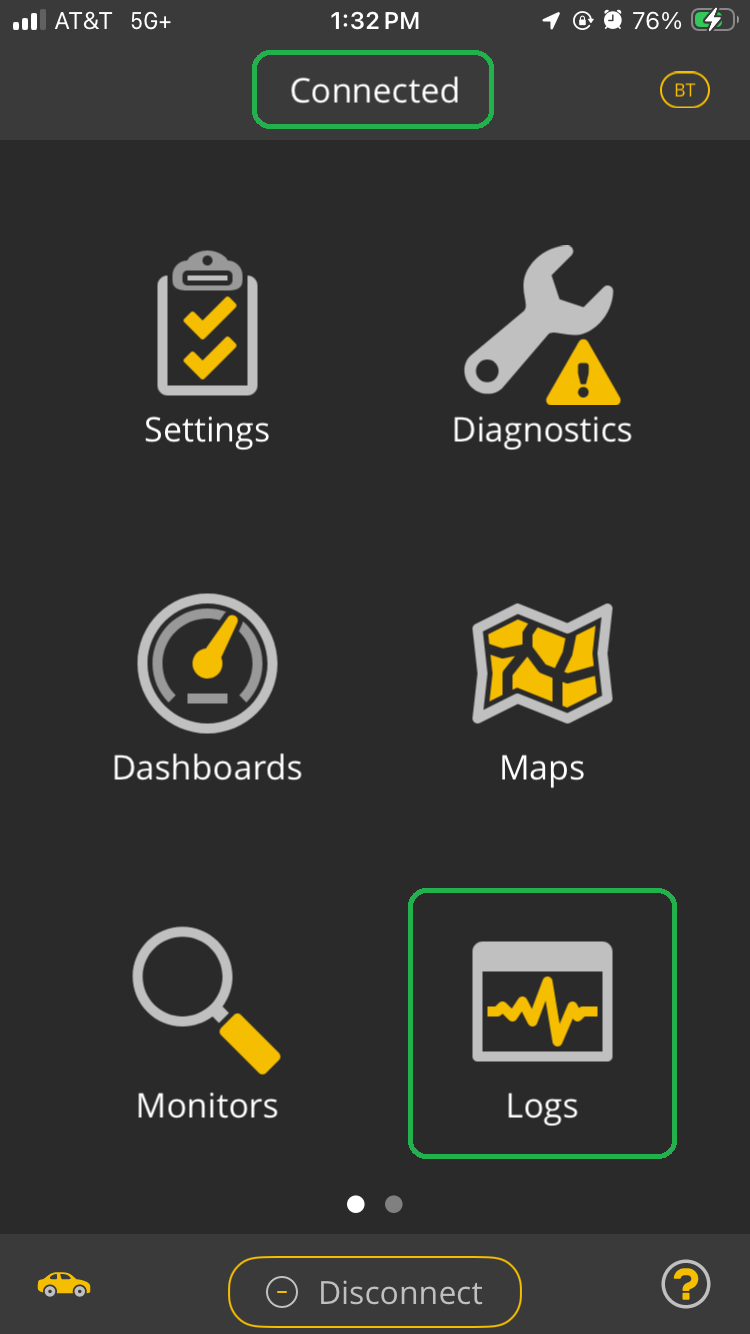
- Be sure the Graphs tab is displayed. Tap Start (highlighted) to start logging.
Note: If the Start button is grayed out, your adapter is not connected to your vehicle.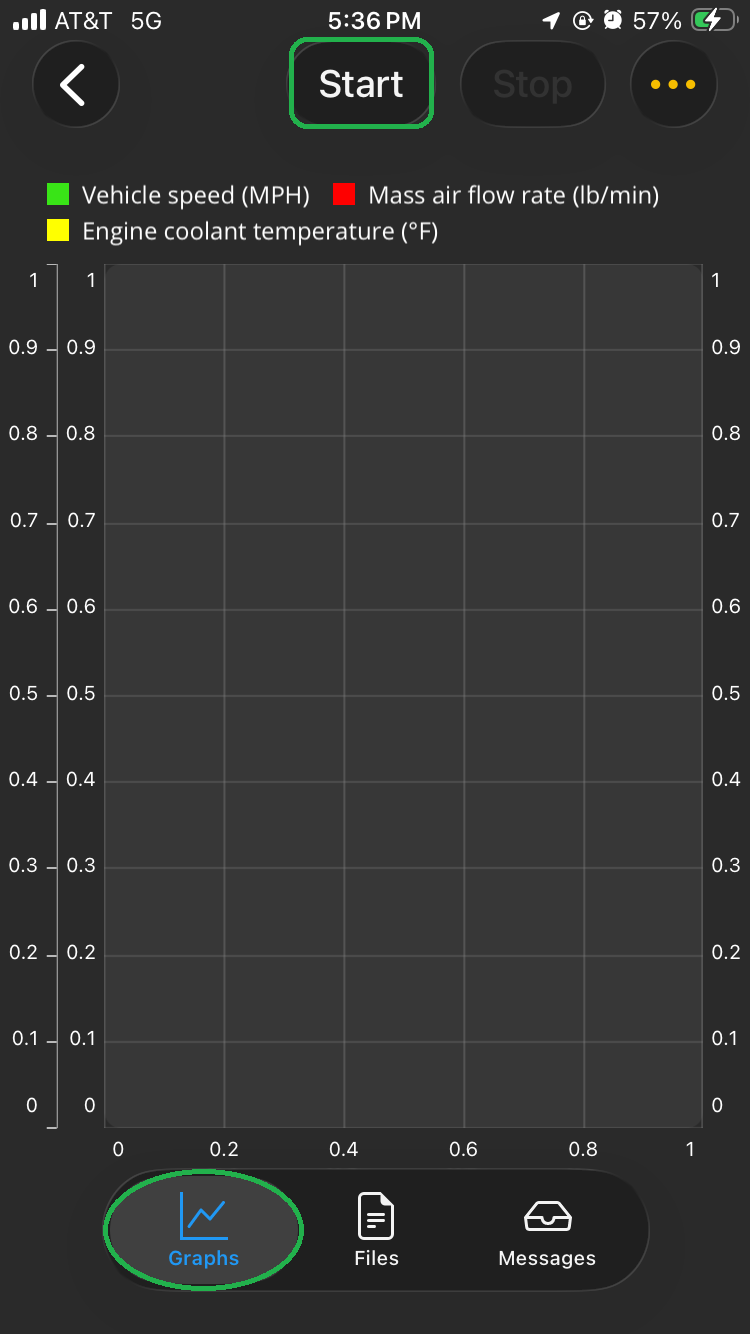
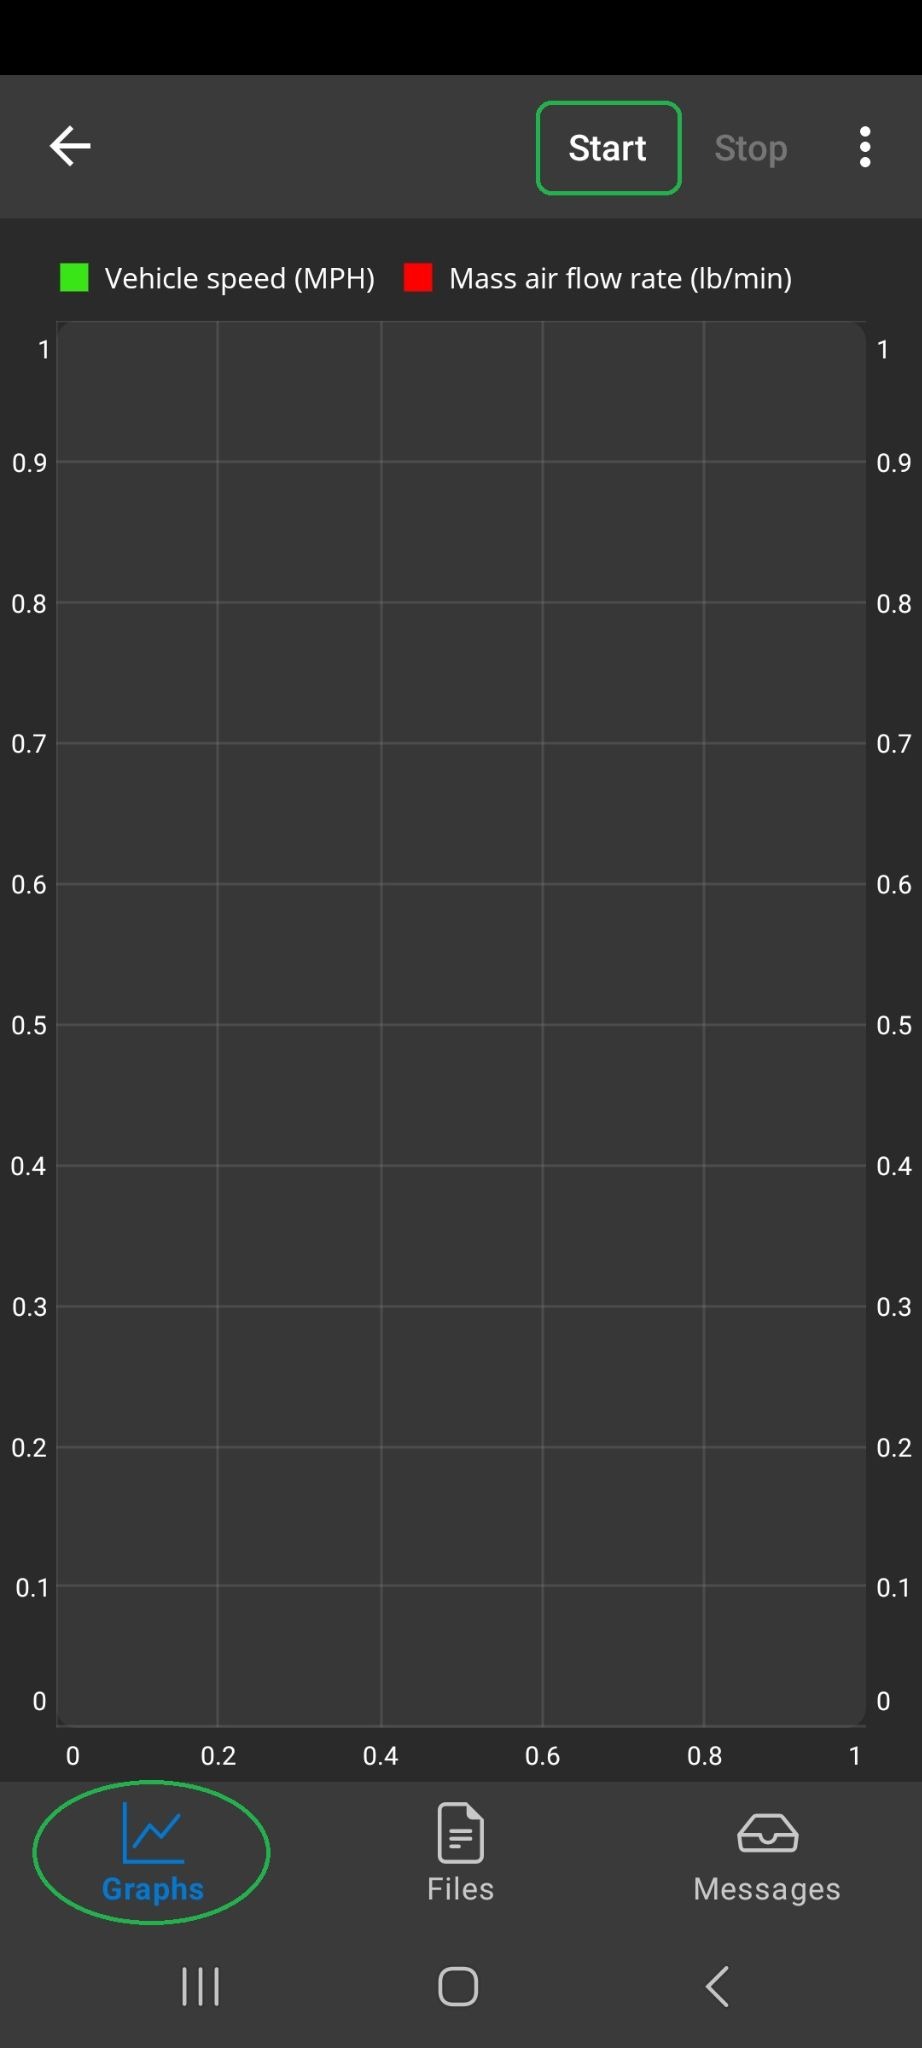
- The OBDLink app logs two items by default (vehicle speed and mass air flow rate).
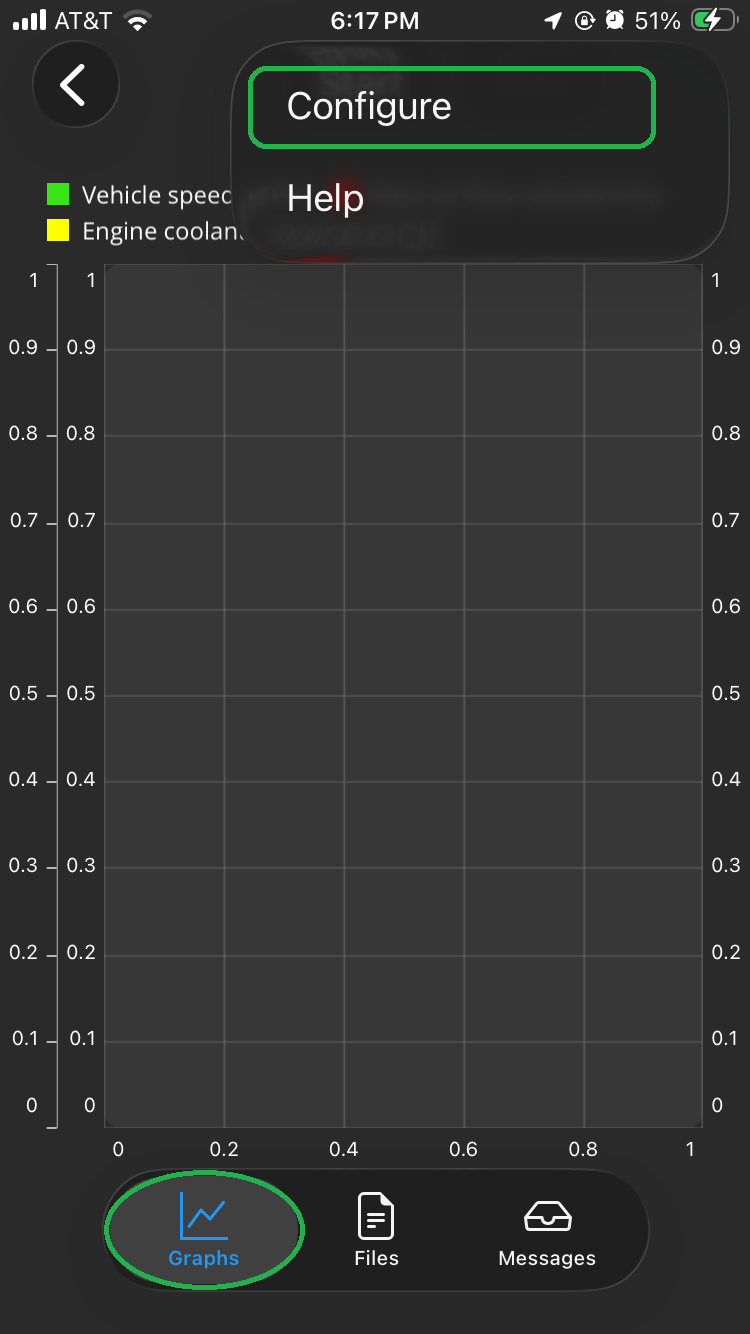
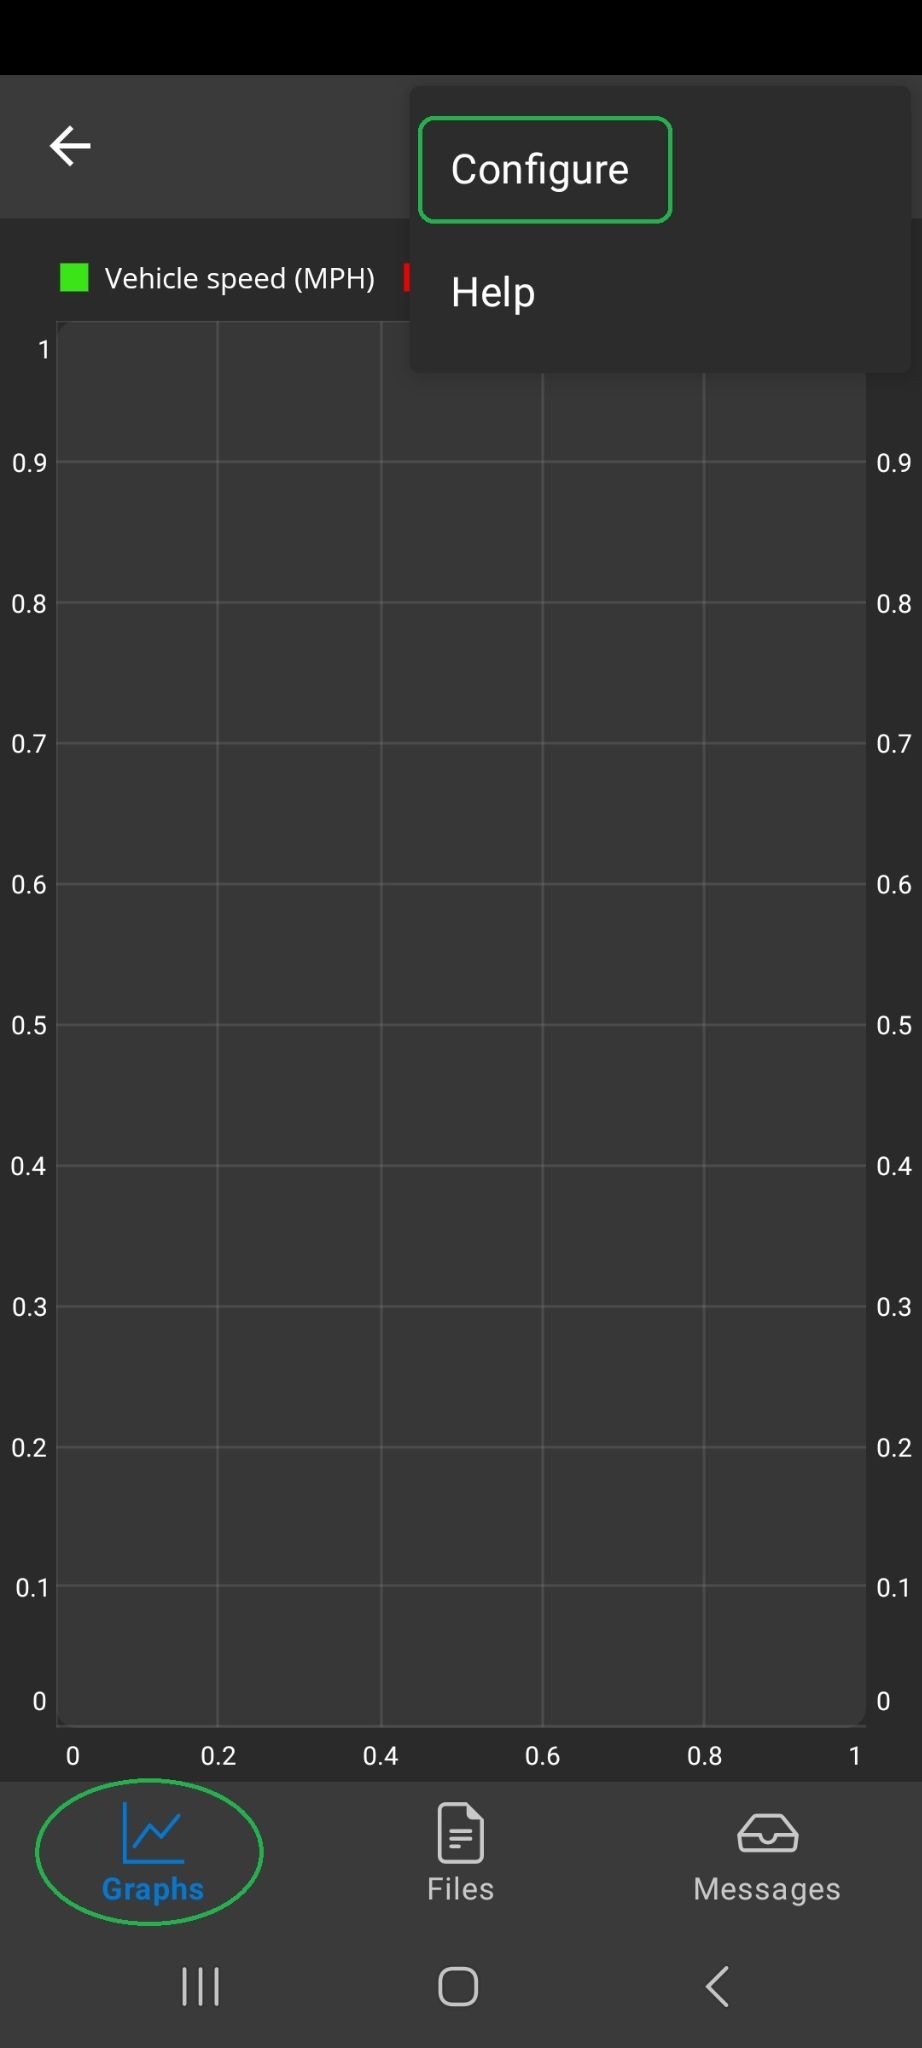
Tap the 3 horizontal dots (iOS) or 3 vertical dots (Android) menu button in the upper right corner to change how the graph looks and to add new items to the graph.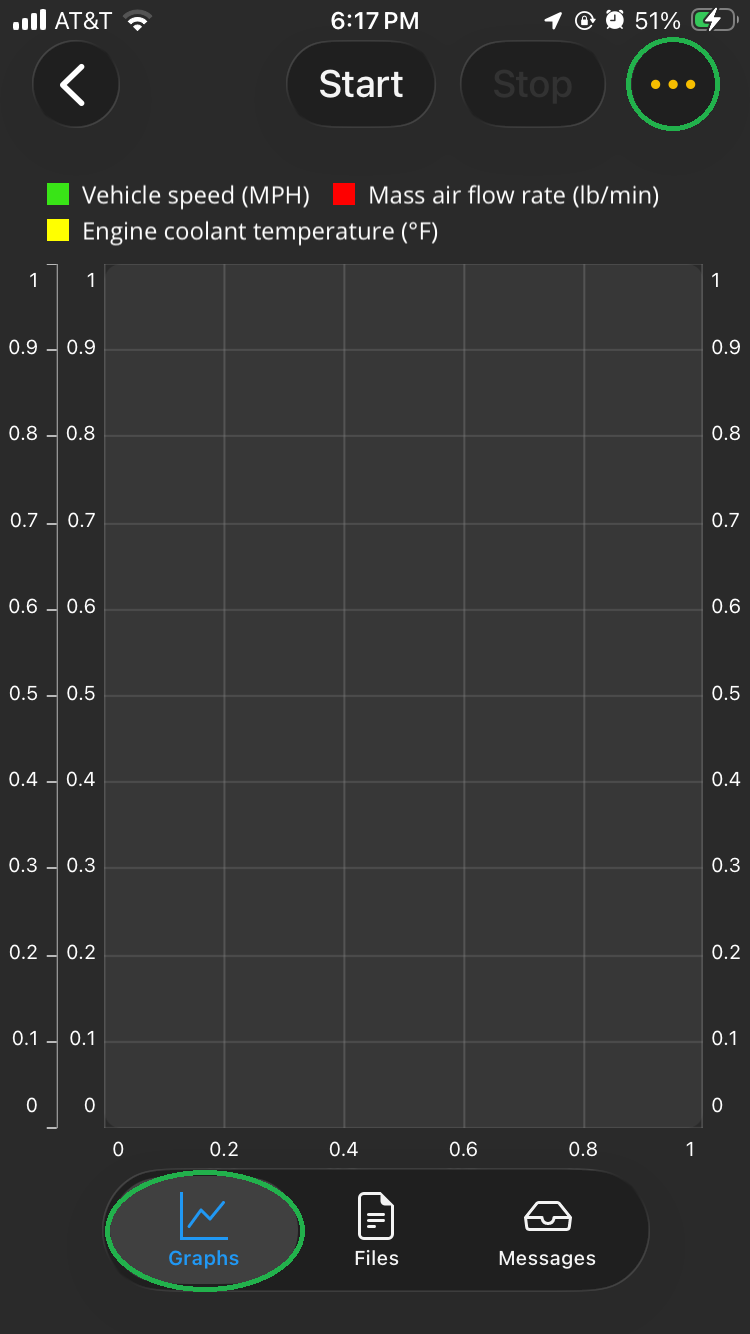
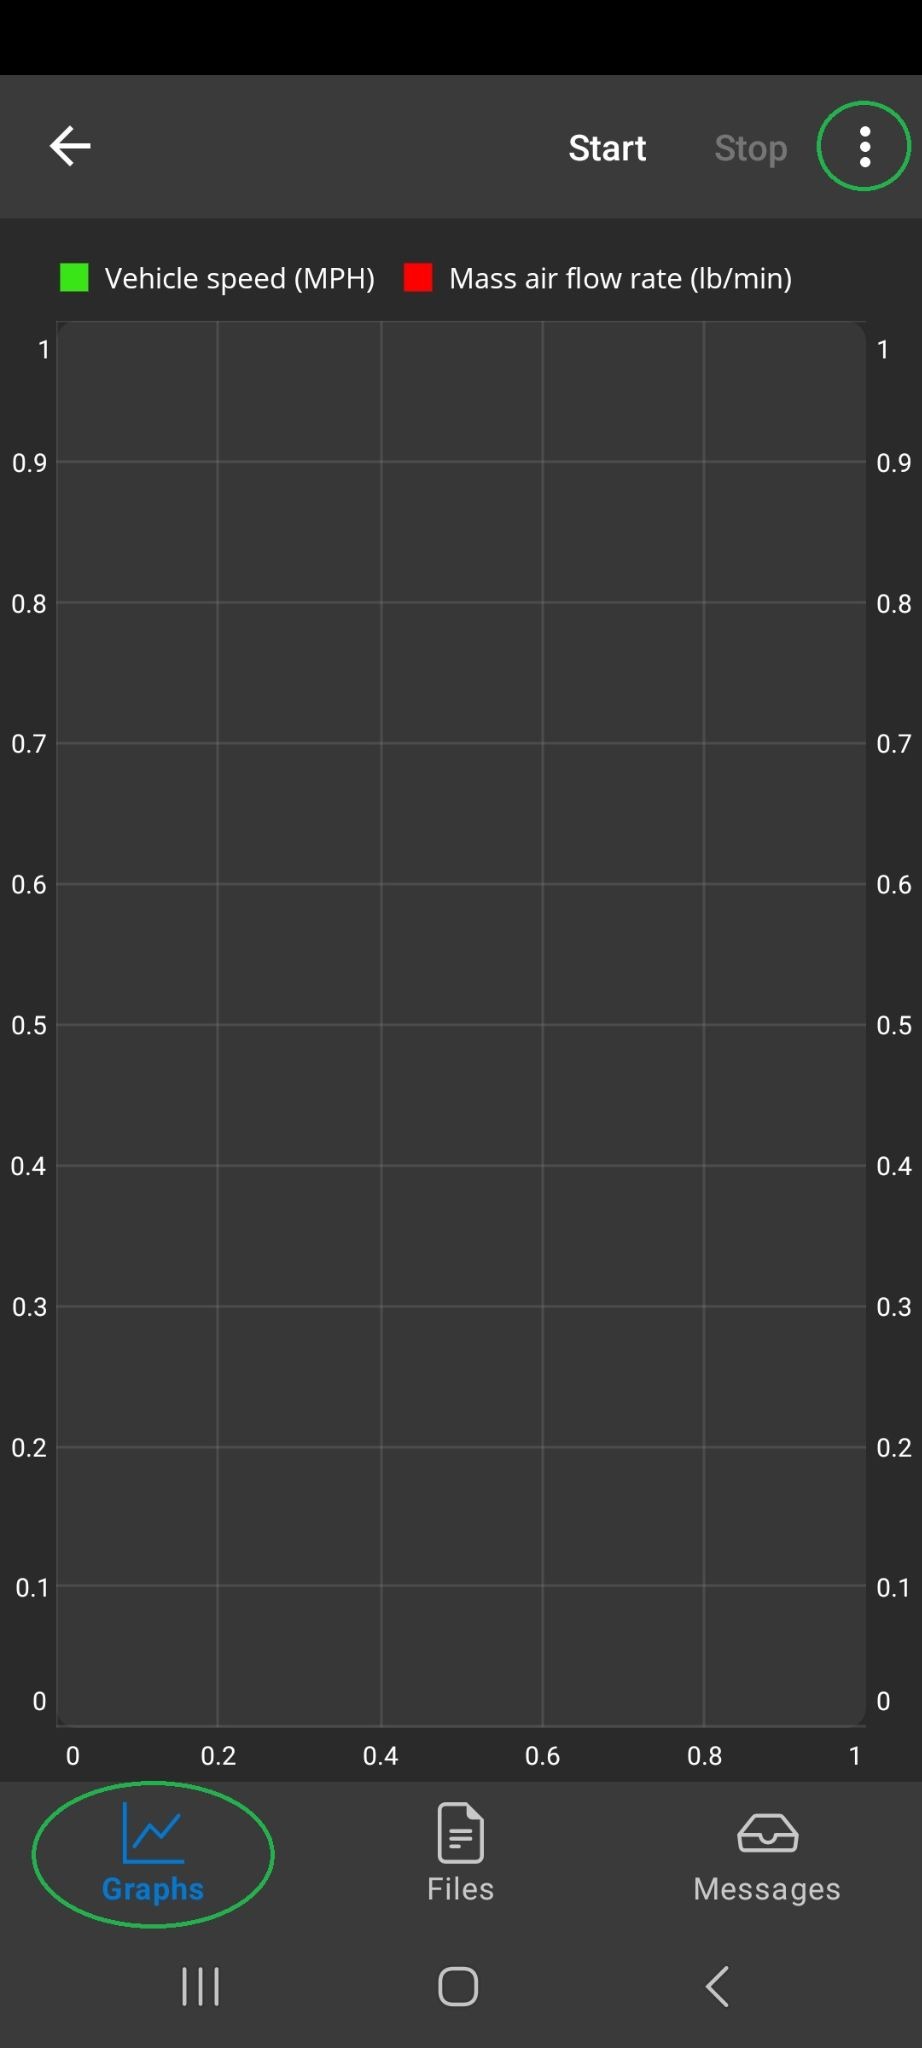
- Tap Configure to modify the graph.
- You will see the Graph Configuration screen. Scroll down to see all the options.
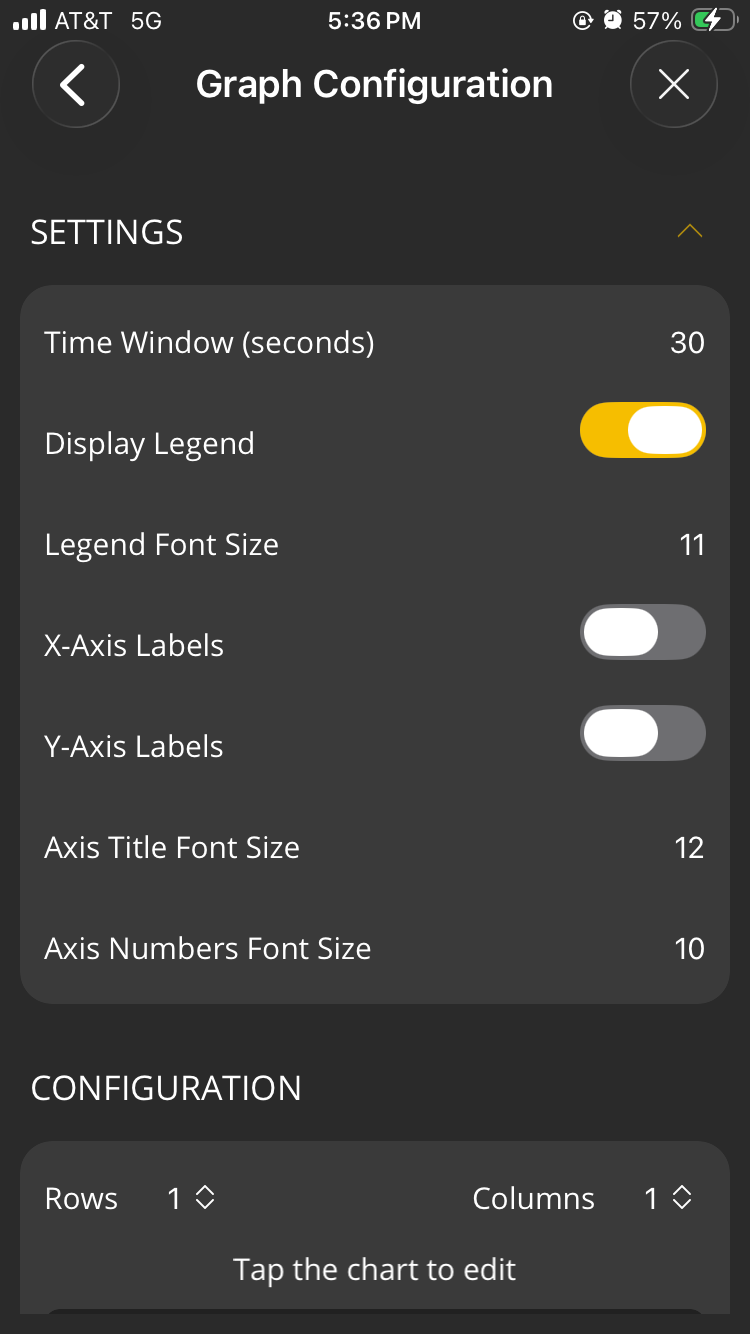
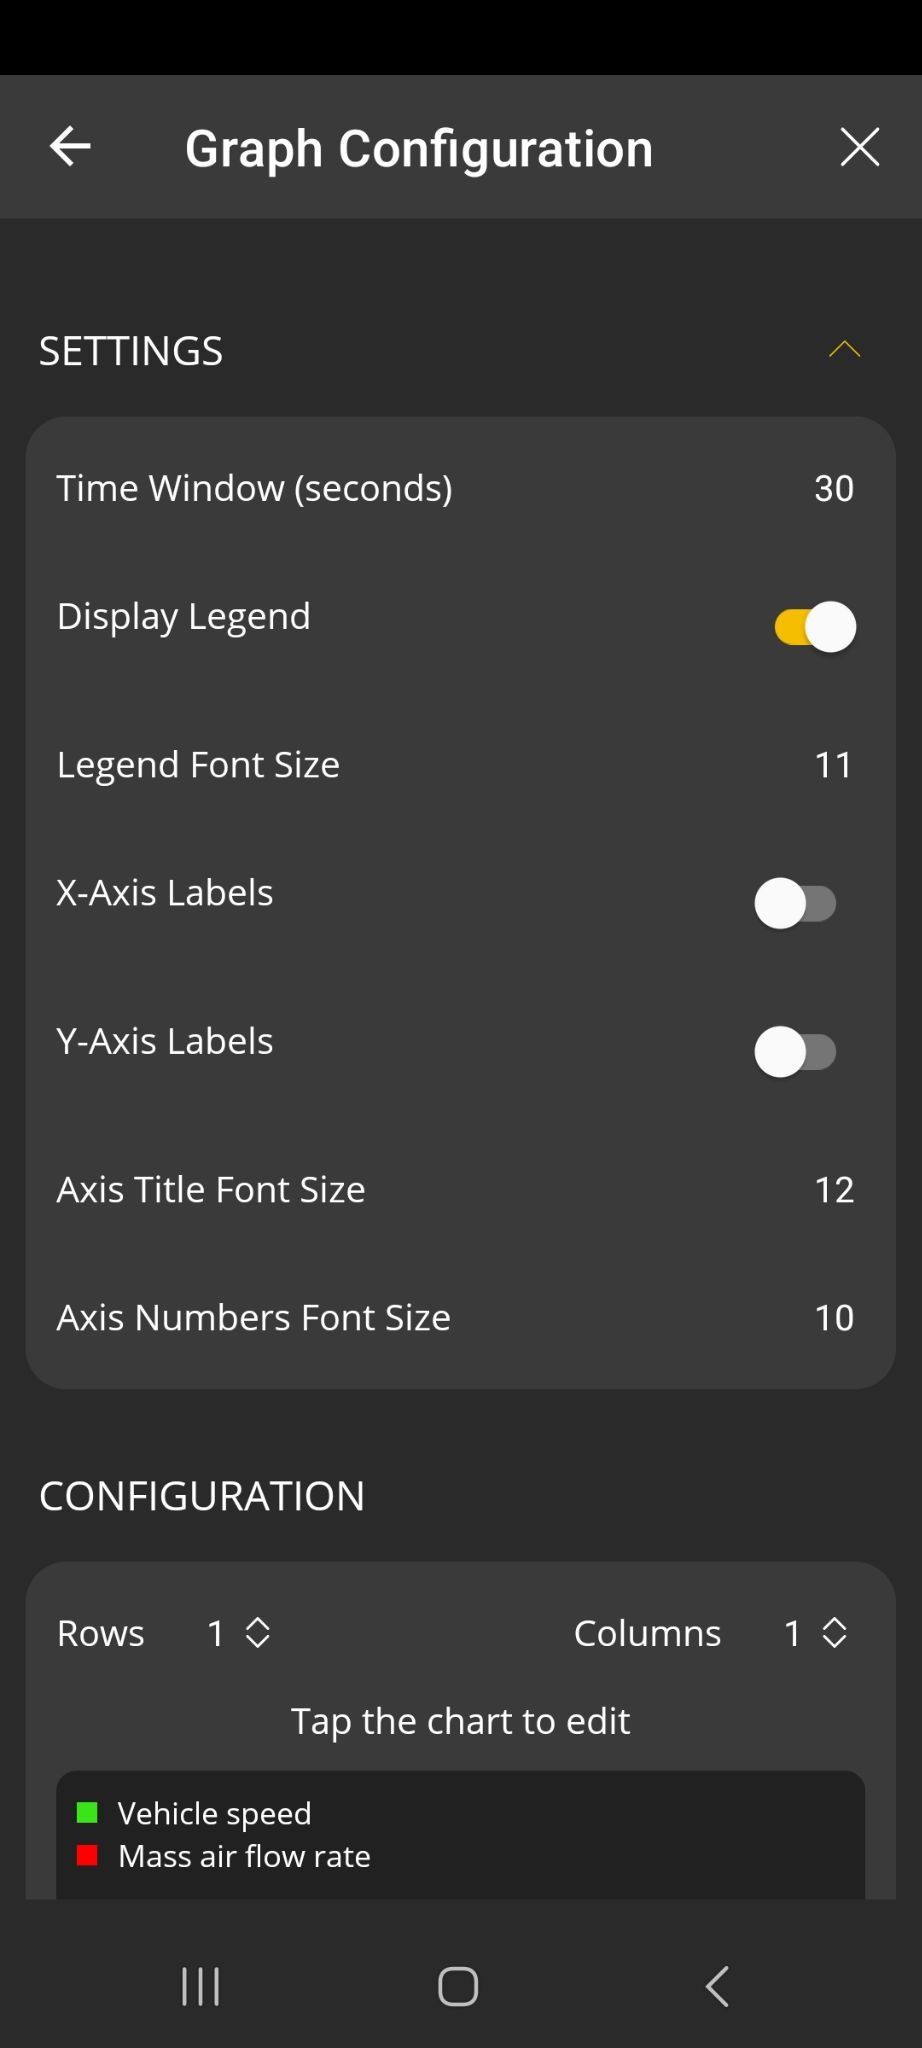
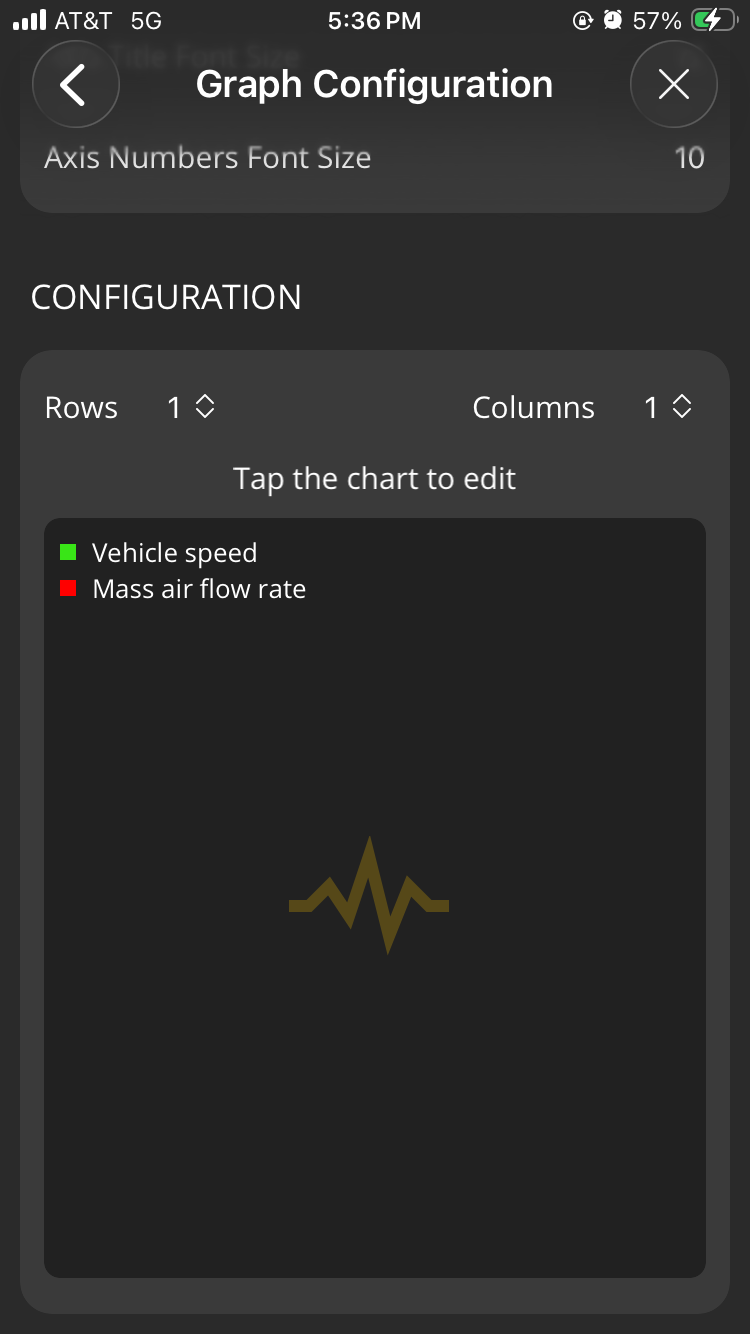
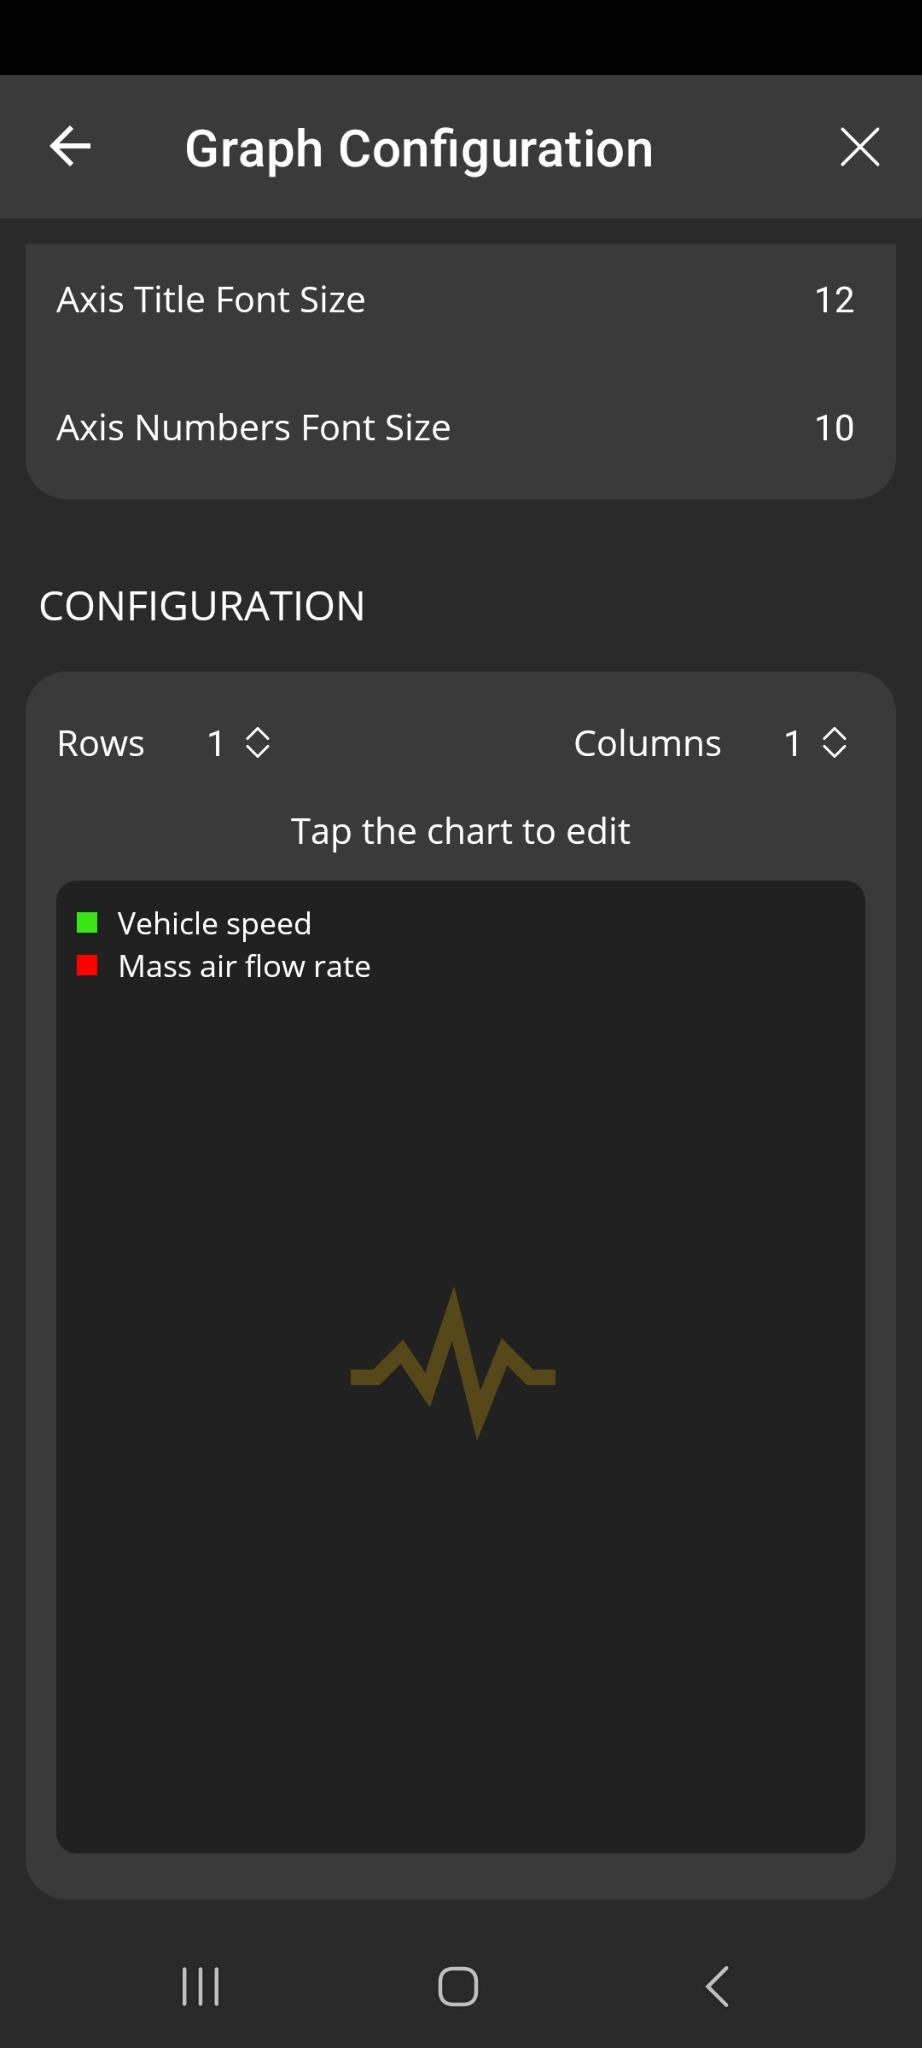
To add an item to the graph, tap the sample chart in the Configuration section.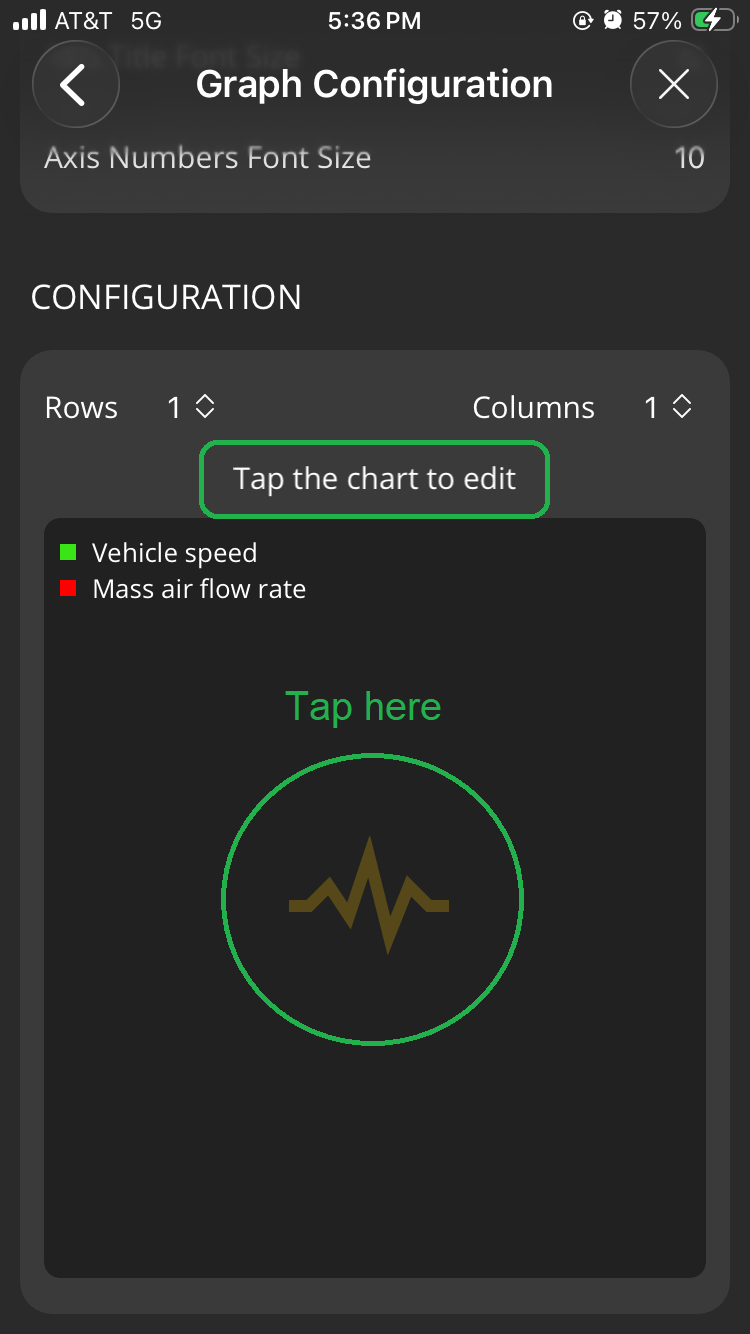
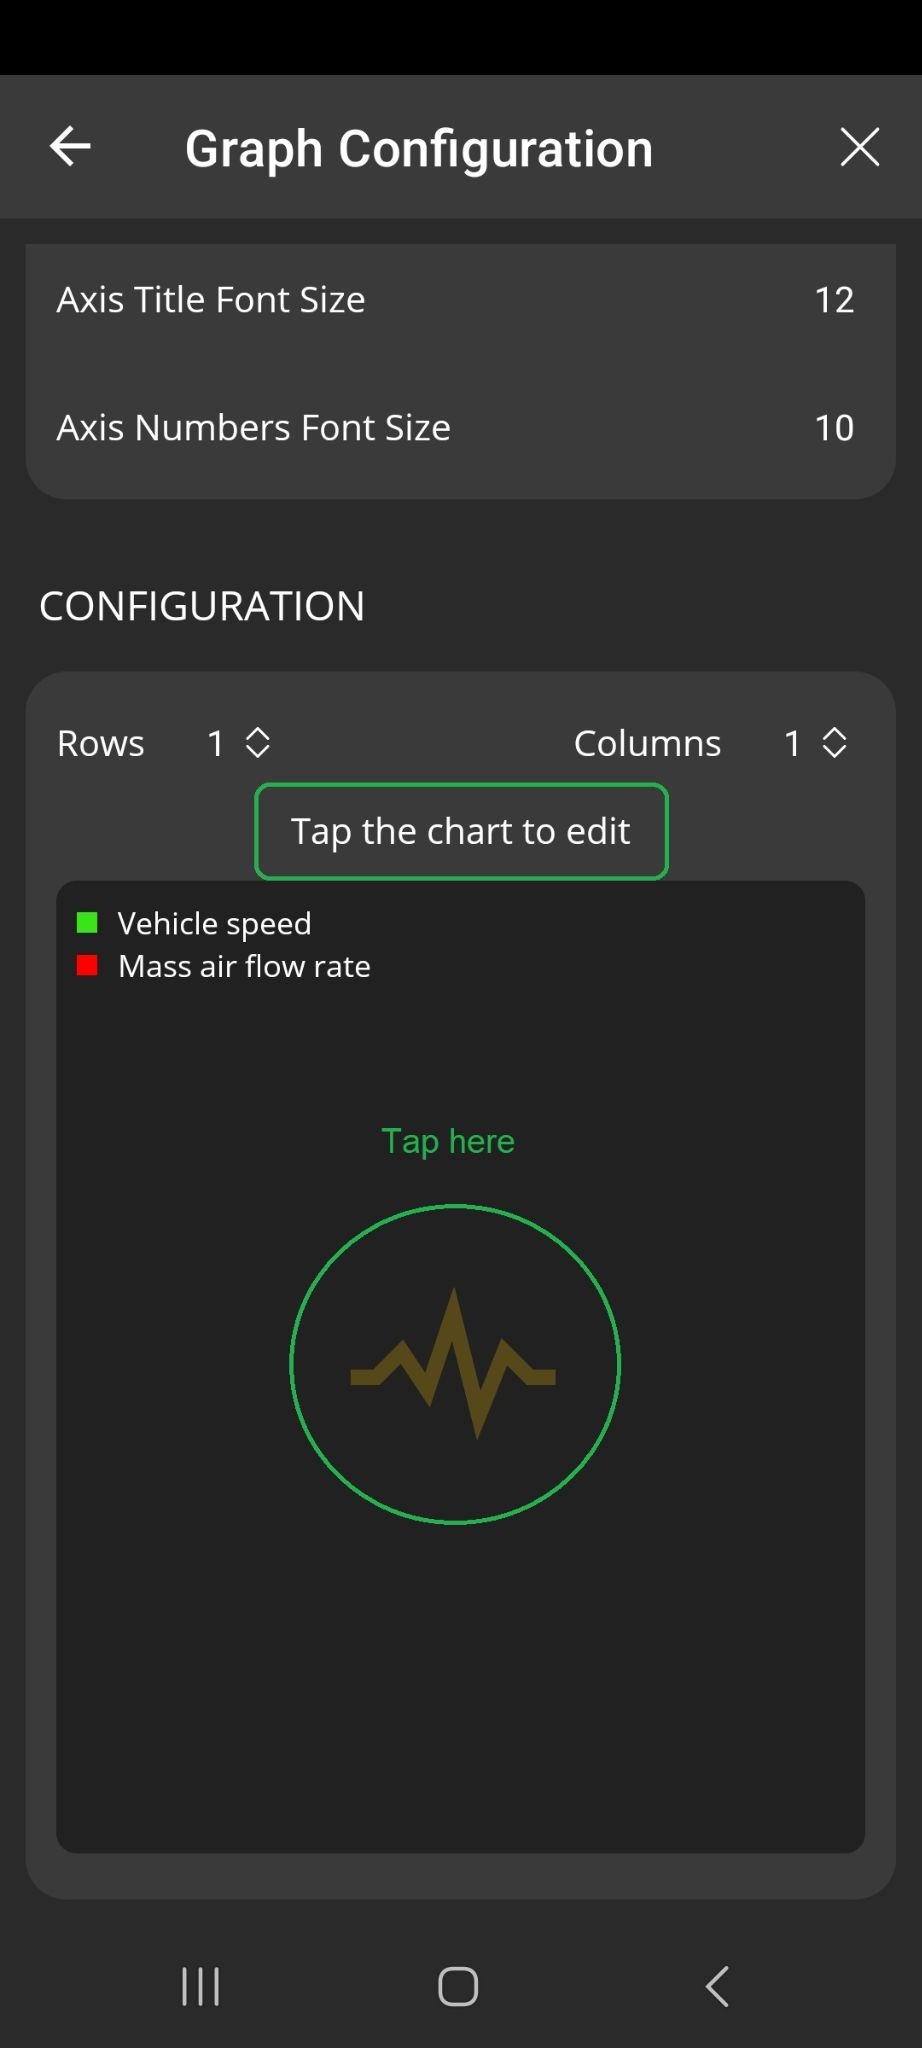
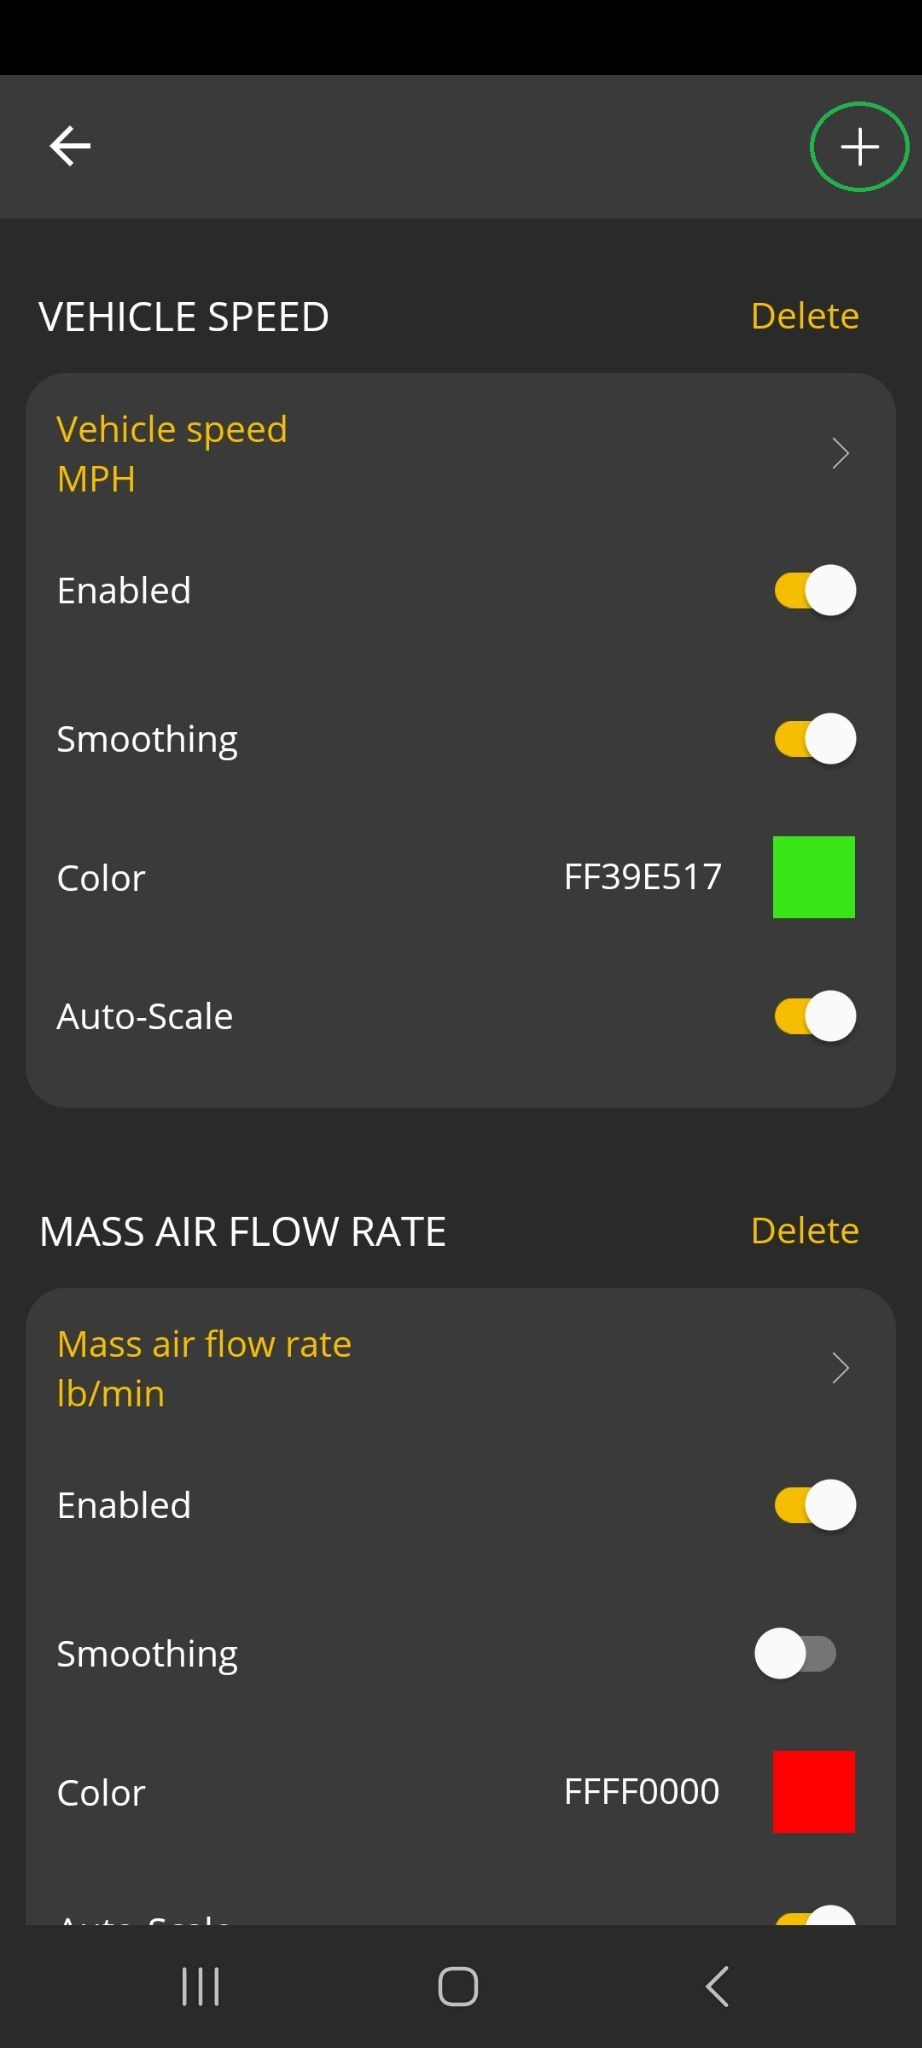
Tap the + symbol in the upper right corner to add an item to the graph.
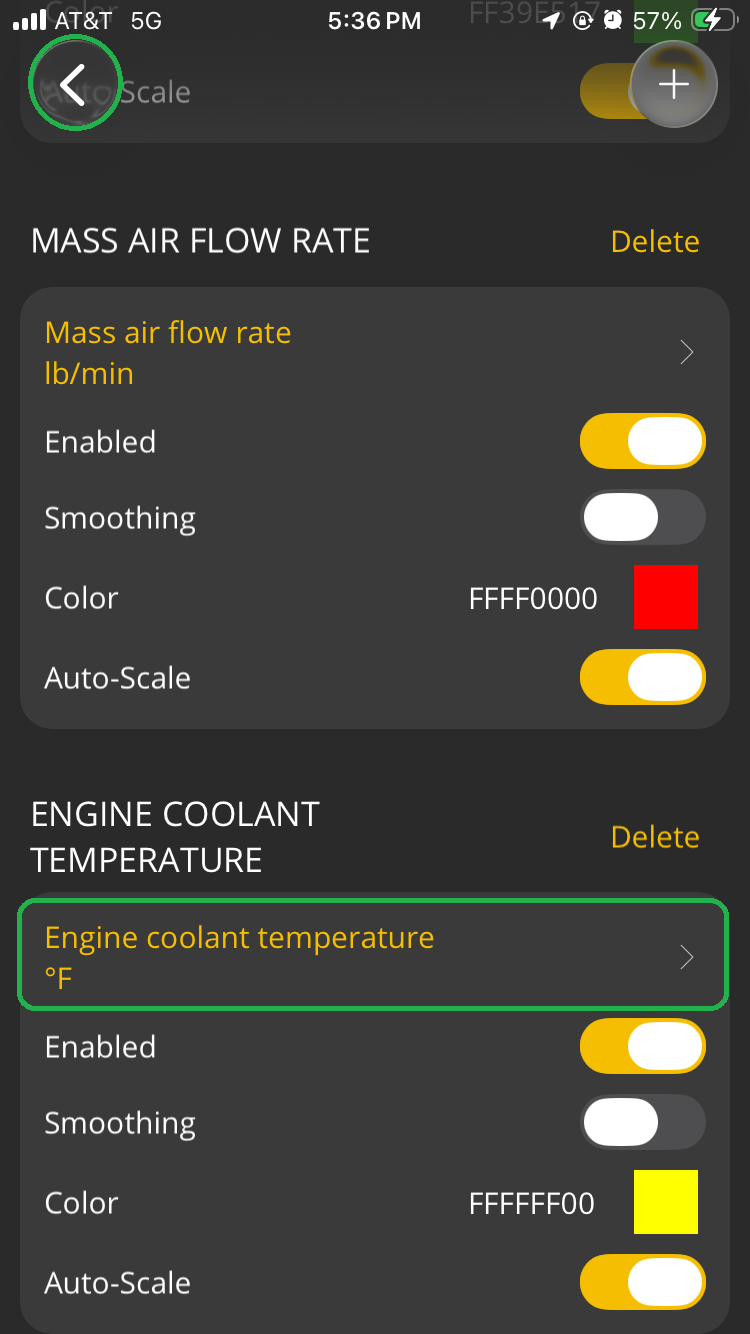
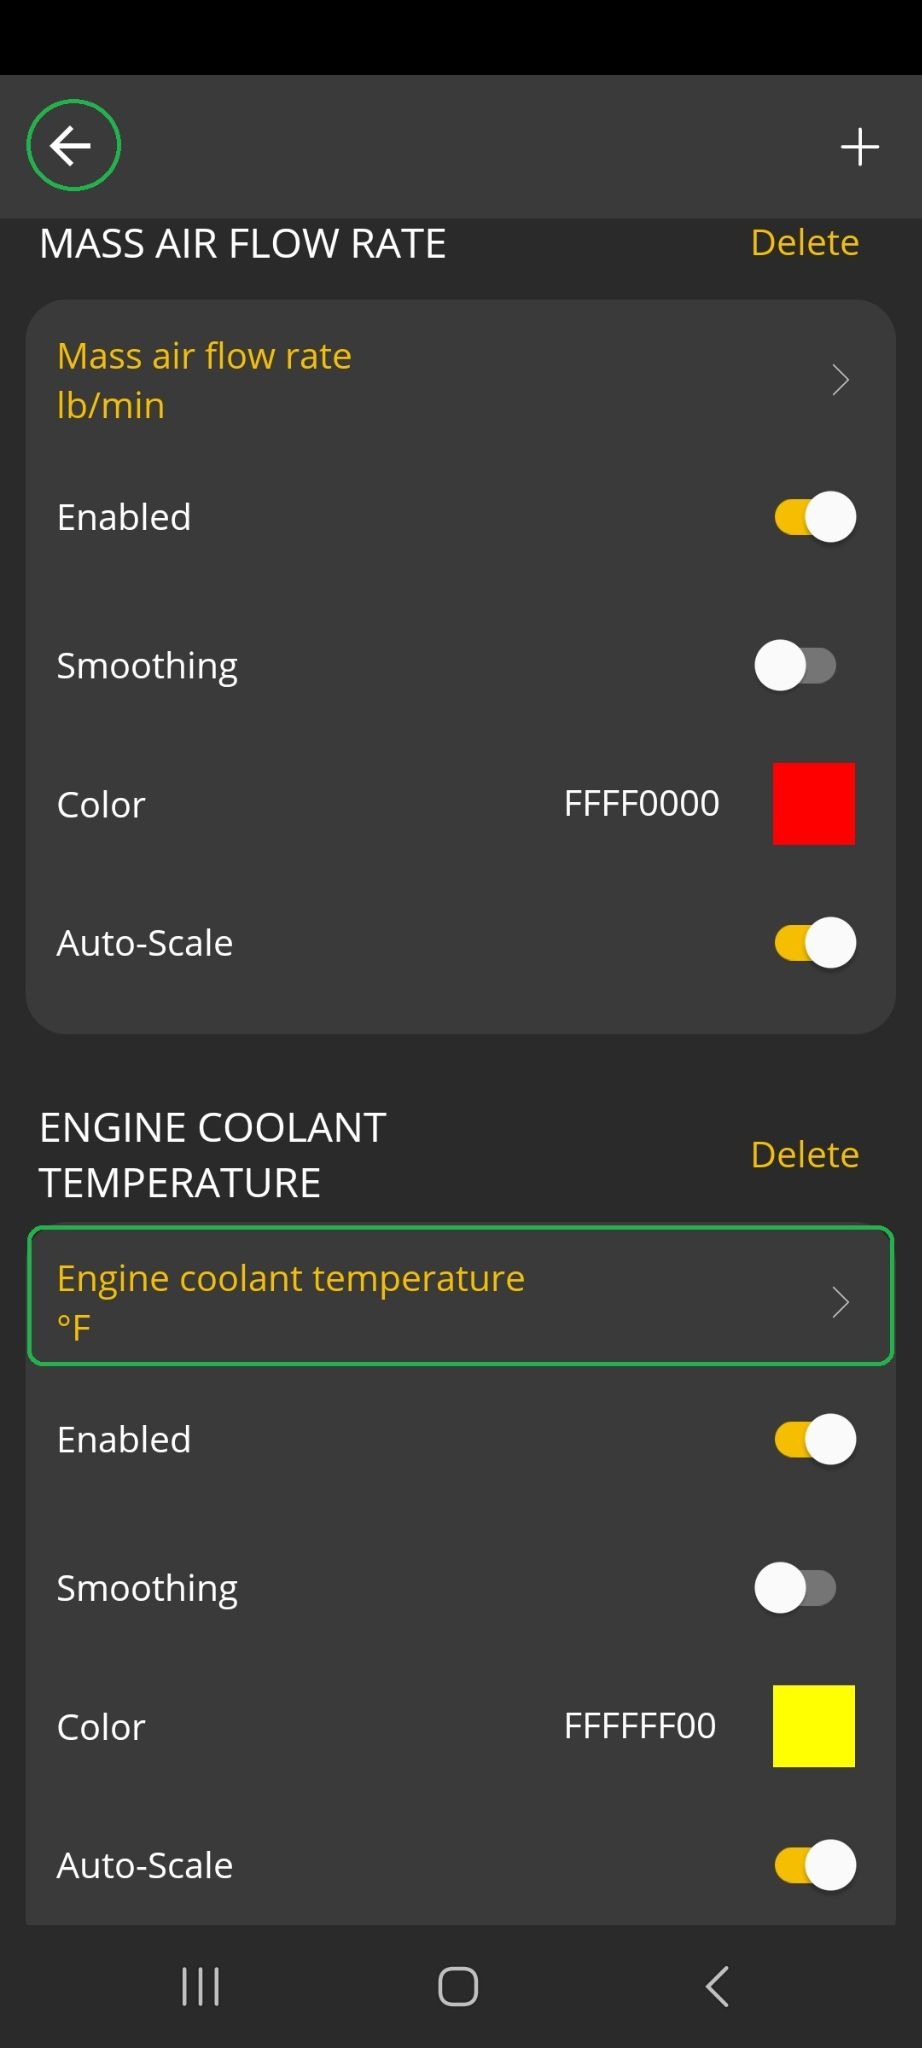
The app will create a new item with a default PID. Tap the PID name to change it. When you're done, tap the back arrow (<) in the upper left corner to save your selection. We added Engine Coolant Temperature in our example.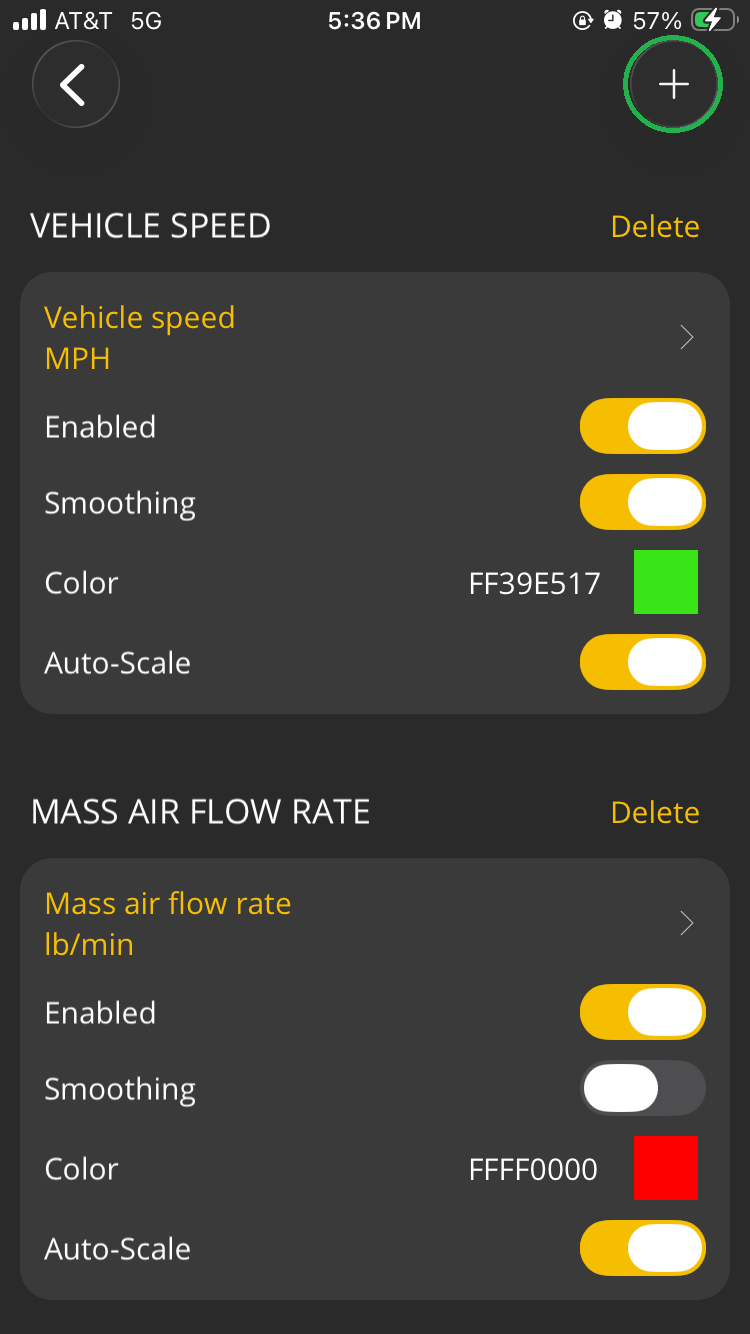
The screenshots below show the Vehicle speed, Mass air flow rate, and Engine Coolant Temperature PIDs logged on an iOS device.
Before logging started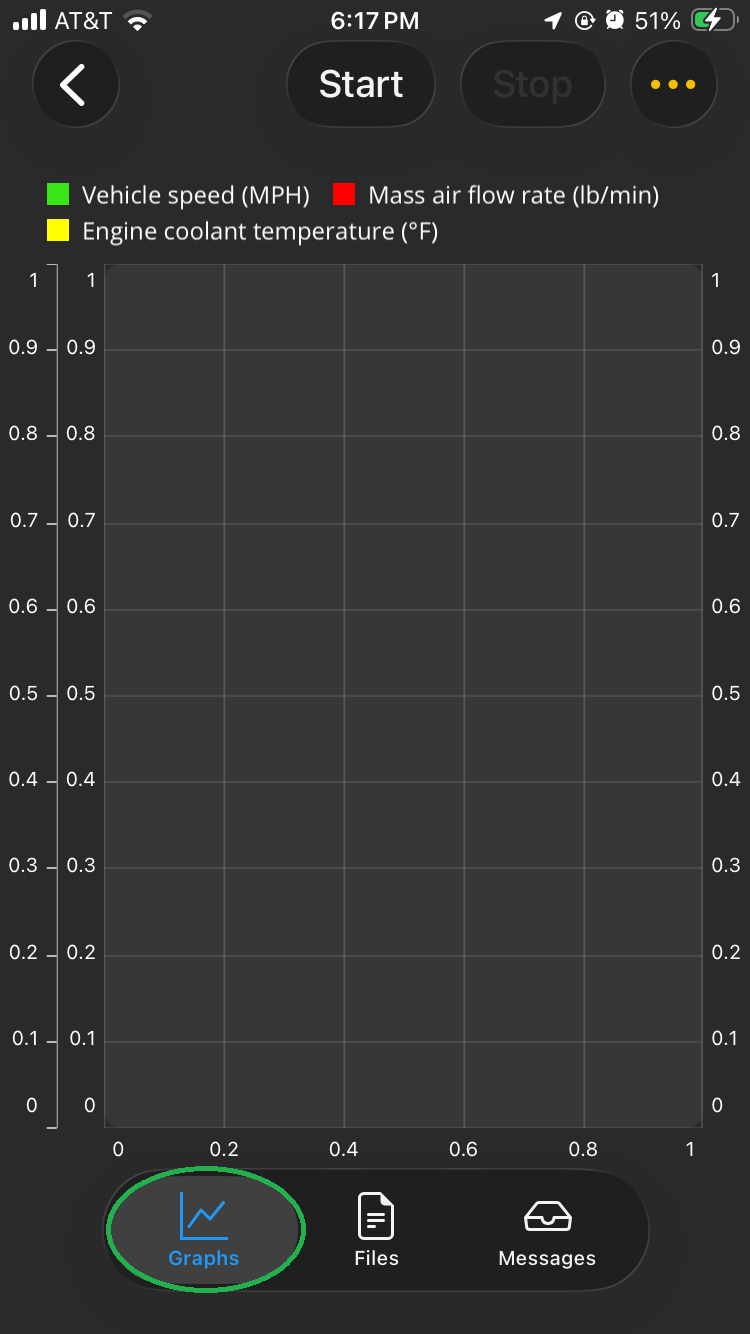 | After logging stopped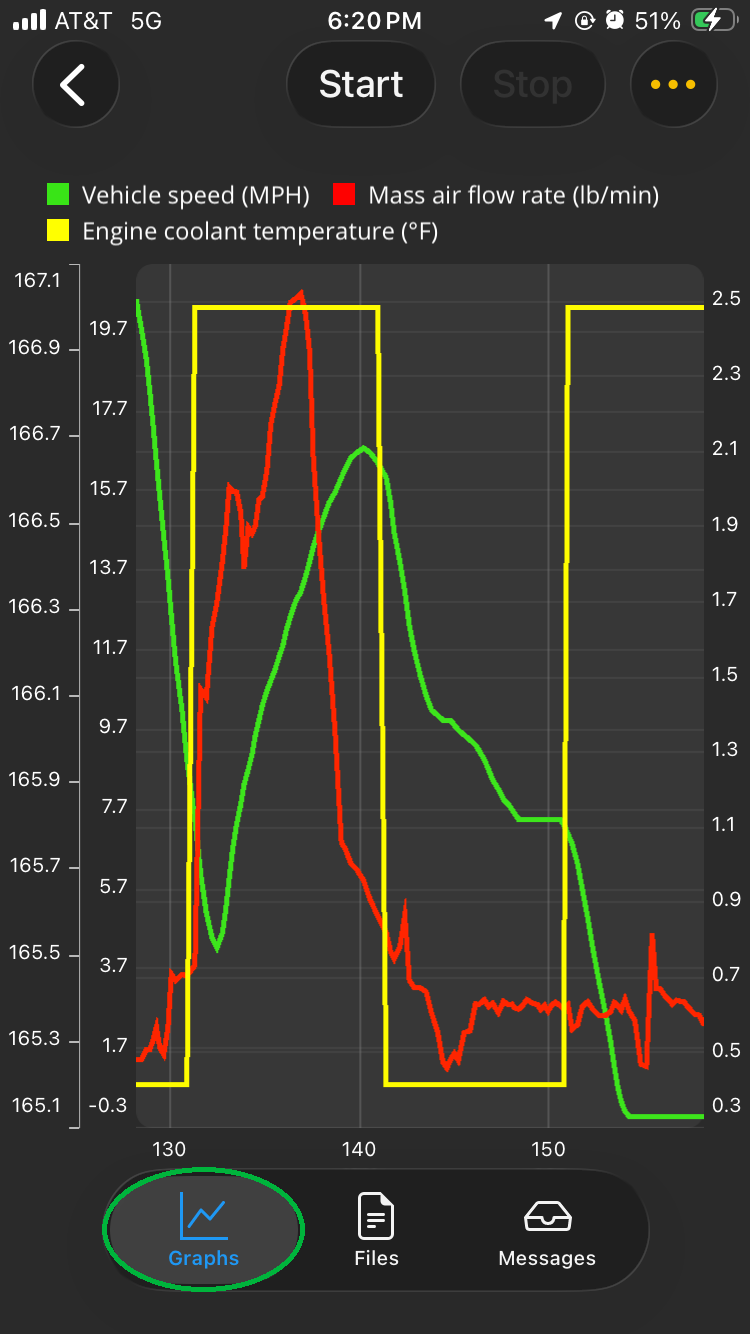 |
View log data
By default, the OBDLink app enables logging for certain vehicle PIDs (vehicle speed, longitude, and latitude), so you can view log data even if you haven’t configured any settings.
Tap Logs in the main screen to begin.
Graphs
This tab displays live data logging. You must be connected when you view graph data.
For details, see the View information while driving section.
Files
This tab lists data logs that were captured for your vehicle (if Logging is enabled). You do not need to be connected when you view recorded log data on the Files tab.
CSV Files
CSV files are listed by default. Tap the date and time of the trip you want to view.
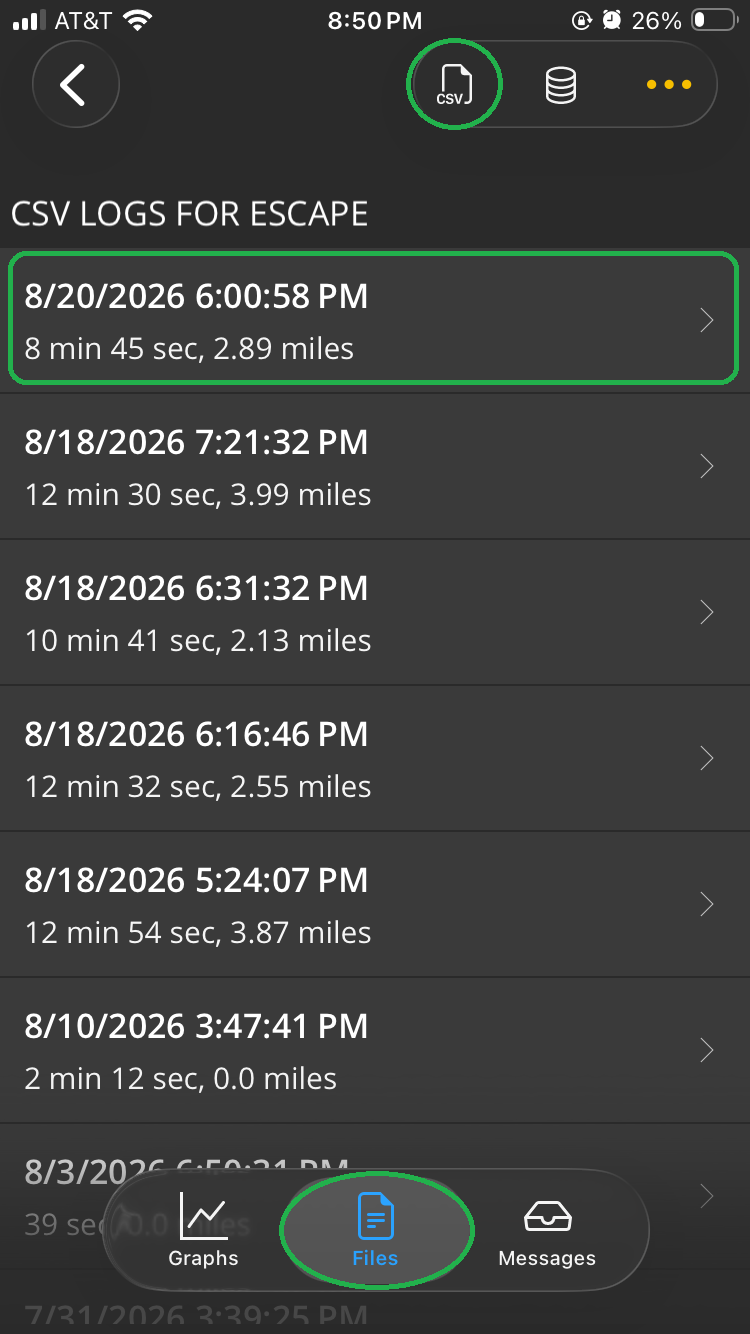 | 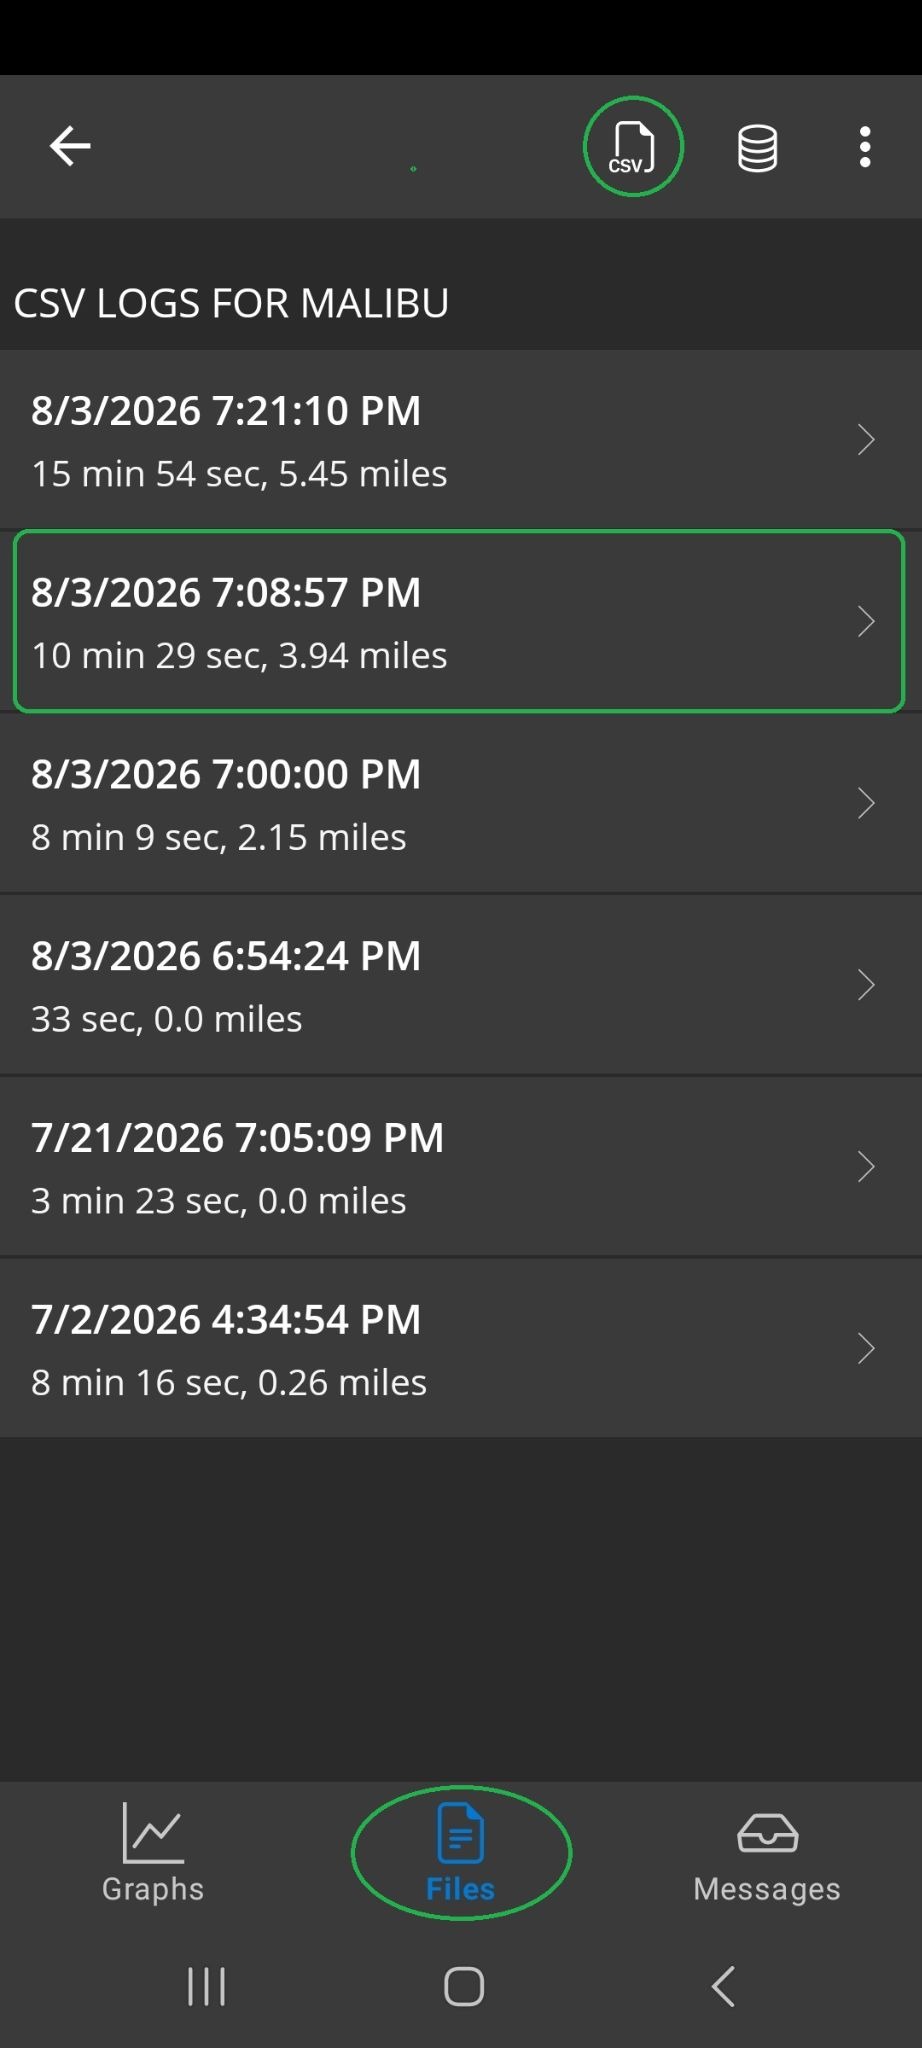 |
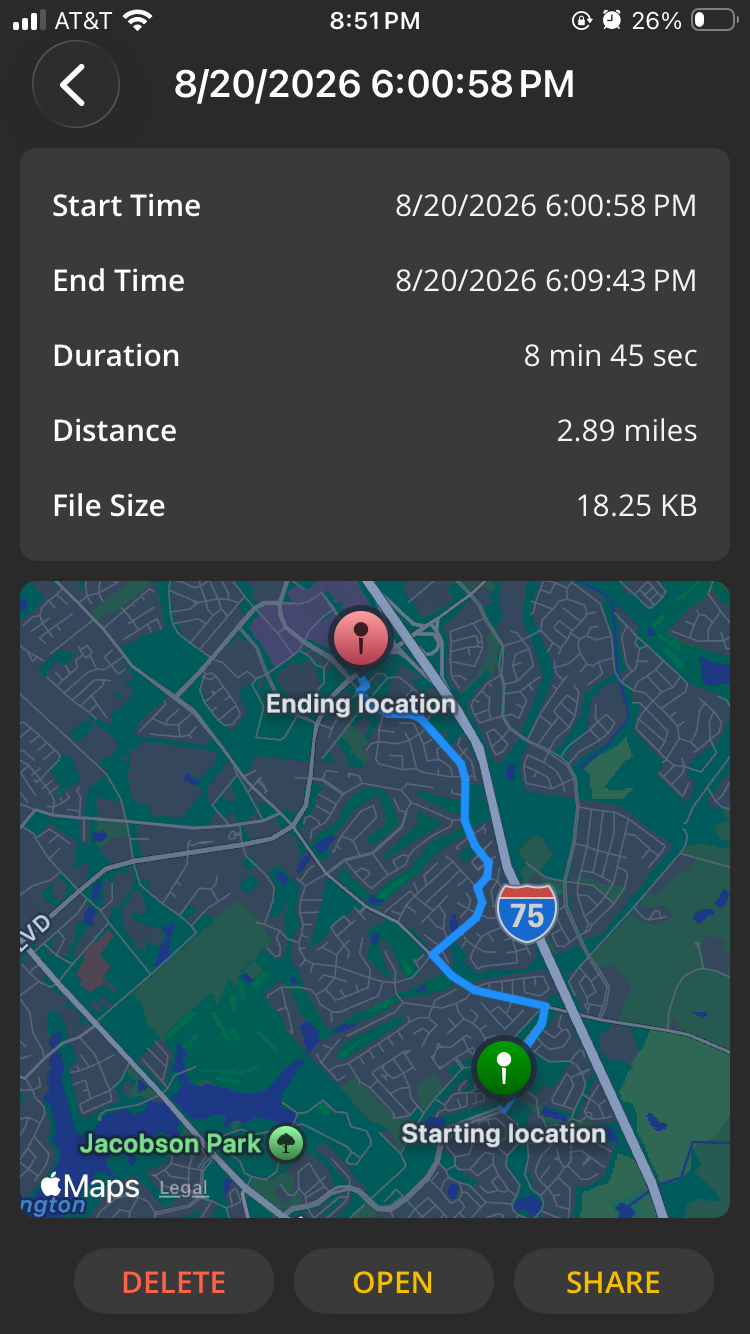
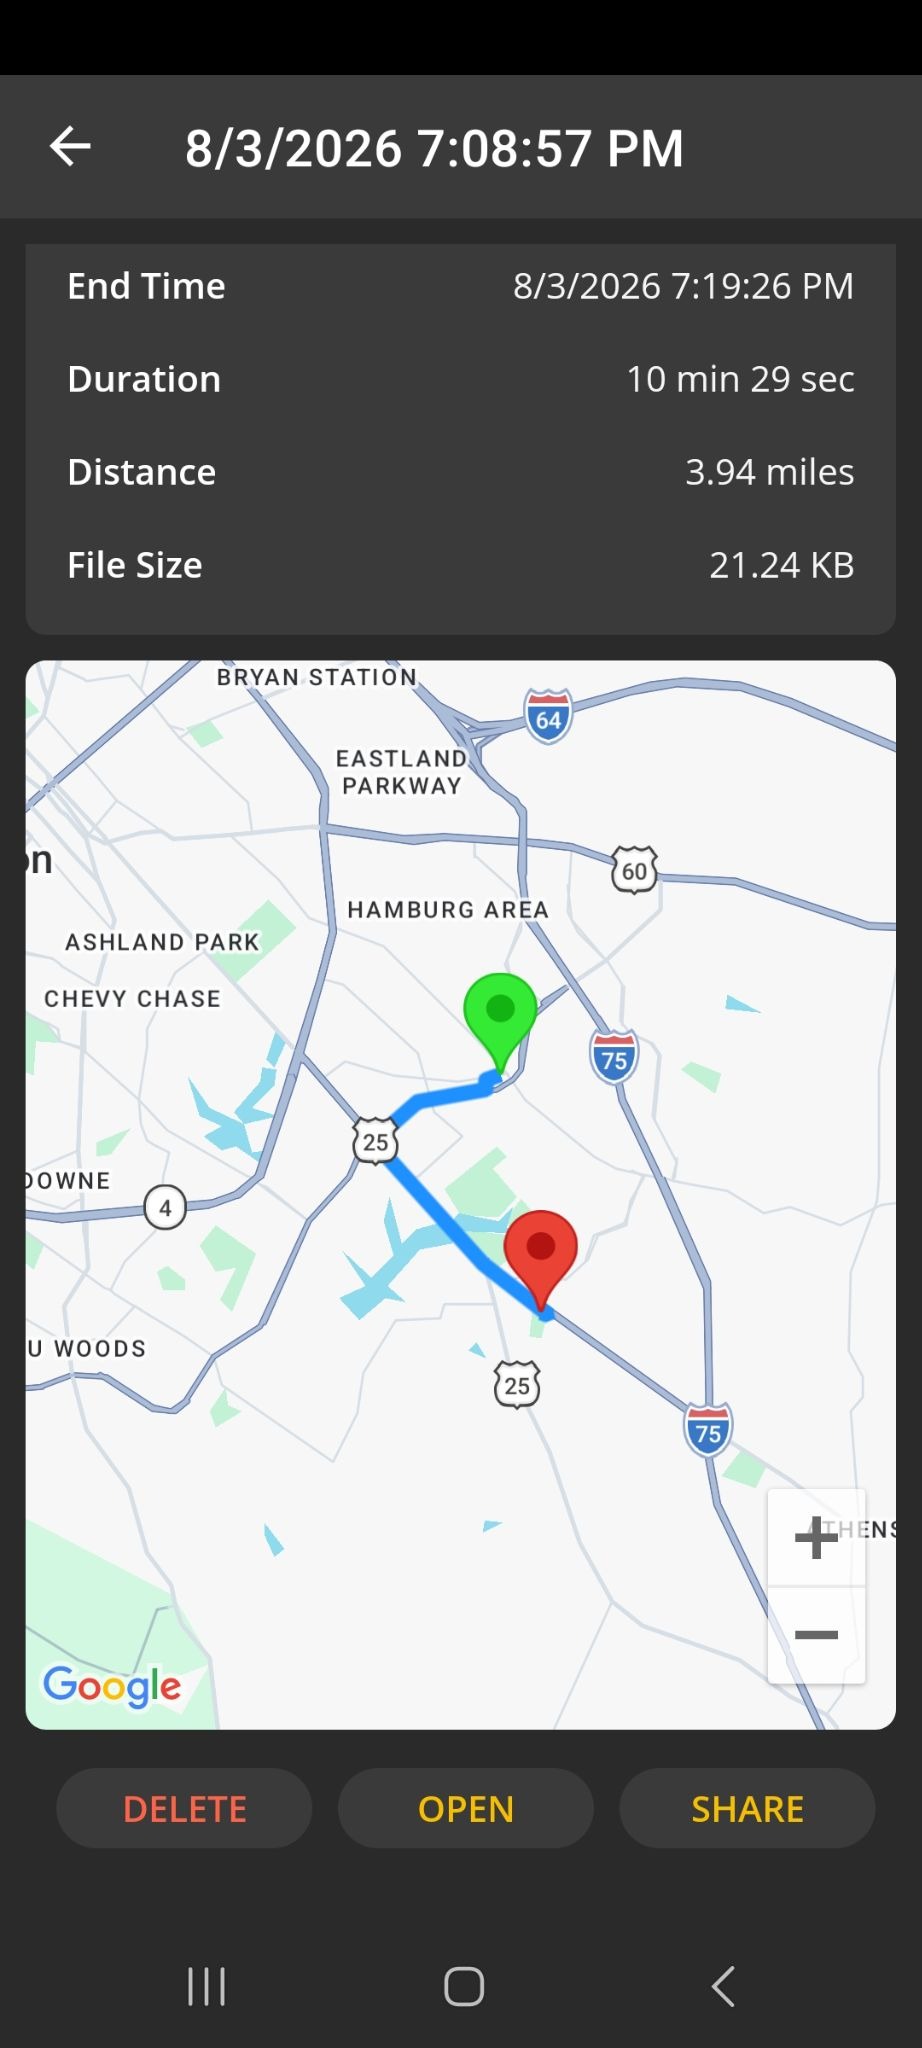
You will see trip information, including start and end time, duration, distance, file size, and a map view.
 |  |
Each CSV log has several options:
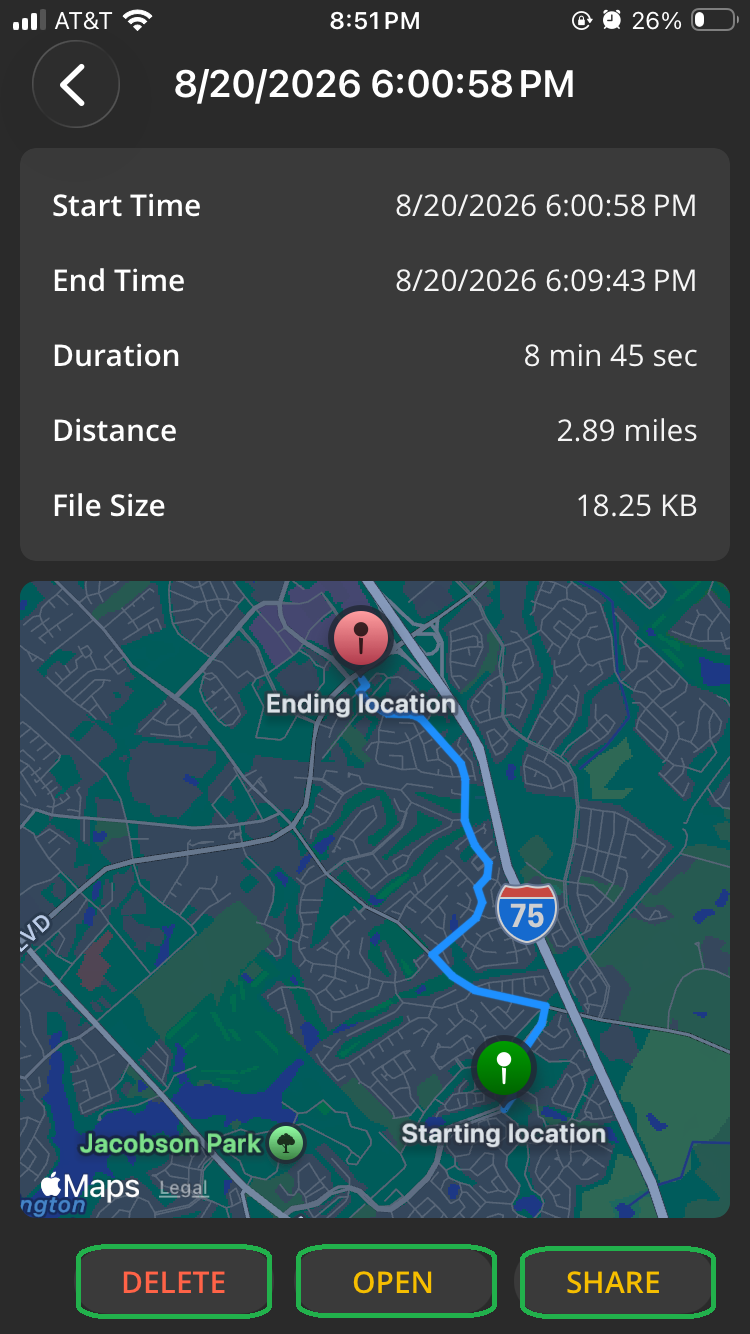 |
- Tap Delete to delete the file. Tap OK on the confirmation message and the file will be deleted.
- Tap Open to see the actual data captured during the trip.
- Tap Share to send the CSV file to another app, such as email or a spreadsheet app.
Note: If you want to share CSV log files using Dropbox or iCloud (iOS only), you must set this up in Settings > Preferences > Sync.
If you connect your Android phone/tablet to a computer, you can access OBDLink CSV log files using this path:
<Your PC>\<Your Device>\Internal storage\Android\data\OCTech.Mobile.Applications.OBDLink\files\vehicles\<Your Vehicle VIN>\CSVLogs
Replace the text in angle brackets with your information. For example, <Your Device> may be Pixel 8 Pro.
Data Files
Tap the Data Files icon to view the list of binary data files.
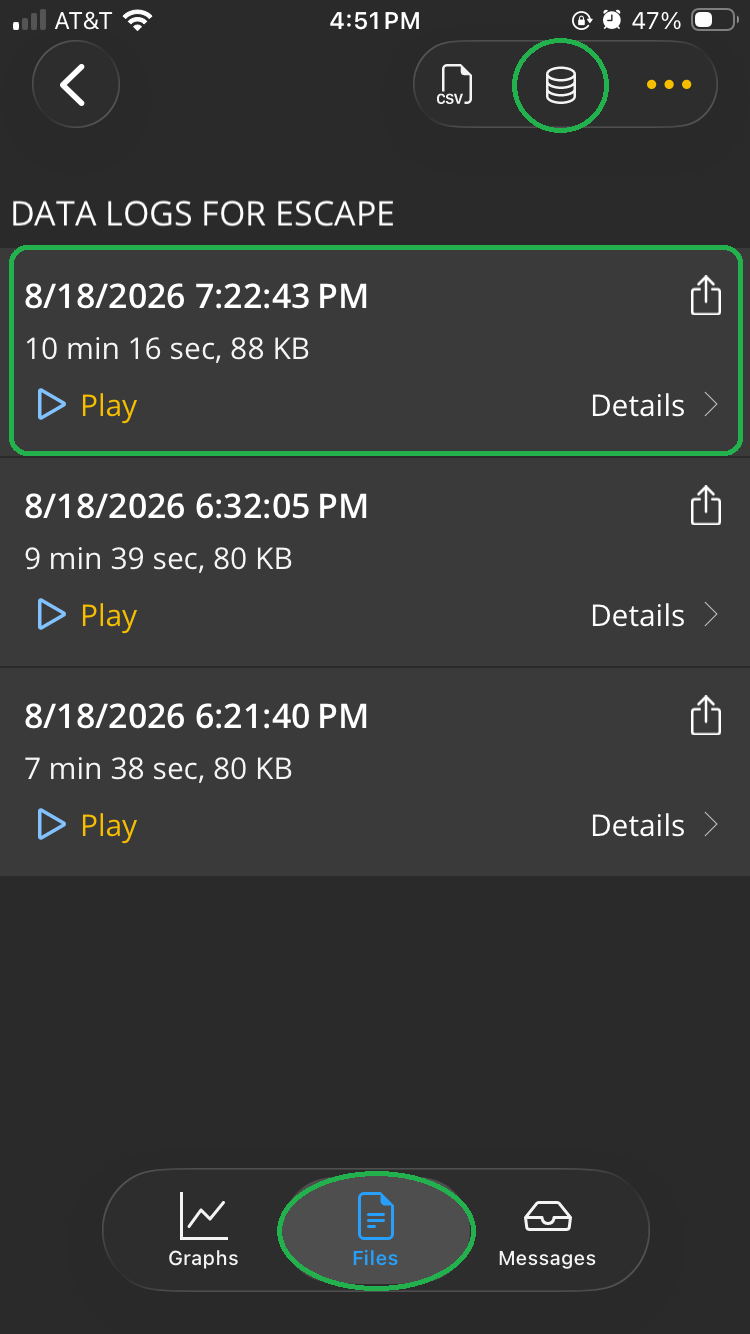 | 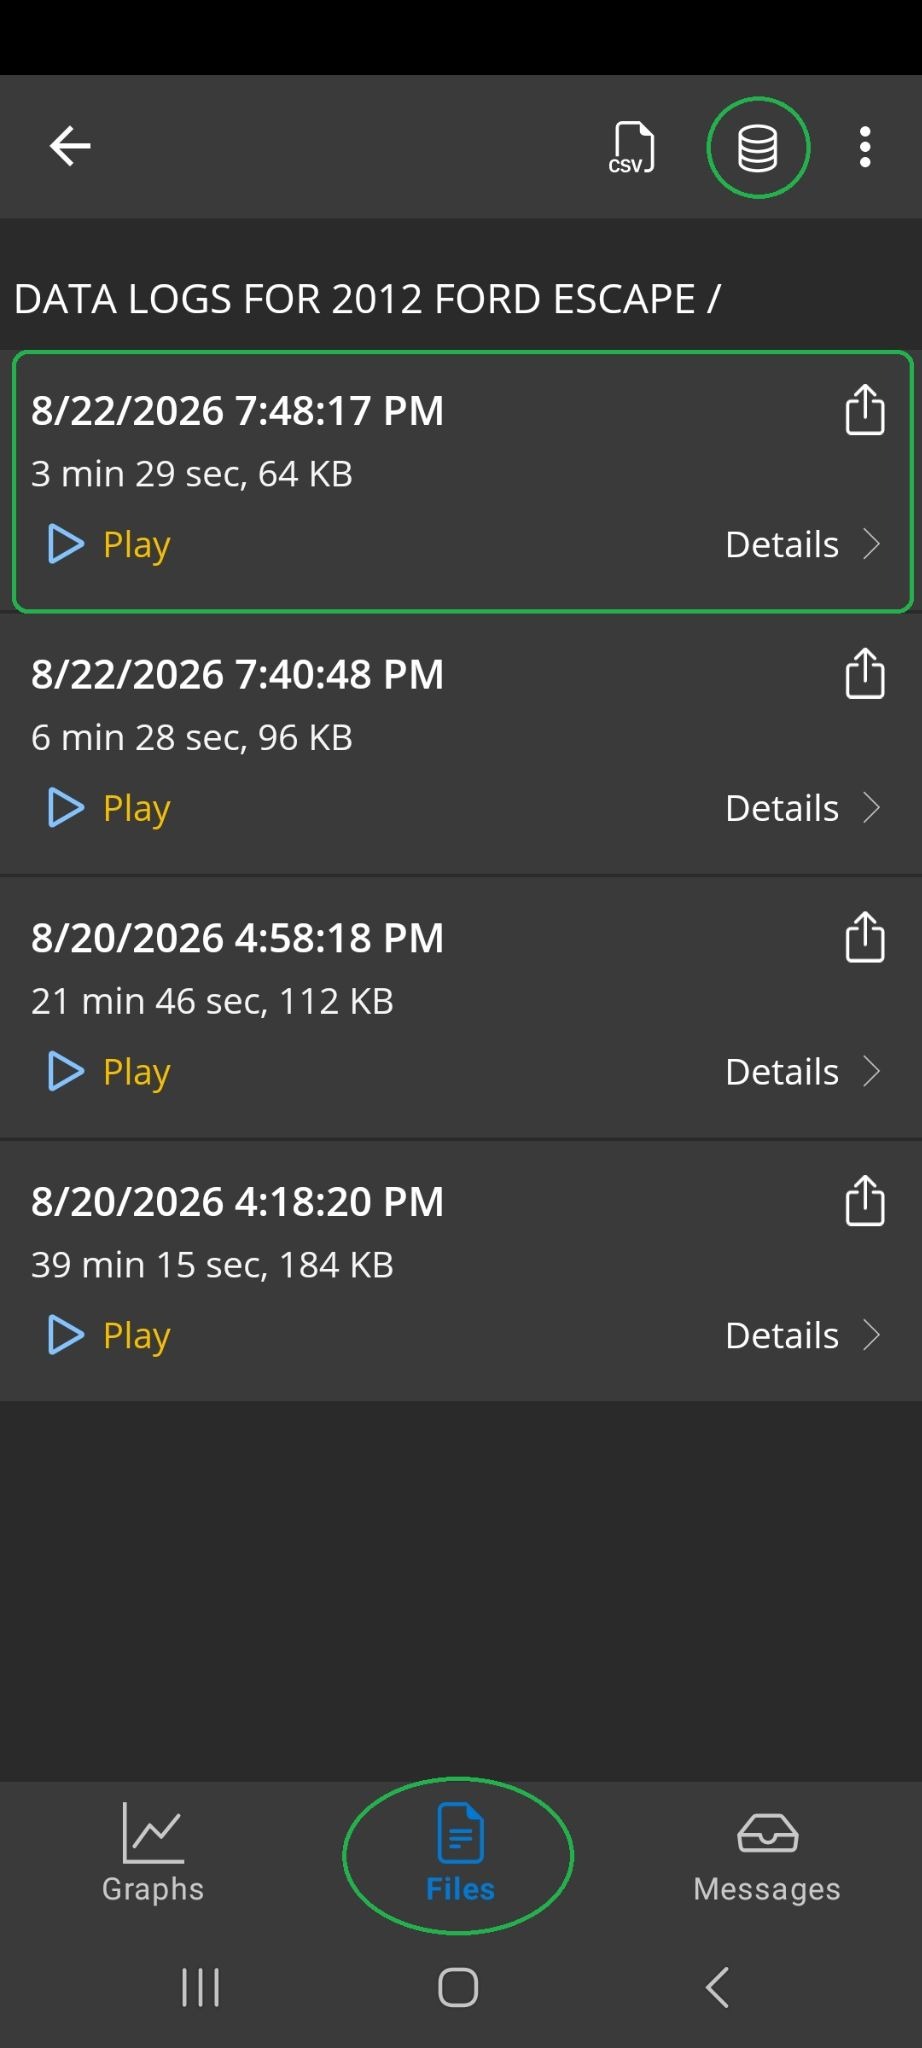 |
Each data log has several options:
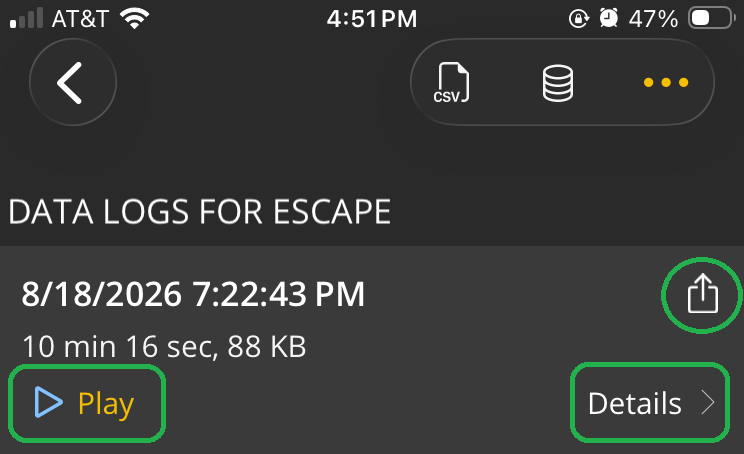 |
- Play button: Starts playback of the data log file.
Tap the Play button for a data log file, then tap the back arrow (<) in the upper left to return to the Home screen.
You will see playback controls at the bottom of the Home screen.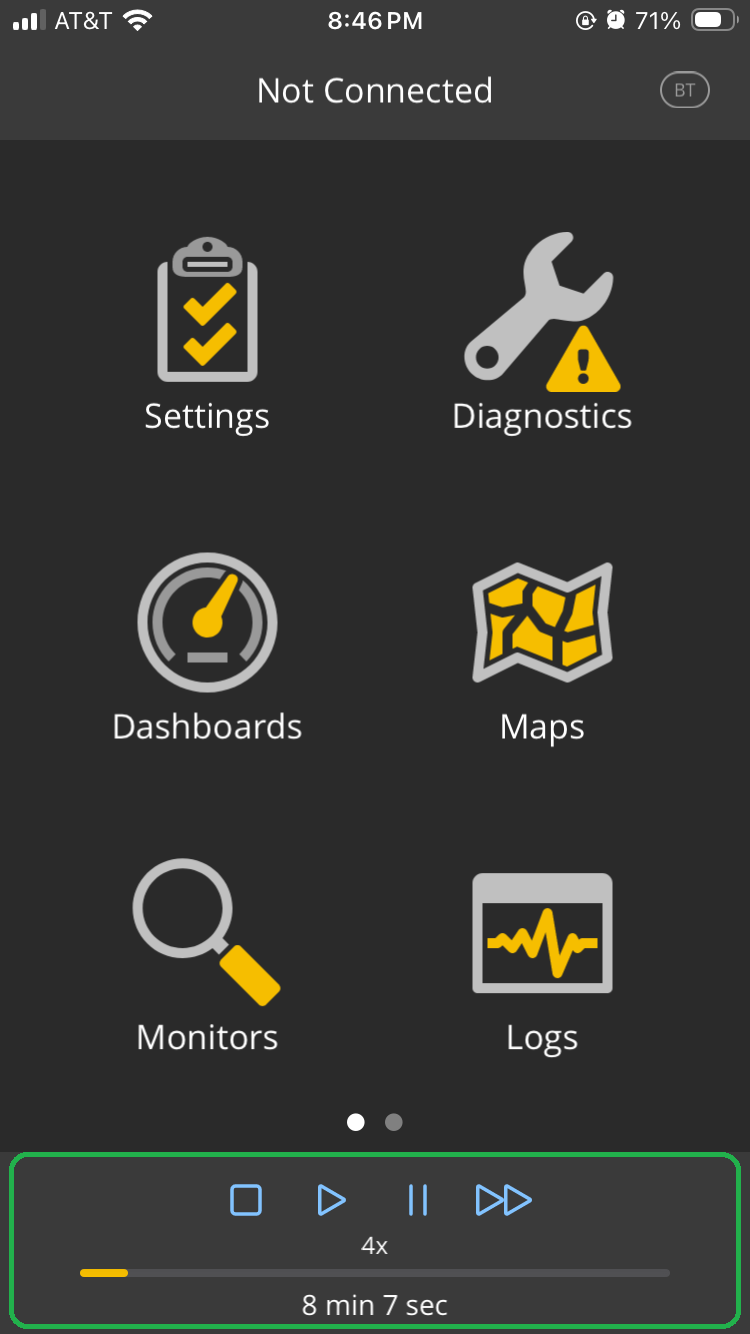
- Note: If the PID(s) you logged are set up as dashboard gauges, you will see the data displayed on the gauges during playback. Tap the Dashboards icon to view gauges during playback.
In the screenshot below, we logged Vehicle Speed and Transmission Fluid Temperature (highlighted).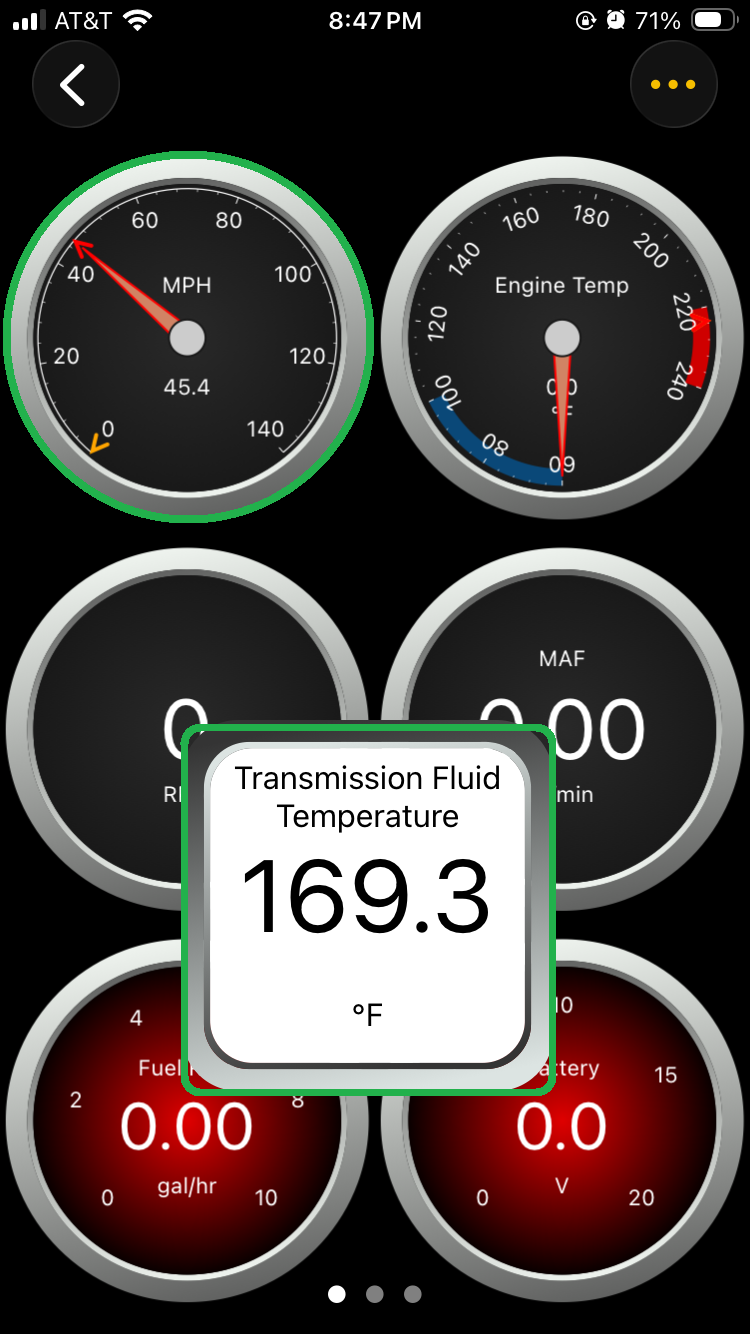
- Details forward arrow (>): Opens file details for the data log.
If you selected GPS PIDs for longitude and latitude, then you will see a map of the logged data.
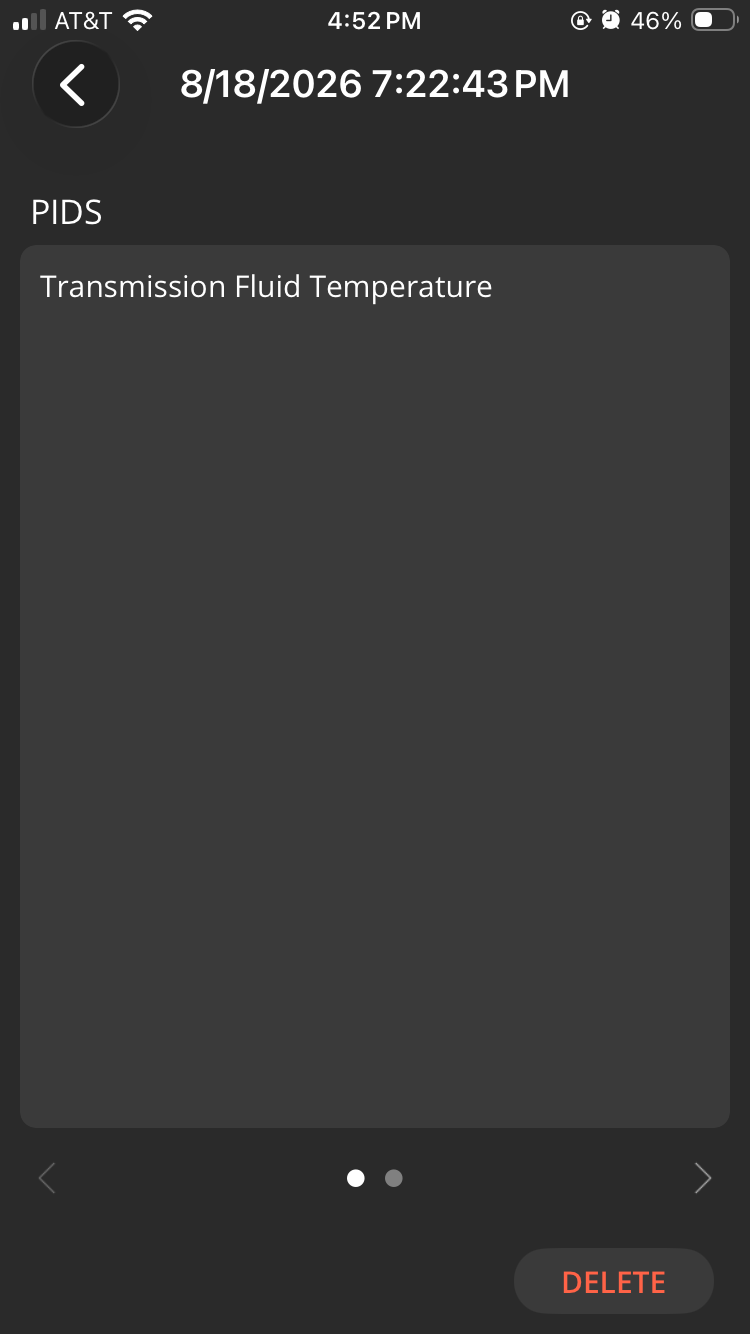
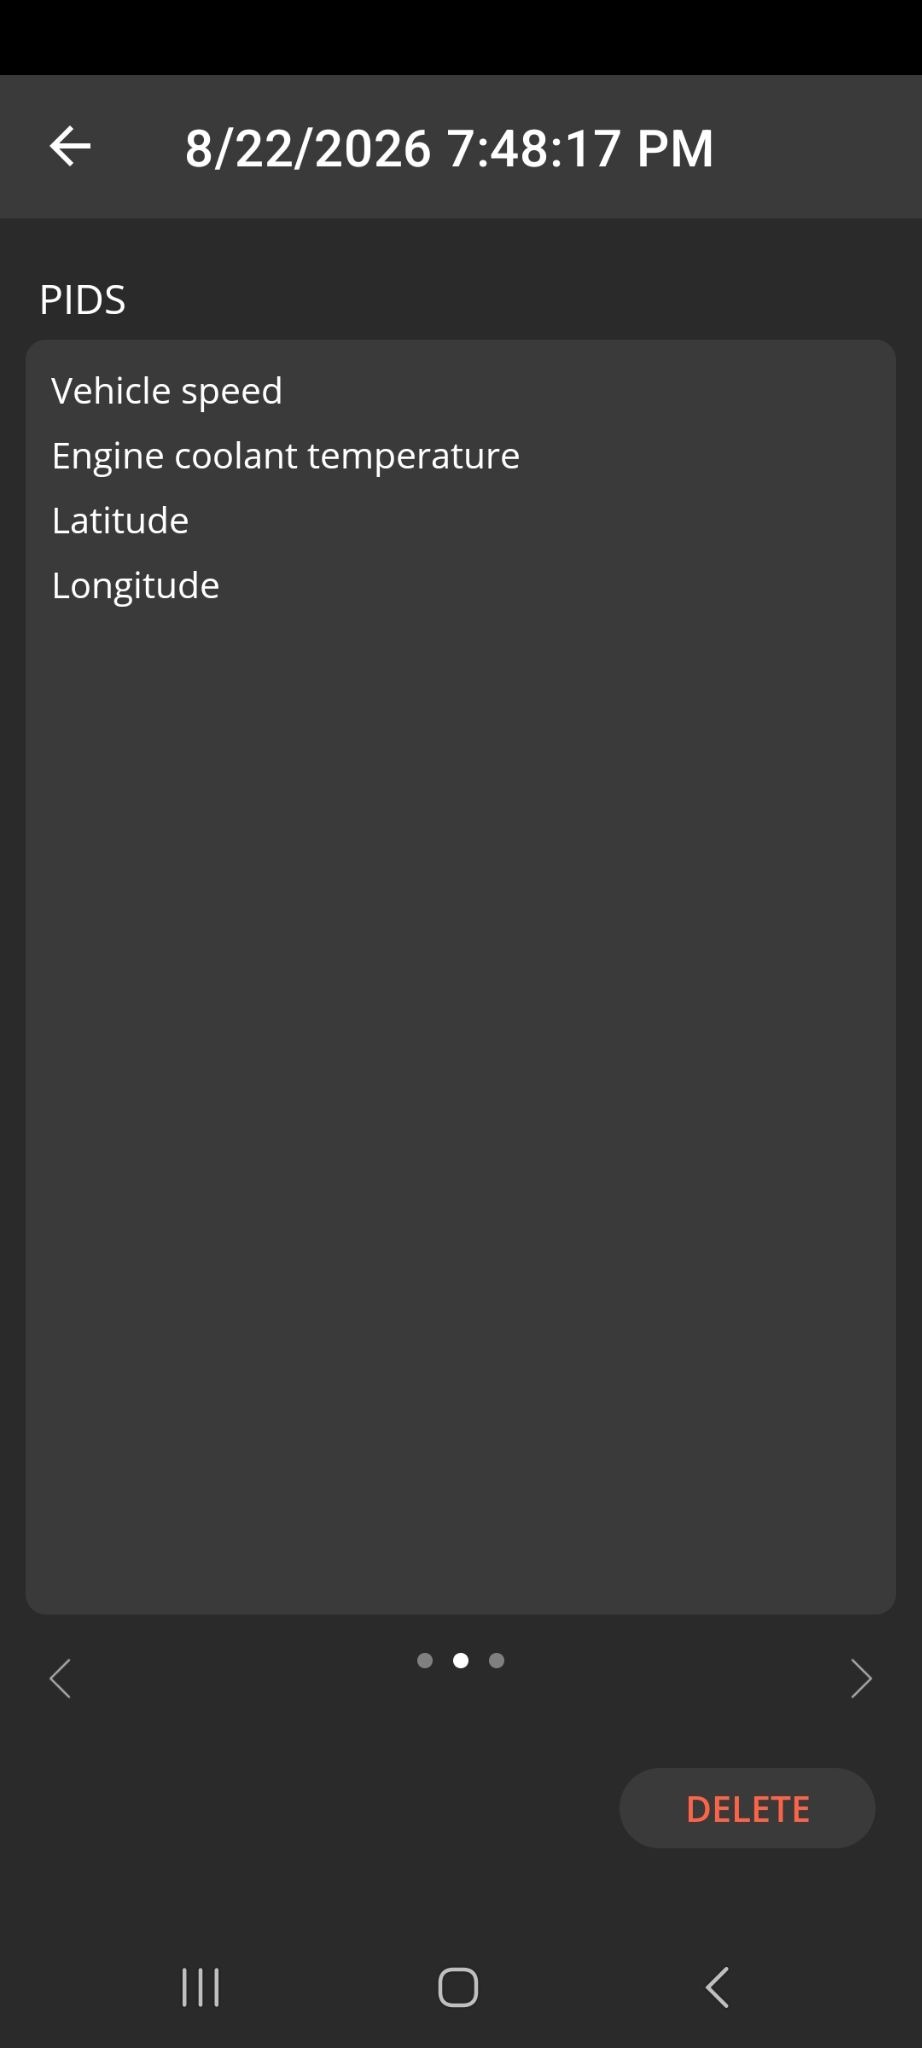
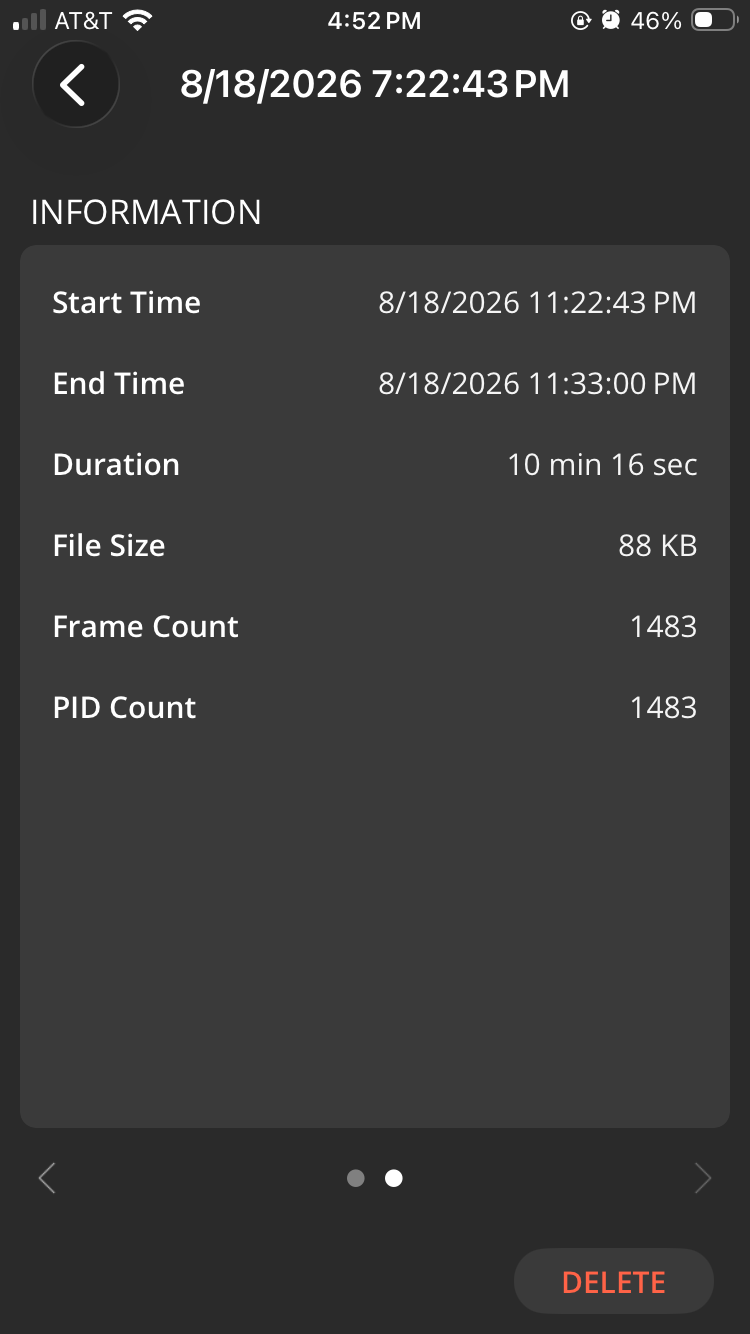
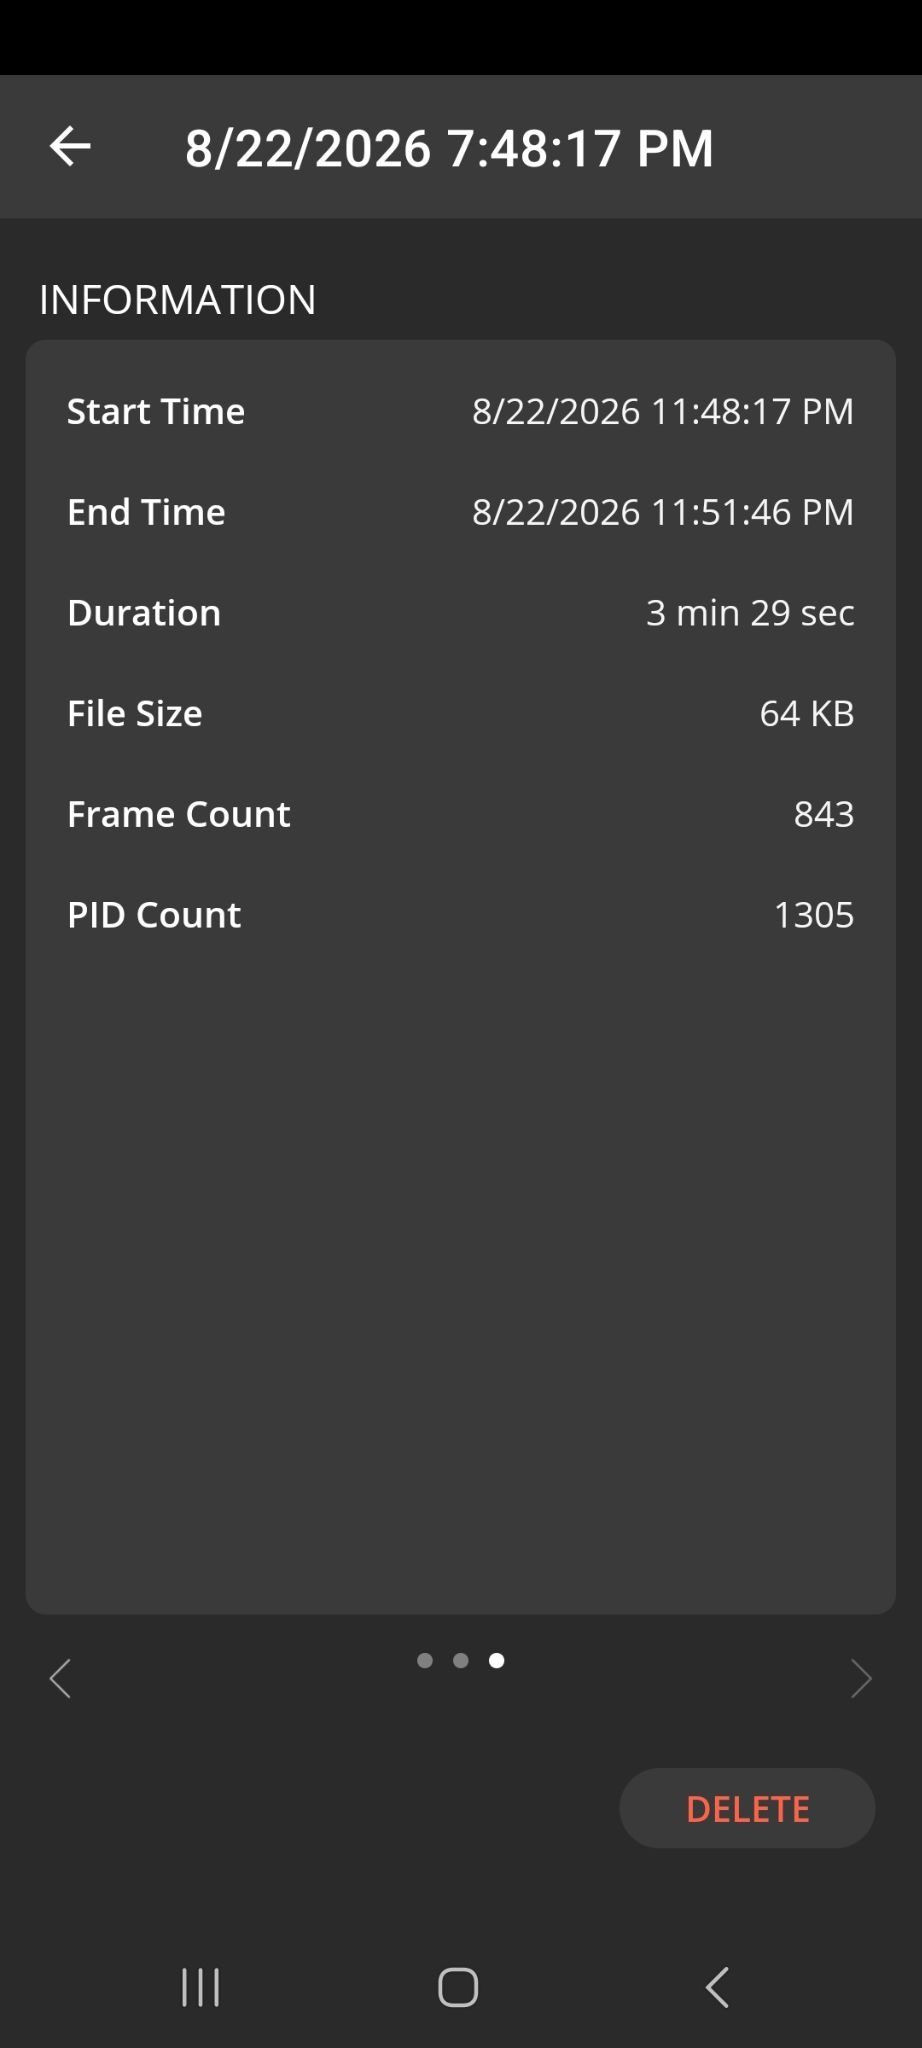
On the next screen, you will see the PID(s) that were logged for this trip. Swipe to move to the next screen. You will see trip information, including start and end time, duration, distance, file size, frame count, and PID count.No map data is available because
longitude and latitude PIDs
were not selected for this trip.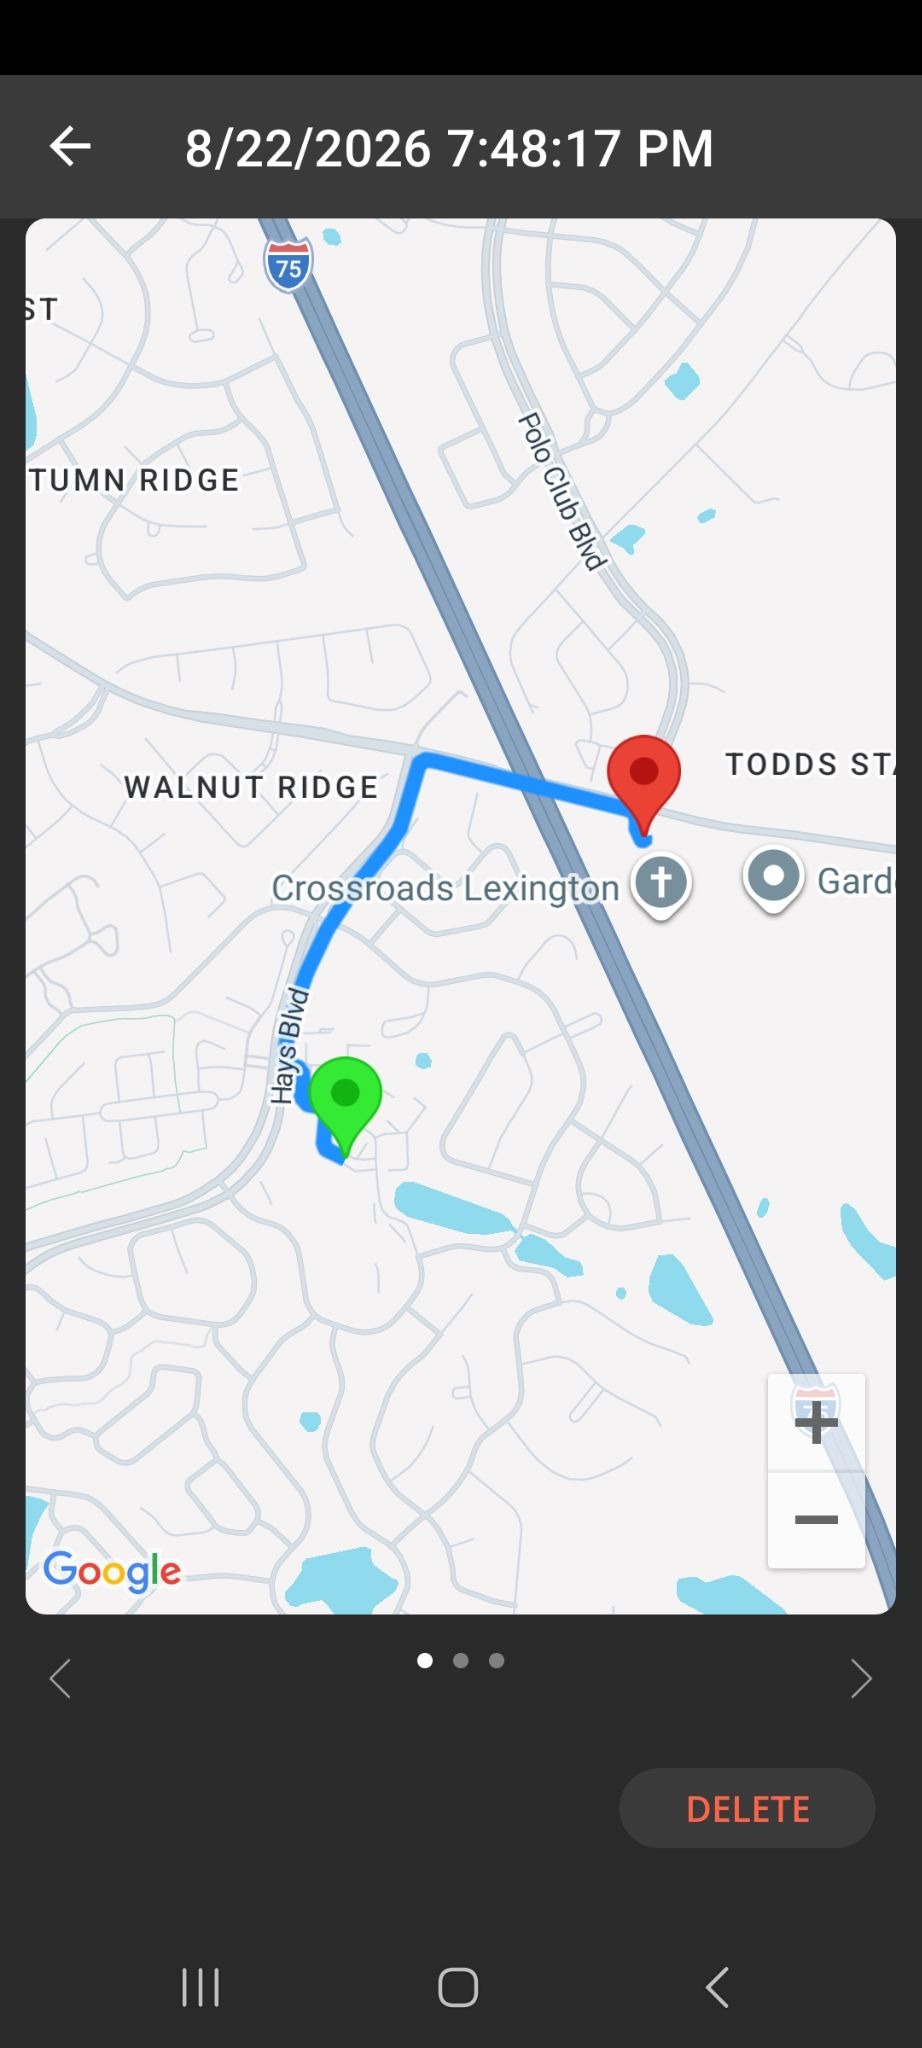
- Share icon: Exports the binary file as-is or converts it to CSV format.
Note: The binary data log file can't be opened by other applications.
If you connect your Android phone/tablet to a computer, you can access OBDLink data log files using this path:
<Your PC>\<Your Device>\Internal storage\Android\data\OCTech.Mobile.Applications.OBDLink\files\vehicles\<Your Vehicle VIN>\DataLogs
Replace the text in angle brackets with your information. For example, <Your Device> may be Pixel 8 Pro.
Messages
This tab lists system log information. If you have issues connecting your adapter, the app should be recording data and it will be displayed here. If a debug log is activated, it will also be displayed here. Read more in the Create a Debug Log article.
Learn more
- In the OBDLink app, tap Settings > Help > Logging and Settings > Help > Graphs to read more about the Logging and Graphs features.
- The Maps function in the OBDLink app is linked to the Logs function. Read more in the Get Started with Maps article.
- The Trips function is also linked to the Logs function. Read more in the Get Started with Trips article.
- You can explore other OBDLink features and functionality using our support article knowledge base.
- For descriptions of terms used in this article, see the Glossary of Acronyms and Terms.
Need more help?
OBDLink® is a registered trademark of OBD Solutions, LLC.